Setup Overview
for the HPE Moonshot System

Pre-installation checklist
Before installing the HPE Moonshot System, be sure to obtain the following items for installation and setup of the system:
- SFP+ or QSFP+ Ethernet transceivers — To determine which transceivers are supported for your uplink module, see the switch documentation.
- Network cables
- Serial cables
- Serial cable or Serial to USB cable (DB9 Null Modem Cable – Female to Female) — To connect to the Moonshot 1500 CM module
- Serial console cable (DB9 RS232 serial to RJ-45, HPE part number 5188-6699) — To connect to switch modules (ships with the chassis)
- Terminal emulator on the technician computer
- Supported operating system — For information about operating systems supported by the Moonshot System, see the operating system support matrices. For deployment procedures, see the Operating System Deployment on HPE ProLiant Moonshot Server Cartridges User Guide.
- The following data center services:
- Management network
- Production network
- DHCP service
- PXE service
- HTTP service — For iLO firmware updates

IMPORTANT: HPE Moonshot cartridges do not contain a display output and require a serial console output. You may need to modify items in your environment such as your PXE server and deployment server. For more information, see the Operating System Deployment on HPE ProLiant Moonshot Server Cartridges User Guide.
For more pre-installation information, see Before you begin.
Installing the chassis
Before you begin the chassis installation process, be sure to review all Warnings and Cautions.
To set up and install the chassis:
- Unpack the following hardware and prepare for installation:
- HPE Moonshot System
- Accessory kit
- Quick Deploy Rail System Kit
- Blanking panel
- Determine the spacing for the rack components. Up to seven chassis can be installed in a 36U, 1200-mm (47.24-in) deep rack.
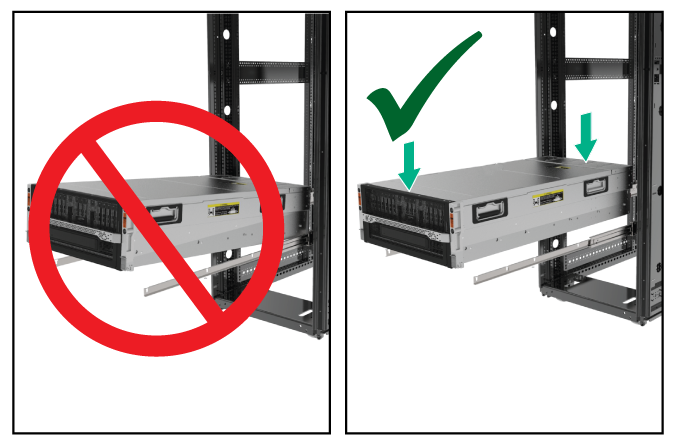
If installing more than one chassis, install the first chassis in the bottom of the rack, and then install additional chassis by moving up the rack with each subsequent chassis.
Due to the height of the Moonshot 1500 Chassis, chassis installation requires either the use of a rack rail adapter kit or a blanking panel. If you ordered a rack rail adapter kit to be installed at the factory, then the blanking panel is not required. If the rack rail adapter kit was not installed, then install the blanking panel directly above the chassis. Be sure to save enough space above the chassis to install the blanking panel.

WARNING: The chassis is very heavy. To reduce the risk of personal injury or damage to the equipment, do the following:
- Observe local occupational health and safety requirements and guidelines for manual material handling.
- Get help to lift and stabilize the product during installation or removal, especially when the product is not fastened to the rails. The chassis weighs more than 43.09 kg (95.00 lb), so at least four people must lift the chassis into the rack together. An additional person may be required to help align the chassis if the chassis is installed higher than chest level.
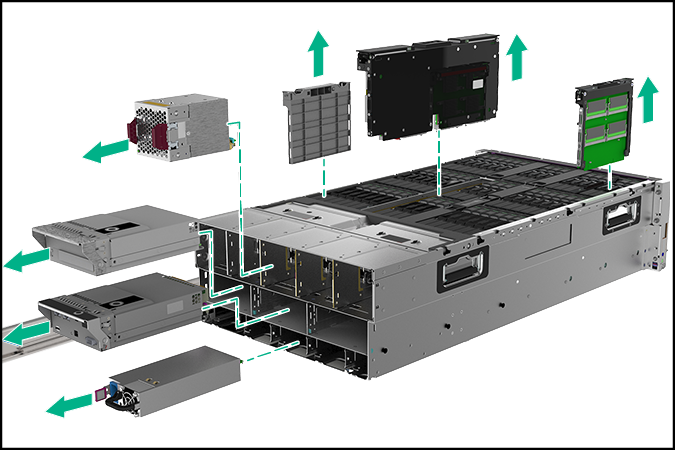
- Remove components to reduce the weight of the chassis. For more information about removing components, see the HPE Moonshot 1500 Chassis Maintenance and Service Guide.
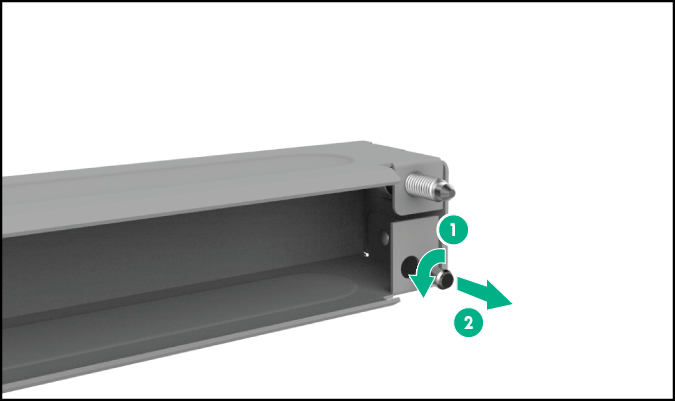
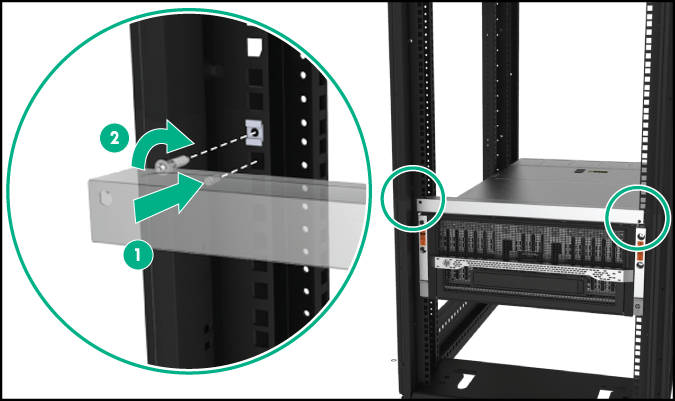
- Install the rack rails and the chassis in the rack. For more information, see the Quick Deploy Rail System Installation Instructions.
- If a rack rail adapter kit is installed, then skip this step and continue to the next step.
If a rack rail adapter kit is not installed, then install the blanking panel:
- For round-hole racks, remove the guide pins from the blanking panel and replace them with the guide pins included for round-hole racks.
- Attach a blanking panel cage nut to each side of the rack.
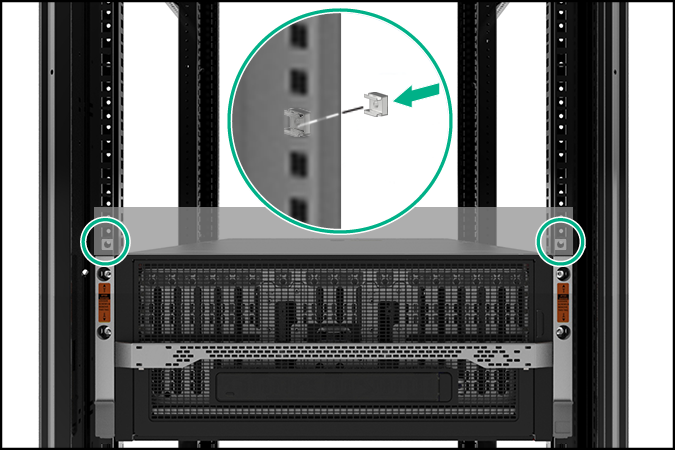
- Align the blanking panel with the rack.
- Secure the blanking panel to the rack.
- For round-hole racks, remove the guide pins from the blanking panel and replace them with the guide pins included for round-hole racks.
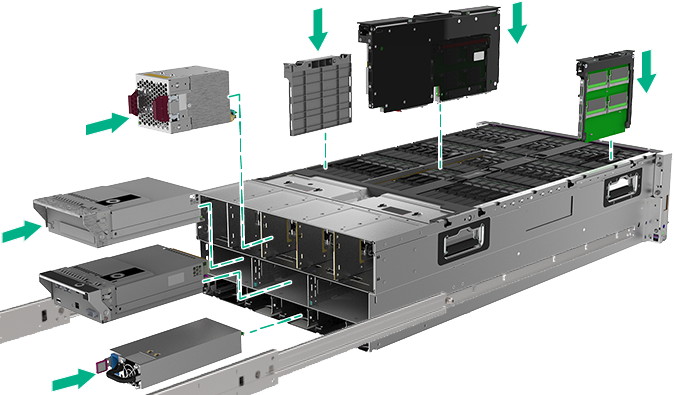
- Install Moonshot System components. For more information about installing components, see the HPE Moonshot 1500 Chassis Setup and Installation Guide.
For detailed instructions on the steps in this section, see the HPE Moonshot 1500 Chassis Setup and Installation Guide.
Cabling the HPE Moonshot System
After the hardware is installed, complete the following cabling procedures:
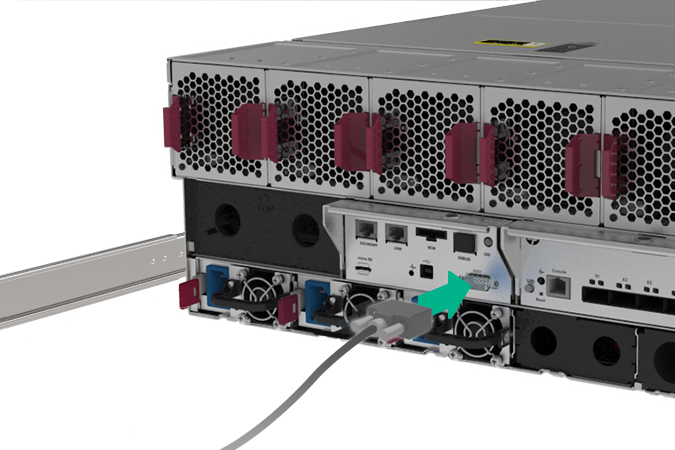
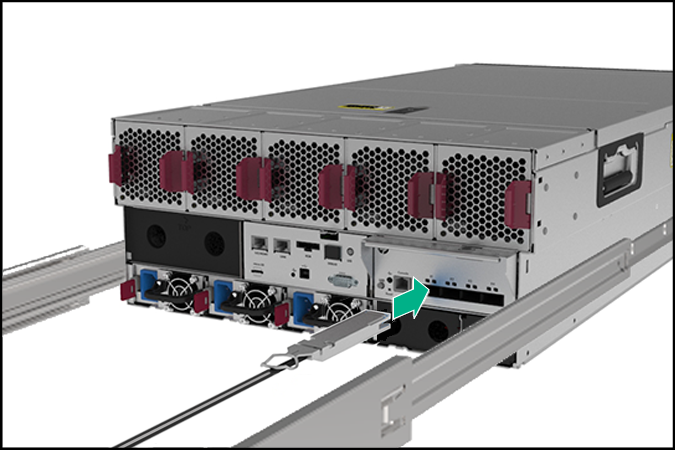
- Cable the management network to the iLO CM management port.

- Cable a terminal to the iLO CM management serial port.
- Cable the production network to one of the QSFP+ ports or SFP+ ports on the uplink module:
- Cabling to the SFP+ port
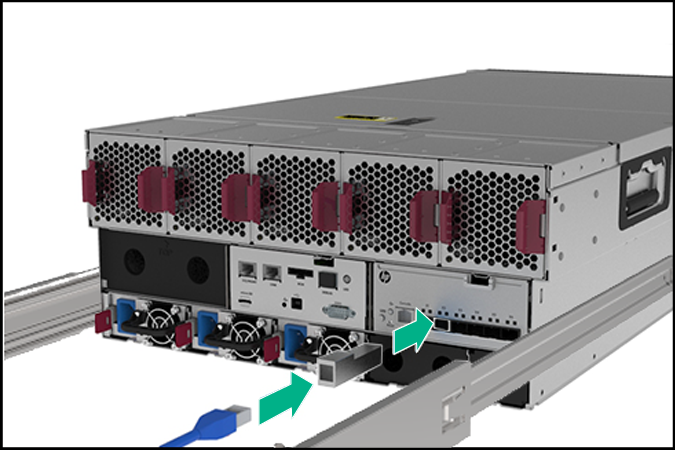
- Cabling to the QSFP+ port
- Cabling to the SFP+ port
- Connect power cables to the chassis.

- Route cables on the cable management arm.
For more information about cabling the HPE Moonshot System, see the HPE Moonshot 1500 Chassis Setup and Installation Guide.
Configuring the system
To configure the HPE Moonshot System, complete the following steps:
- Configure the chassis.
- Configure the switch modules.
- Set the power cap for the system.
For more information, see the following documents:
- HPE Moonshot iLO Chassis Management CLI User Guide
- HPE Moonshot 1500 Chassis Setup and Installation Guide
Updating the firmware
Hewlett Packard Enterprise recommends updating the firmware in the following order:
- iLO CM firmware
- Cartridge firmware
- Switch firmware
For available firmware updates, see the Hewlett Packard Enterprise website.
For more information on updating the firmware, see the HPE Moonshot iLO Chassis Management CLI User Guide.
Deploying an operating system
For deployment procedures, see the Operating System Deployment on HPE ProLiant Moonshot Server Cartridges User Guide.
For information about operating systems supported by the Moonshot System, see the operating system support matrices.
For important safety, environmental, and regulatory information, see Safety and Compliance Information for Server, Storage, Power, Networking, and Rack Products, available at the Hewlett Packard Enterprise website.
Hewlett Packard Enterprise is committed to providing documentation that meets your needs. To help us improve the documentation, send any errors, suggestions, or comments to Documentation Feedback. When submitting your feedback, include the document title, part number, edition, and publication date located on the front cover of the document. For online help content, include the product name, product version, help edition, and publication date located on the legal notices page.
Part number: 748314-002R
May 2016
Edition: 3