|
|
|


Optical drive option
For more information about product features, specifications, options, configurations, and compatibility, see the product QuickSpecs on the Hewlett Packard Enterprise website.
To install the component:
- Power down the server.
- Remove all power:
- Disconnect each power cord from the power source.
- Disconnect each power cord from the server.
- Do one of the following:
- Remove the access panel.
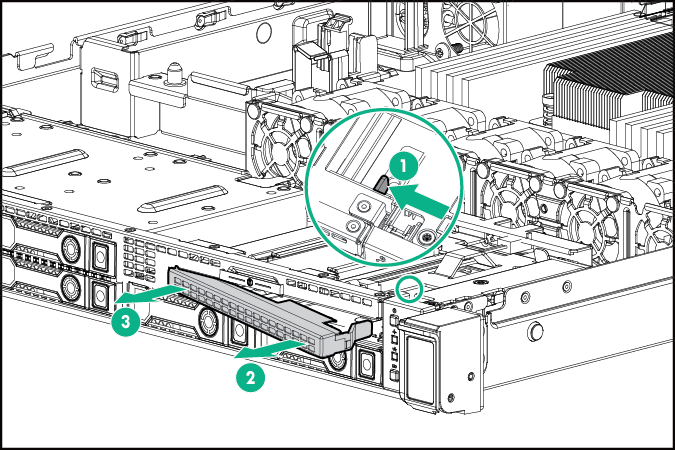
- Remove the optical drive blank
Retain the blank for future use.
- Four-bay LFF configuration

- Eight-bay SFF configuration
- Four-bay LFF configuration
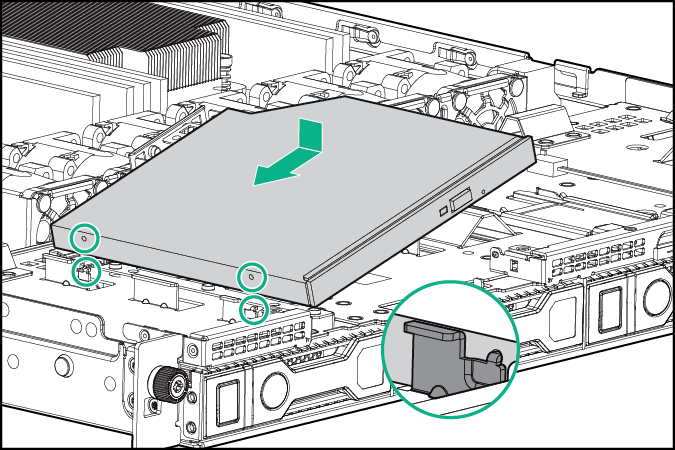
- Install the optical drive into the bay.
- Four-bay LFF configuration
- Eight-bay SFF configuration

After sliding in the optical drive, be sure to secure the drive with the screw.
- Four-bay LFF configuration
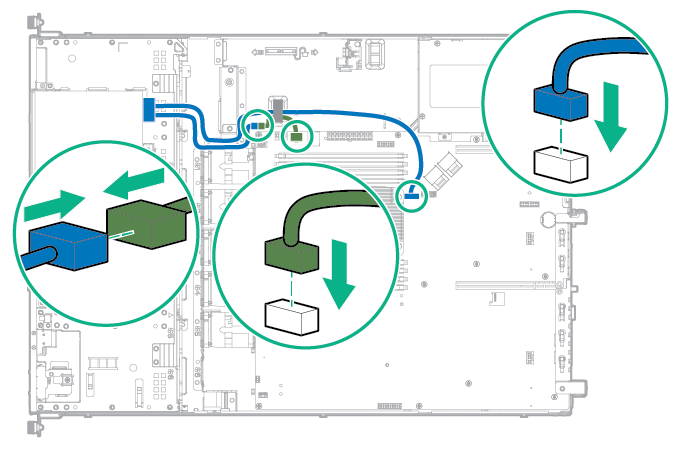
- Connect the optical drive cable to the optical drive.
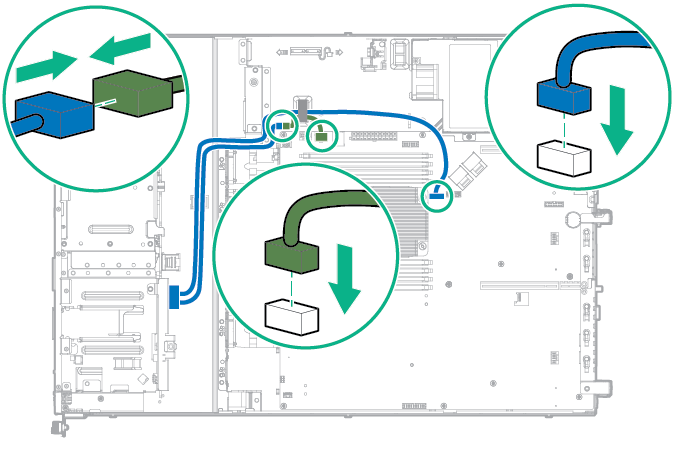
- Route the optical drive cable through the cable clip and connect the cable to the system board SATA connector, and then connect the power cable to the system board power cable connector.
- Four-bay LFF configuration
- Eight-bay SFF configuration
- Four-bay LFF configuration
- Install the access panel.
- Install the server into the rack.
- Power up the server.