|
|
|


Installing the server into the rack
To install the server into a rack with square, round, or threaded holes, refer to the instructions that ship with the rack hardware kit.
If you are installing the server into a telco rack, order the appropriate option kit at the Rack Solutions website. Follow the server-specific instructions on the website to install the rack brackets.
Use the following information when connecting peripheral cables and power cords to the server.
|
WARNING: This server is very heavy. To reduce the risk of personal injury or damage to the equipment:
|
|
CAUTION: Always plan the rack installation so that the heaviest item is on the bottom of the rack. Install the heaviest item first, and continue to populate the rack from the bottom to the top. |
To install the server in a Hewlett Packard Enterprise, Compaq-branded, Telco, or a third-party rack:
- Install the server and cable management arm option into the rack. See the documentation that ships with the Easy Install Rail Kit.
- Connect peripheral devices to the server. For information on identifying connectors, see "Rear panel components."

WARNING: To reduce the risk of electric shock, fire, or damage to the equipment, do not plug telephone or telecommunications connectors into RJ-45 connectors.
- For a server using a non-hot-plug power supply: To prevent the accidental disconnection of the power cord when sliding the server into and from the rack, secure the power cord through the strain relief clip:
- If the clip is positioned too near the power cord that it blocks the power cord plug connection, slide the clip backward.
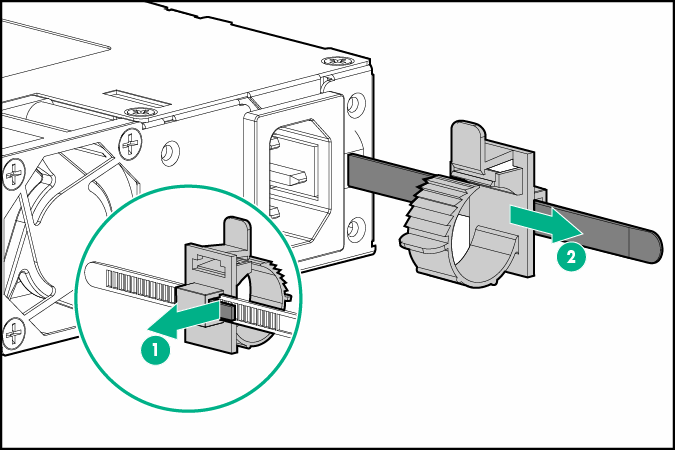
- Connect the power cord to the server.
- Press the top part of the clip, and then pull the clip open.
- Position the power cord inside the clip, and then close the clip.
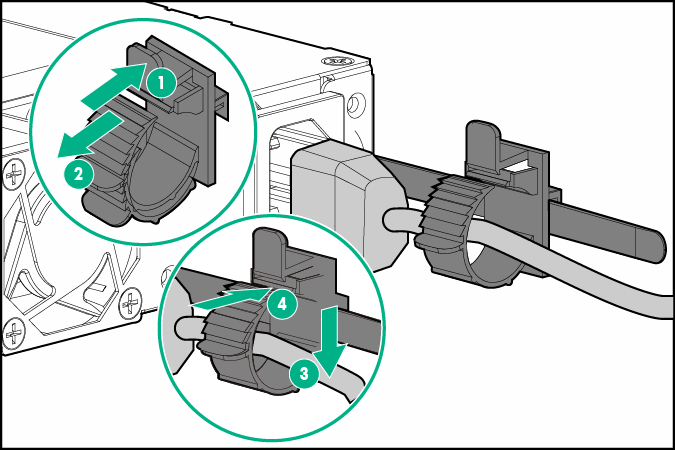
- Slide the clip forward until it is flush against the edge of the power cord plug.
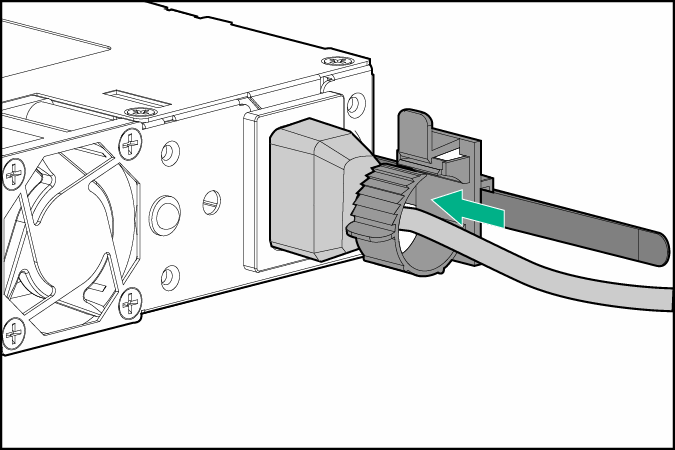
- If the clip is positioned too near the power cord that it blocks the power cord plug connection, slide the clip backward.
- For a server using a hot-plug power supply: To prevent accidental power cord disconnection when sliding the server in and out of the rack, secure the power cord in the strain relief strap attached to the power input module handle:
- Unwrap the strain relief strap from the power input module handle.

CAUTION: Avoid tight bend radii to prevent damaging the internal wires of a power cord or a server cable. Never bend power cords and server cables tight enough to cause a crease in the sheathing.
- Bend the plug end of the power cord in the position shown in the following image.
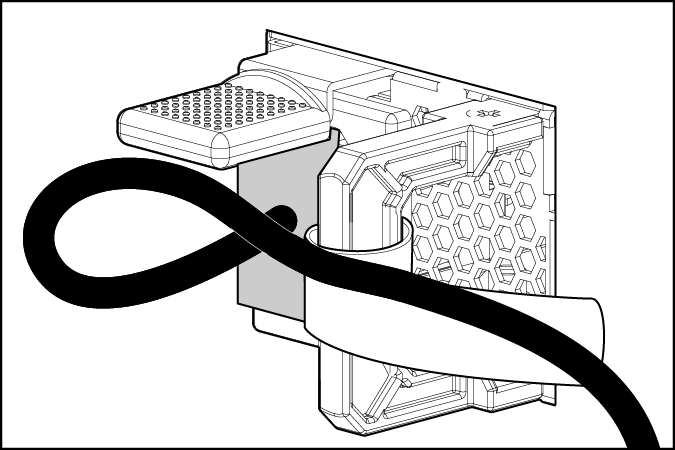
- Secure the power cord with the strain relief strap.
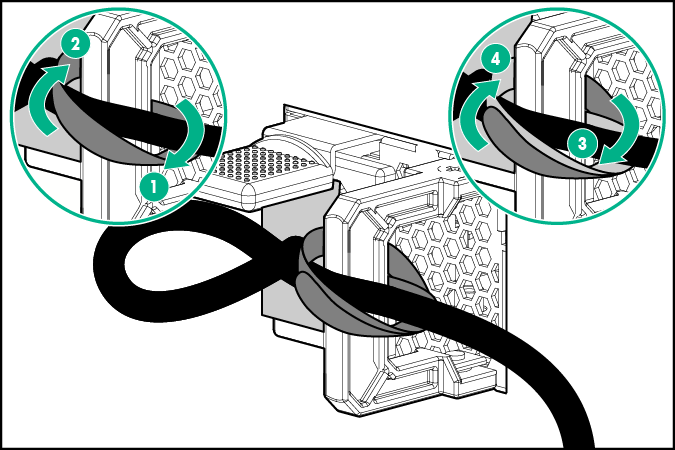
- Unwrap the strain relief strap from the power input module handle.
- Employ best practices to route and manage the power cords and other cables in the server rear panel.

IMPORTANT: When using cable management arm components, be sure to leave enough slack in each of the cables to prevent damage to the cables when the server is extended from the rack.
- Use the hook-and-loop strap included in the server shipping carton to secure the power cords and the other rear panel cables to the rack rail. For detailed instructions, see "Installing the rack rail hook-and-loop strap."
- Connect the power cord to the power source.
WARNING: To reduce the risk of electric shock or damage to the equipment:
- Do not disable the power cord grounding plug. The grounding plug is an important safety feature.
- Plug the power cord into a grounded (earthed) electrical outlet that is easily accessible at all times.
- Unplug the power cord from the power supply to disconnect power to the equipment.
- Do not route the power cord where it can be walked on or pinched by items placed against it. Pay particular attention to the plug, electrical outlet, and the point where the cord extends from the server.