Installing a front 2SFF NVMe/SAS/SATA Premium drive cage

Prerequisites

Before you perform this procedure, make sure that you have the following items available:

  • T-10 Torx screwdriver

  • The components included with the hardware option kit

  • This installation requires a universal media bay.
Procedure
  1. Power down the server.
  2. Remove all power:
    1. Disconnect each power cord from the power source.
    2. Disconnect each power cord from the server.
  3. Do one of the following:
  4. Remove the access panel.
  5. Remove the front bay blank.

    Removing the front bay blank
  6. Remove the optical disc drive from the universal media bay.

    Removing the optical disc drive from the universal media bay
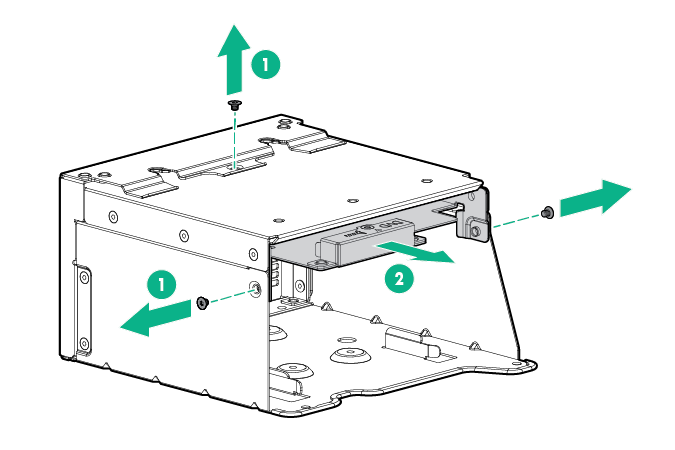
  7. Remove the SFF drive blank from the universal media bay.

    Removing the drive bay blank
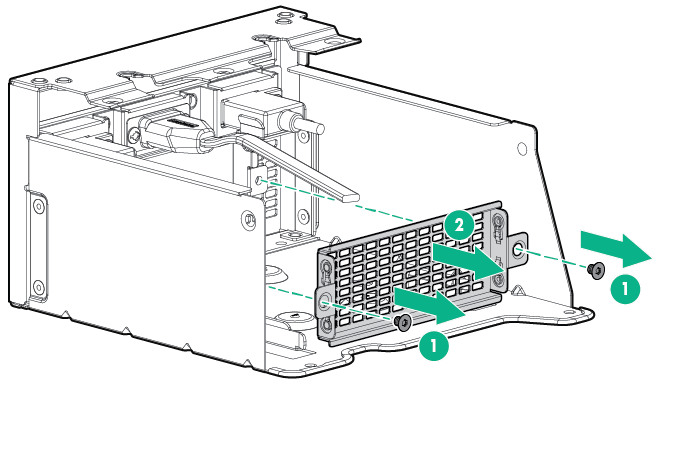
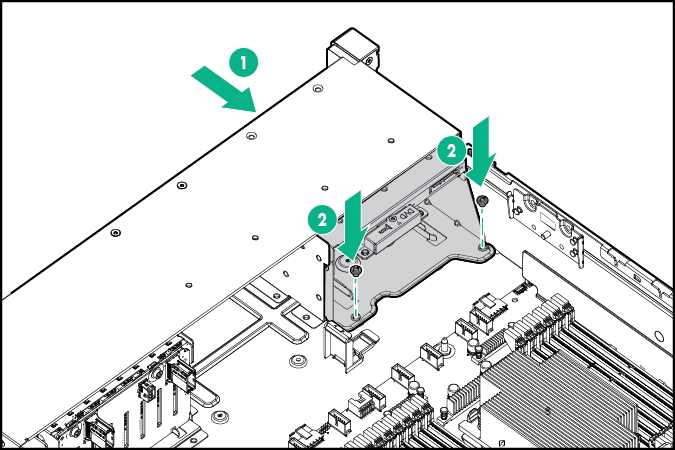
  8. Install the drive cage into the universal media bay.

    Installing the 2 SFF drive cage
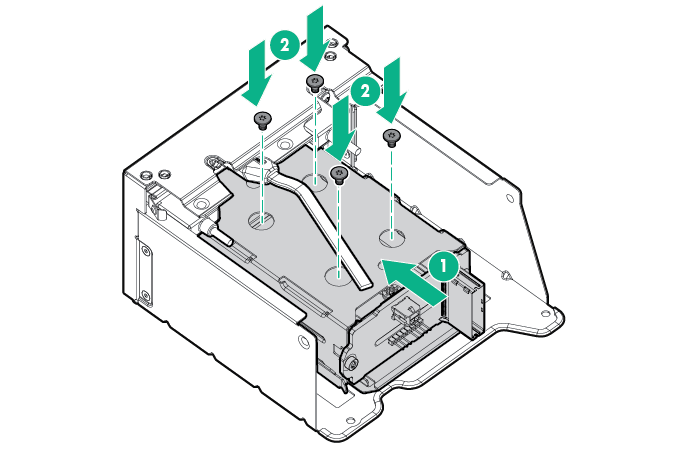
  9. Install the optical disc drive in the universal media bay.

    Installing the optical disc drive in the universal media bay
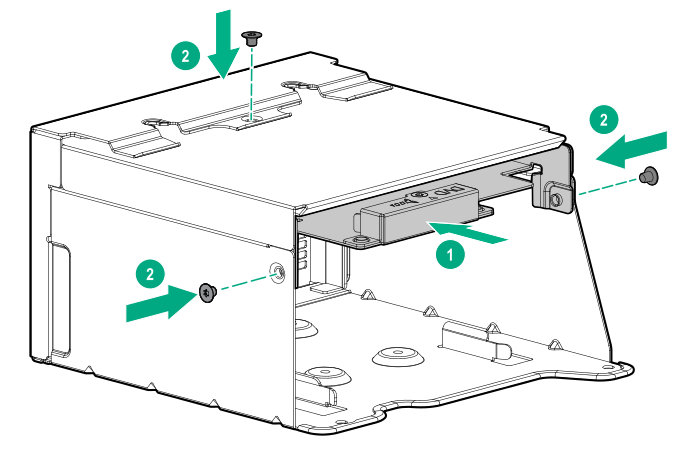
  10. Install the universal media bay.

    Installing the front 2 SFF drive bay
  11. Connect the power and data cables.
  12. Install the access panel.
  13. Slide the server into the rack.
  14. Connect each power cord to the server.
  15. Connect each power cord to the power source.
  16. Power up the server.

The installation is complete.