Installing the Systems Insight Display

Prerequisites

Before you perform this procedure, make sure that you have the following items available:

  • The components included with the hardware option kit

  • T-10 Torx screwdriver

Procedure
  1. Power down the server.
  2. Remove all power:
    1. Disconnect each power cord from the power source.
    2. Disconnect each power cord from the server.
  3. Do one of the following:
  4. Remove the access panel.
  5. Do one of the following:
  6. Remove the fan cage.
  7. Disconnect the power switch module cable from the power switch/SID module connector.
    The SID module cable will be connected to this same connector.
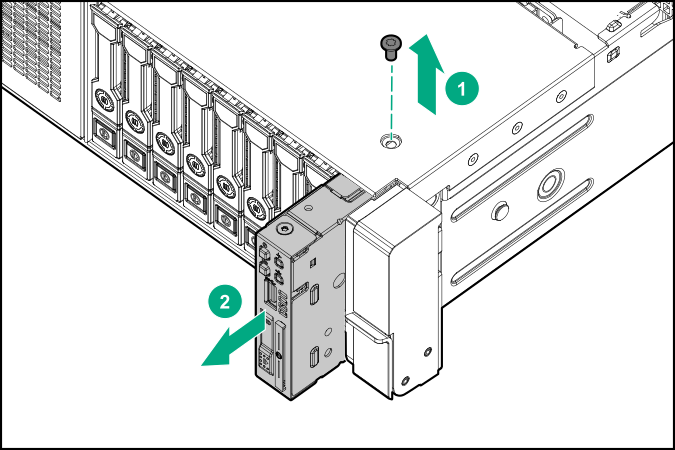
  8. Remove the power switch module. Retain the T-10 screw for later use.

    Removing the power switch module
    CAUTION: When routing cables, make sure that the cables are not in a position where they can be pinched or crimped.
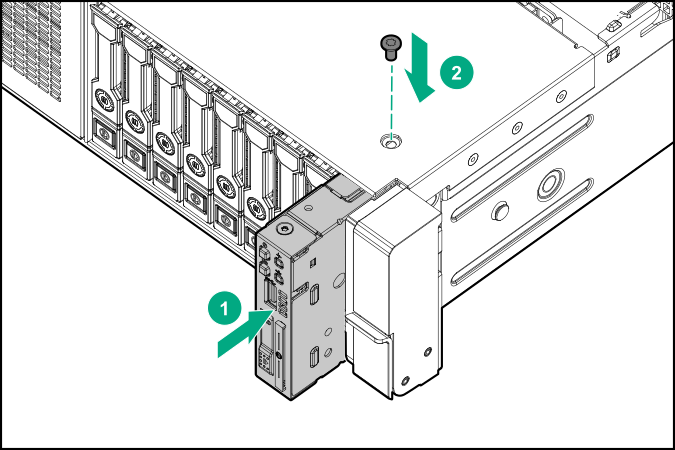
  9. Route the SID cable through the opening in the front of the server, and then install the SID module. Secure the module using the T-10 screw removed in step 8.

    Installing the SID module
  10. Connect the SID module cable to the power switch/SID module connector.
  11. Install the fan cage.
  12. Do one of the following:
  13. Install the access panel.
  14. Slide the server into the rack.
  15. Connect each power cord to the server.
  16. Connect each power cord to the power source.
  17. Power up the server.

The installation is complete.