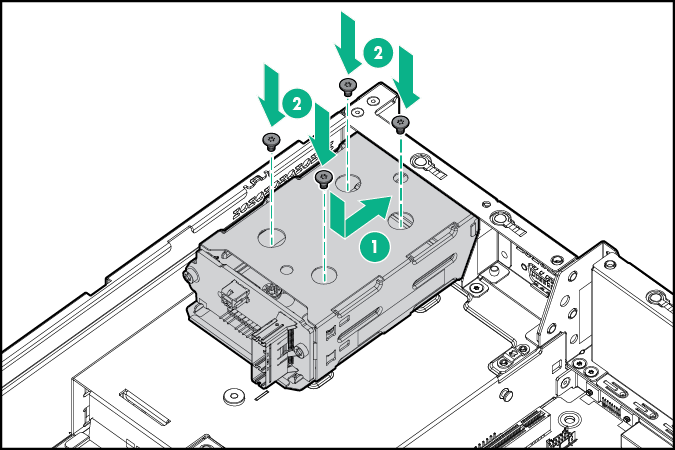
Two-bay SFF rear drive cage option
For rear drive cage installation, the front bays must be fully populated using the 12 LFF or 24 SFF drives. High performance fans must be installed in all fan bays.
To install the component:
Procedure
- Remove the secondary riser cage or PCI blank:
- Secondary riser cage
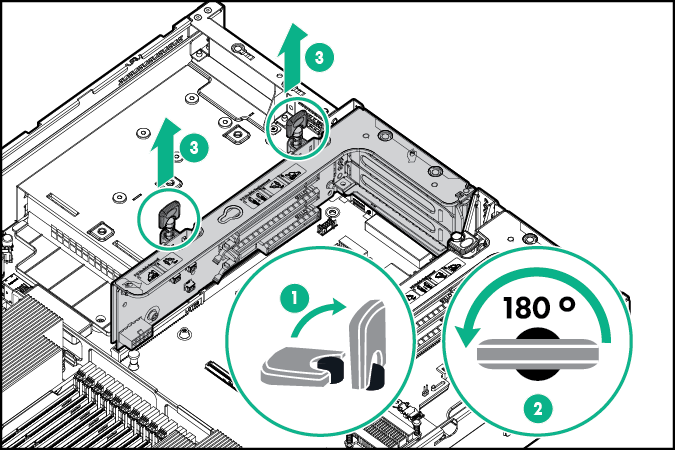
- PCI blank
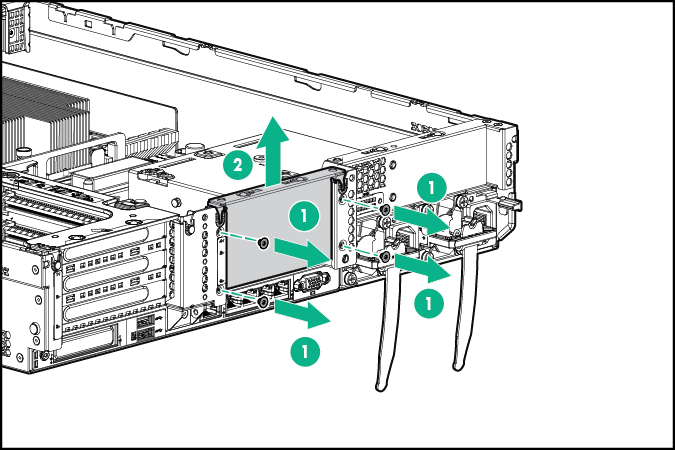
- Secondary riser cage
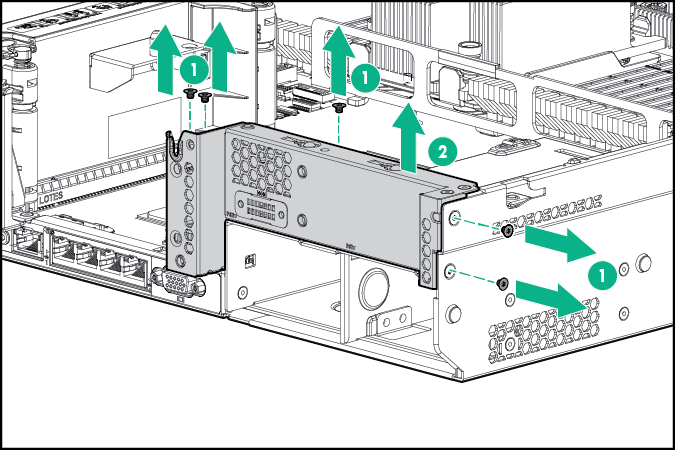
- Remove the rear wall blank.
- Install the drive cage compatible rear wall.
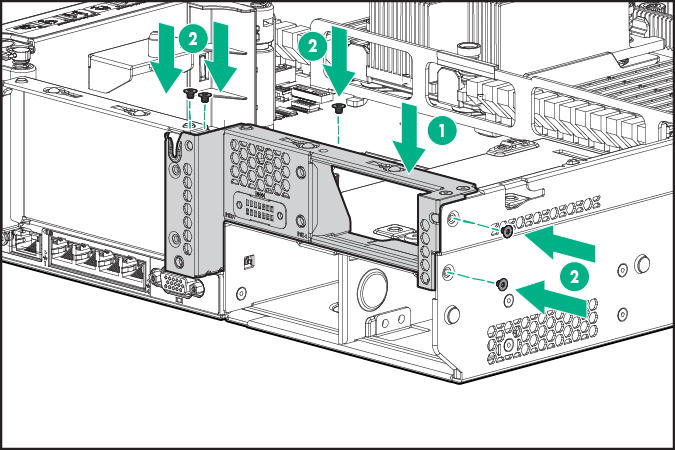
- Install the rear two-bay SFF drive cage option.
- If installing drives, connect the power cable:
- Single cable connection with 12 LFF configuration in the front
- Y cable connection with 24 SFF drive configuration in the front
- Single cable connection with 12 LFF configuration in the front
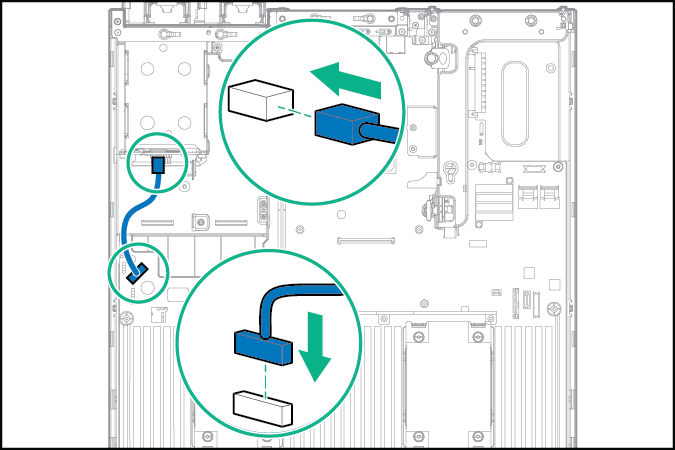
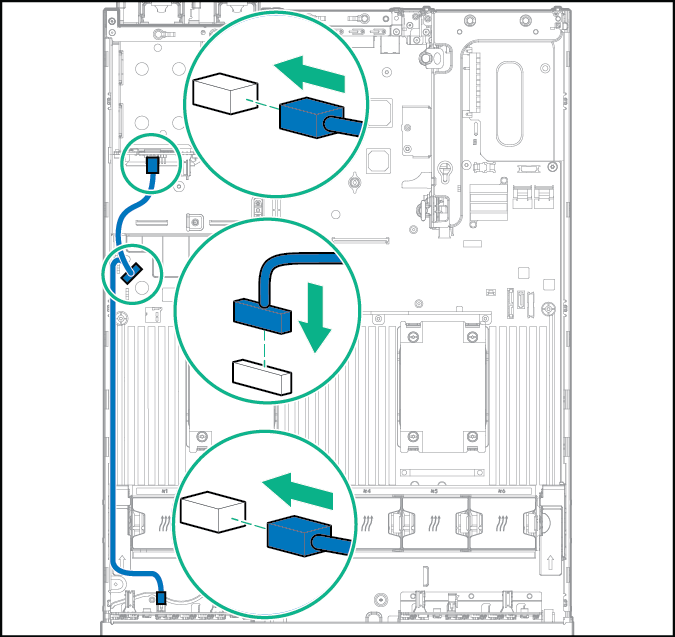
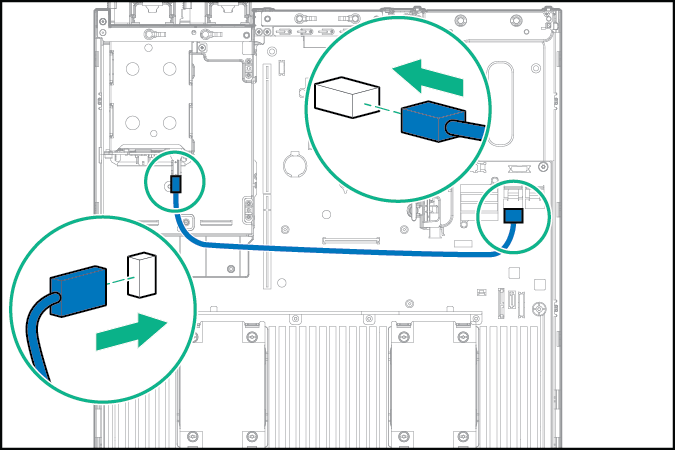
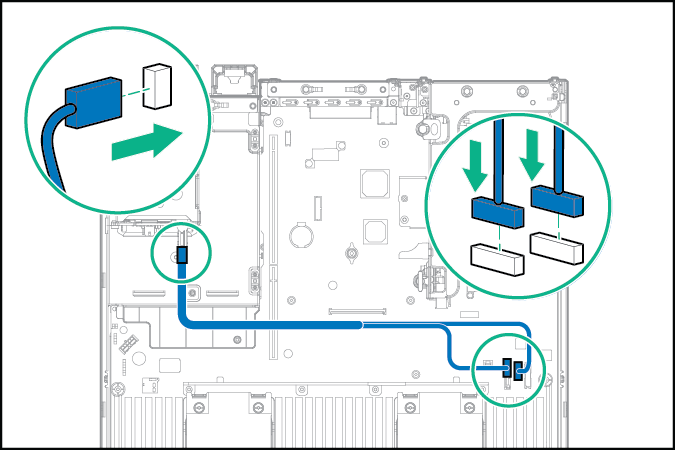
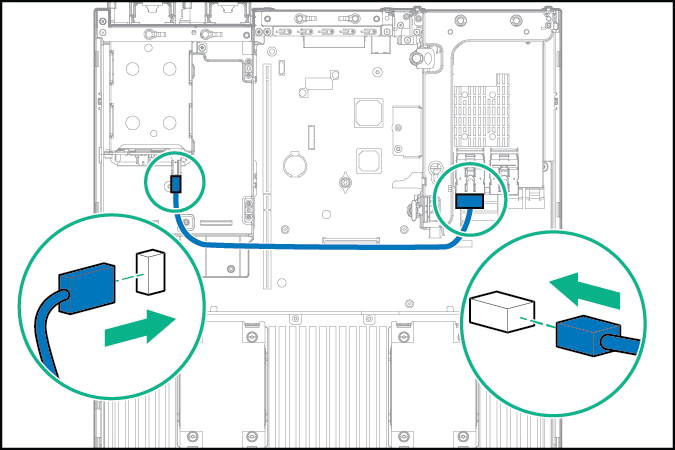
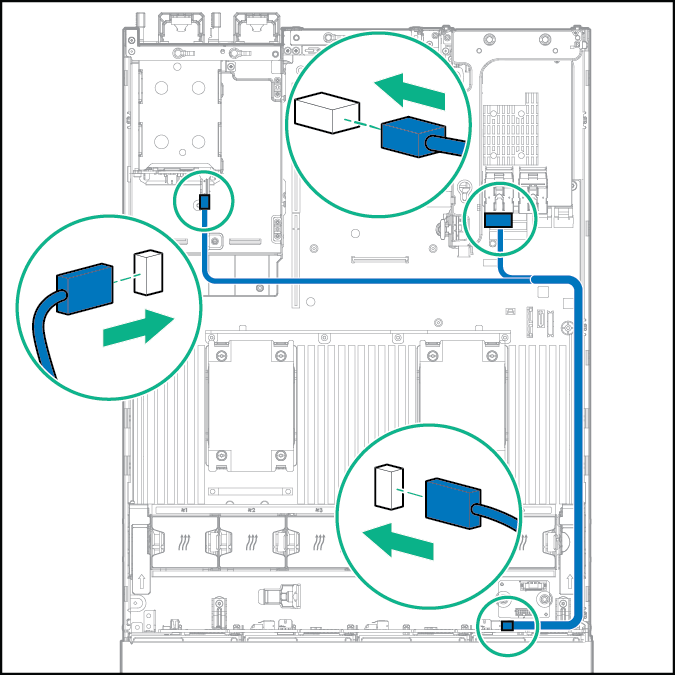
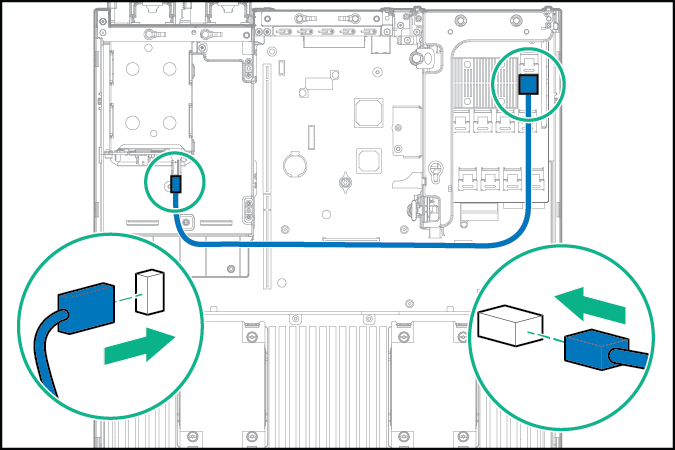
- Connect the data cable in one of the following configurations:
- Connected to the onboard x4 SATA connector
- Connected to the x2 SATA port and optical disk drive connector
- Connected to a PCI expansion board
- Connected to a PCI expansion board and the 12 LFF backplane
- Connected to an HPE 12G SAS Expander Card
- Connected to the onboard x4 SATA connector