GPU enablement kit
WARNING: To reduce the risk of personal injury, electric shock, or damage to the equipment, remove the power cord to remove power from the server. The front panel Power On/Standby button does not completely shut off system power. Portions of the power supply and some internal circuitry remain active until AC power is removed.
CAUTION: To prevent improper cooling and thermal damage, do not operate the server unless all PCI slots have either an expansion slot cover or an expansion board installed.
To install the component:
Procedure
- Remove the standard efficiency air diverters from the air baffle.
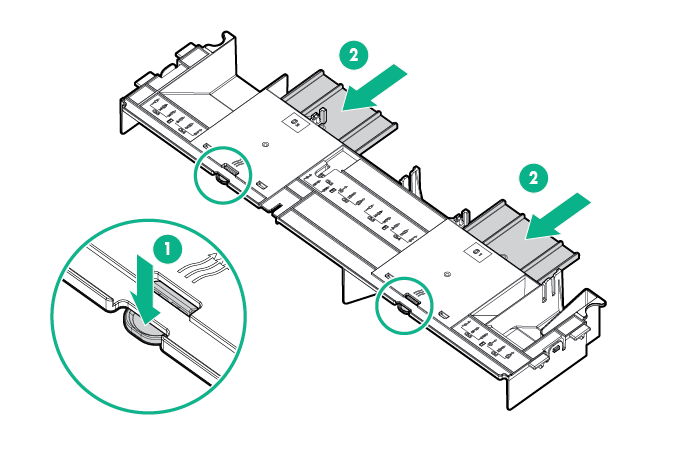
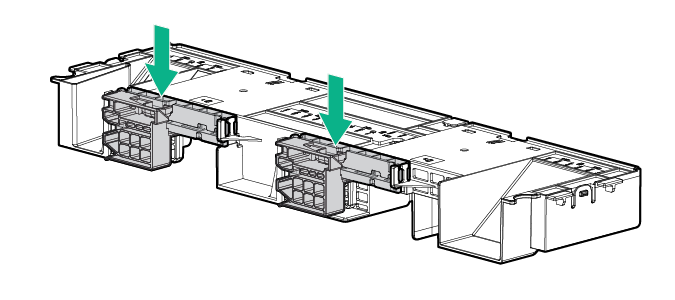
- Install the GPU retention clips onto the air baffle.
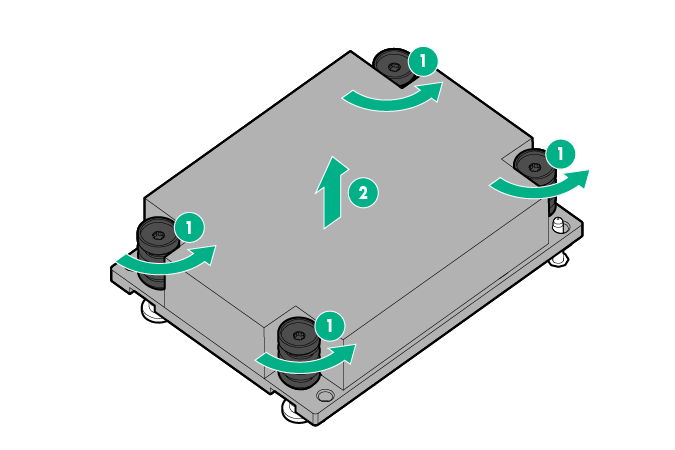
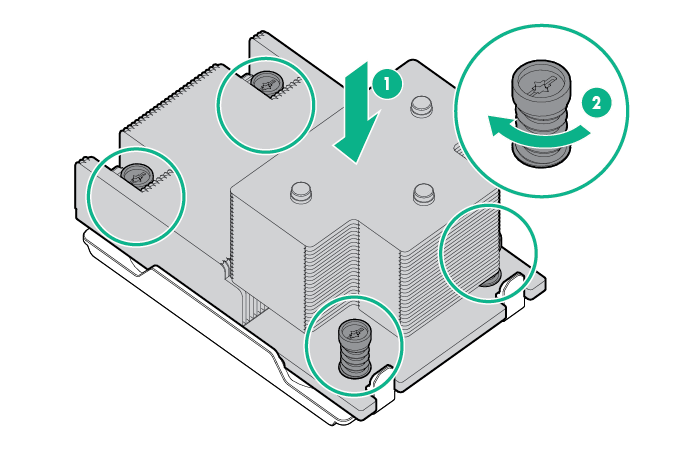
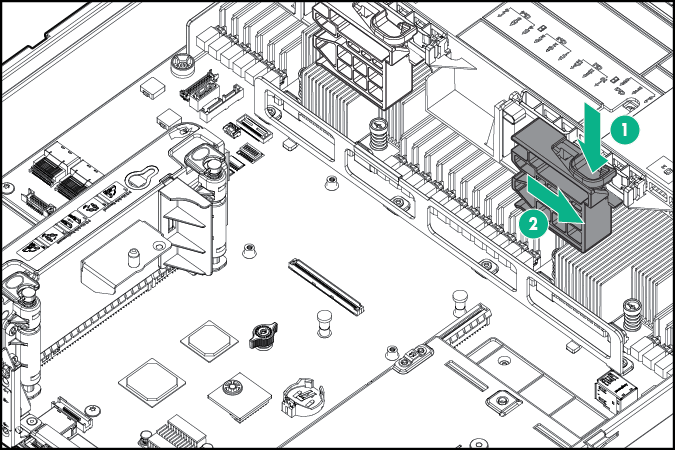
- Remove the standard heatsinks.
- Install the high-performance heatsinks.
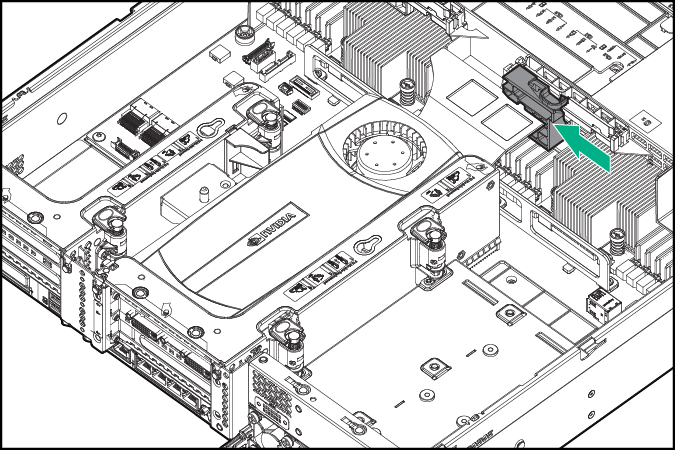
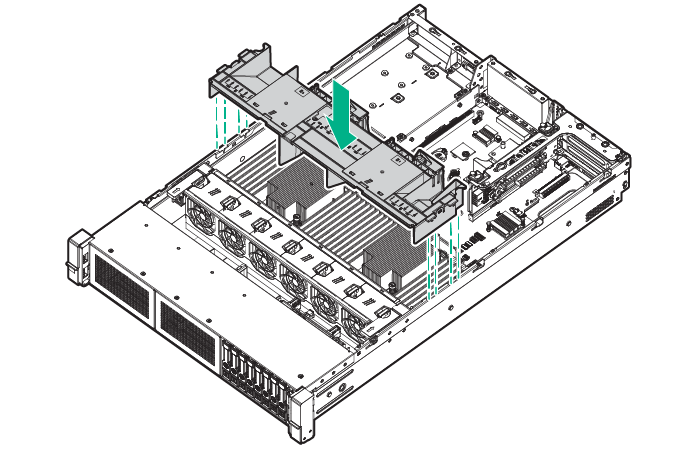
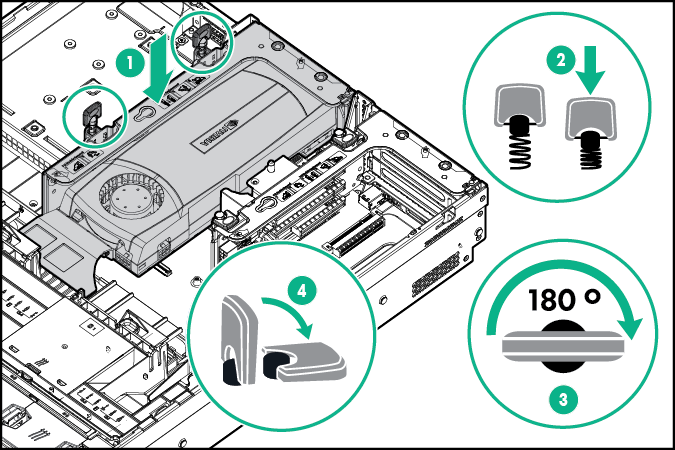
- Install the air baffle.
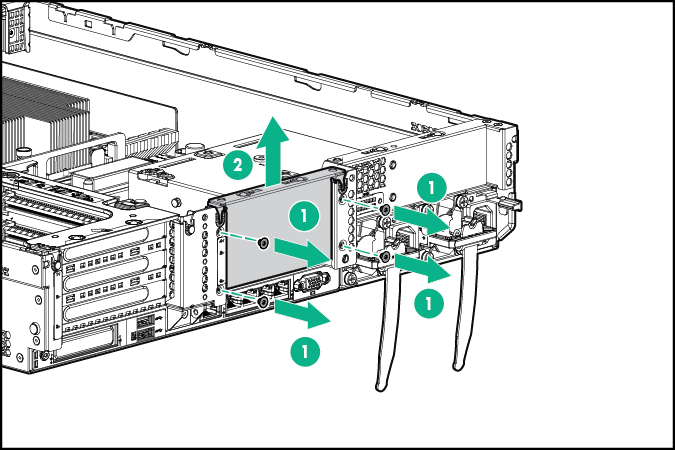
 IMPORTANT: This server supports GPU riser cages in both the primary and secondary riser locations. This document shows installation into the secondary riser location.
 - Remove the secondary PCI riser blank. Some models might require removing more than two screws.
- Install a GPU into the optional GPU-enabled riser cage.
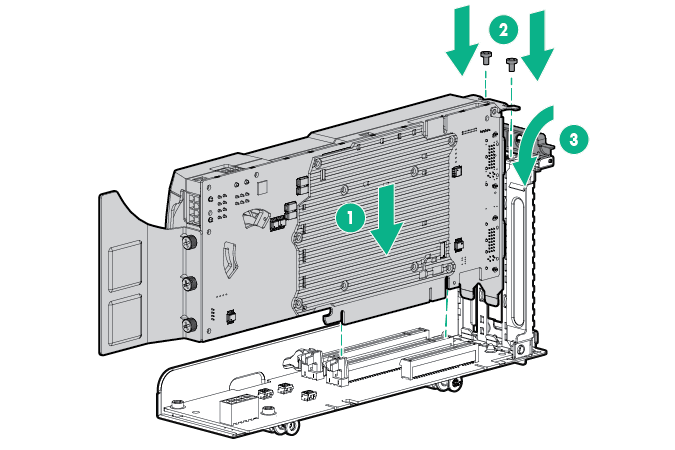
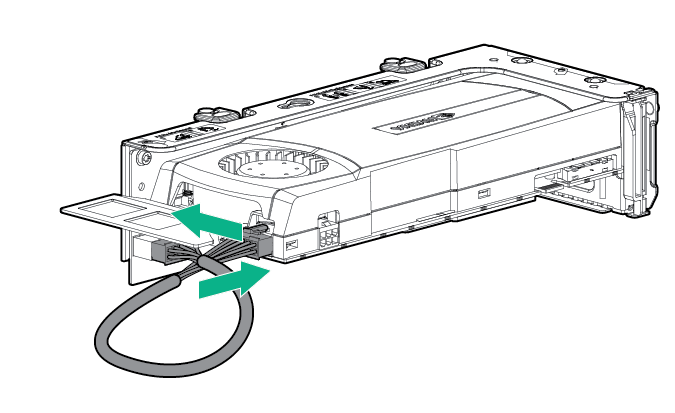
- Connect the power cable.
- Press down on the top of the retention clips and slide them to the unlocked position.
- Install the GPU-enabled riser cage option.
- Slide the retention clips to the locked position.