|
|
Processor and fan option
The server supports single- and dual-processor operation.
|
|
CAUTION: To avoid damage to the processor and system board, only authorized personnel should attempt to replace or install the processor in this server. |
|
|
CAUTION: To prevent possible server malfunction and damage to the equipment, multiprocessor configurations must contain processors with the same part number. |
|
|
IMPORTANT: If installing a processor with a faster speed, update the system ROM before installing the processor. |
To install a processor:
- Power down the server.
- Remove all power:
- Disconnect each power cord from the power source.
- Disconnect each power cord from the server.
- Extend the server from the rack.
- Remove the access panel.
- If any full-length PCI riser boards are installed, release the full-length expansion board retainer, and then remove the PCI riser cage.
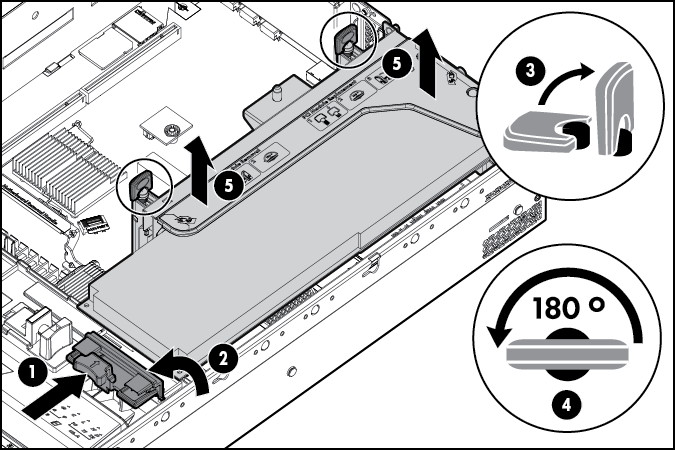
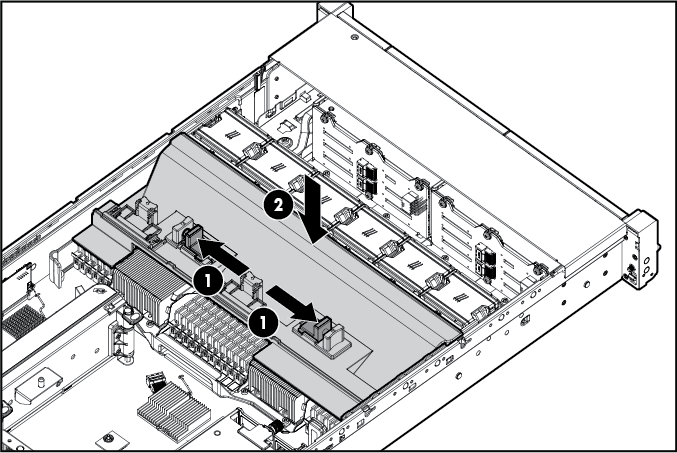
- Remove the air baffle.
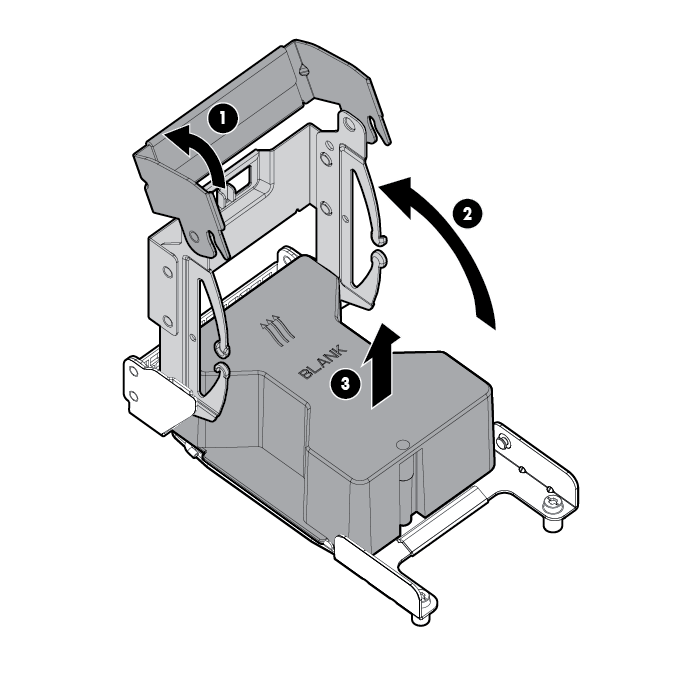
- Open the heatsink retaining bracket, and then remove the blank.

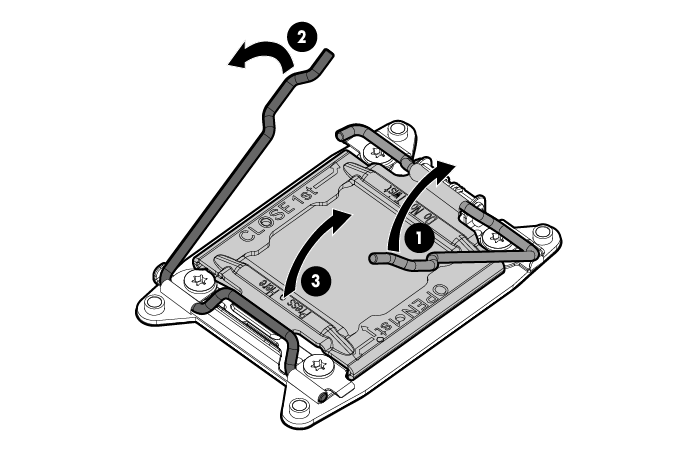
CAUTION: The pins on the processor socket are very fragile. Any damage to them may require replacing the system board.
- Open each of the processor locking levers in the order indicated, and then open the processor retaining bracket.
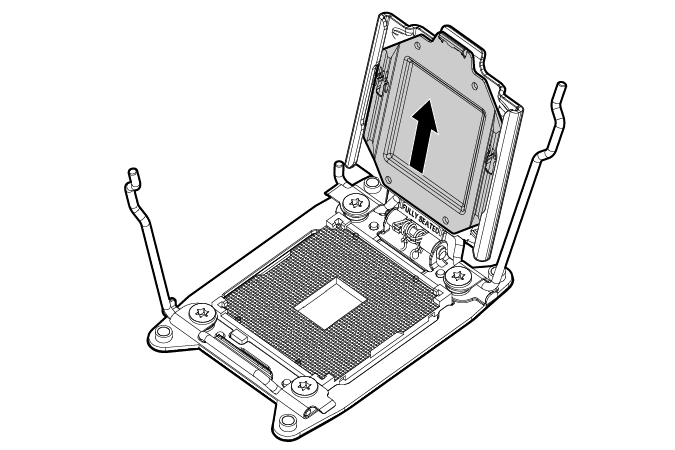
- Remove the clear processor socket cover. Retain the processor socket cover for future use.
- Install the processor. Verify that the processor is fully seated in the processor retaining bracket by visually inspecting the processor installation guides on either side of the processor. THE PINS ON THE SYSTEM BOARD ARE VERY FRAGILE AND EASILY DAMAGED.
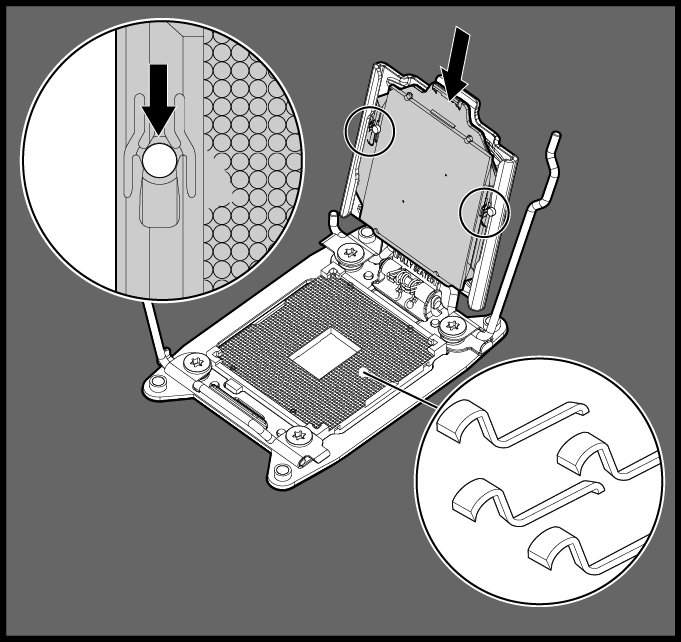
CAUTION: THE PINS ON THE SYSTEM BOARD ARE VERY FRAGILE AND EASILY DAMAGED. To avoid damage to the system board, do not touch the processor or the processor socket contacts.
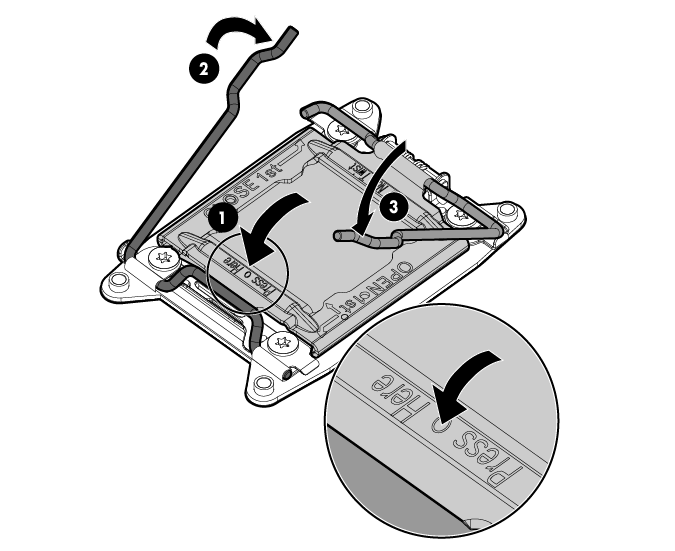
- Close the processor retaining bracket. When the processor is installed properly inside the processor retaining bracket, the processor retaining bracket clears the flange on the front of the socket.
CAUTION: Do not press down on the processor. Pressing down on the processor may cause damage to the processor socket and the system board. Press only in the area indicated on the processor retaining bracket.
- Press and hold the processor retaining bracket in place, and then close each processor locking lever. Press only in the area indicated on the processor retaining bracket.
- Remove the thermal interface protective cover from the heatsink.
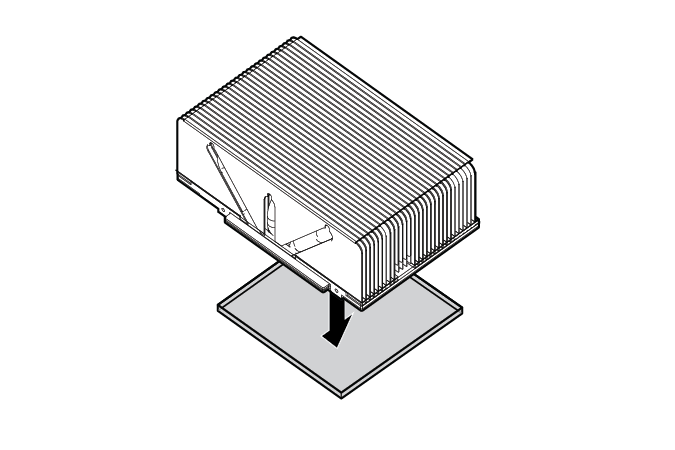
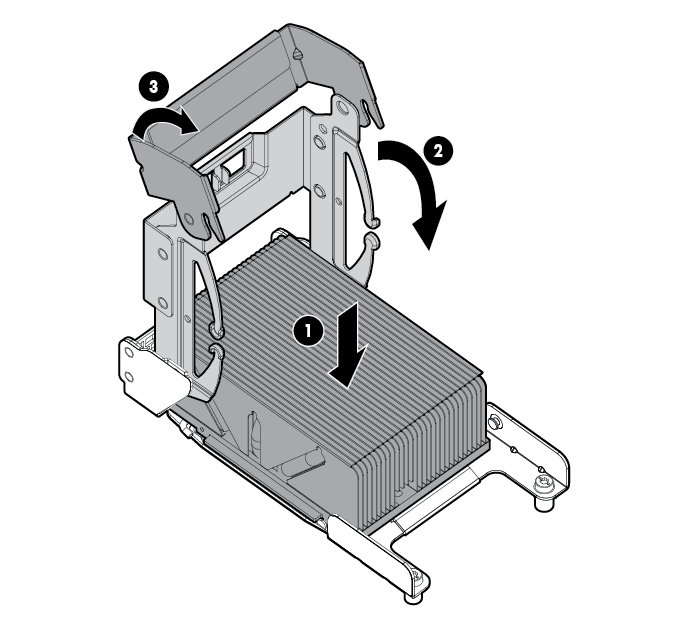
- Install the heatsink.
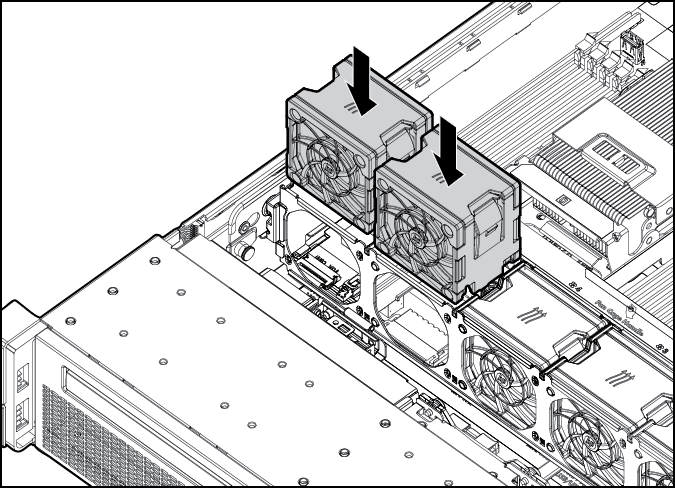
- Remove the two fan blanks.
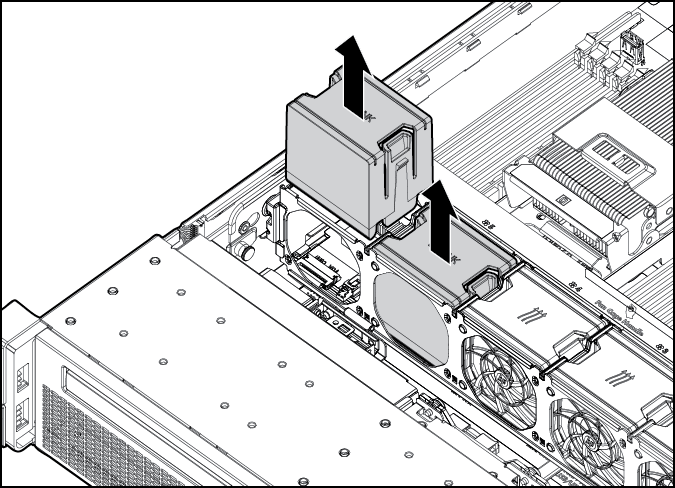
- Install the two additional fans included with the processor.
You can install memory on the second processor. HP recommends balancing memory between both processors for improved performance. For more information on memory configurations, see "Memory Options."
- Install the air baffle.
- Install any full-length expansion boards, if previously removed.
- Install the access panel.
- Install the server into the rack.
- Connect each power cord to the server.
- Connect each power cord to the power source.
- Power up the server.