|
|
|


Systems Insight Display
- Power down the server.
- Remove all power:
- Disconnect each power cord from the power source.
- Disconnect each power cord from the server.
- Extend the server from the rack.
- Remove the access panel.
- Remove the fan cage.
- Depending on the server options installed, do one of the following:
- Disconnect the cabled power switch module cables from the system board.
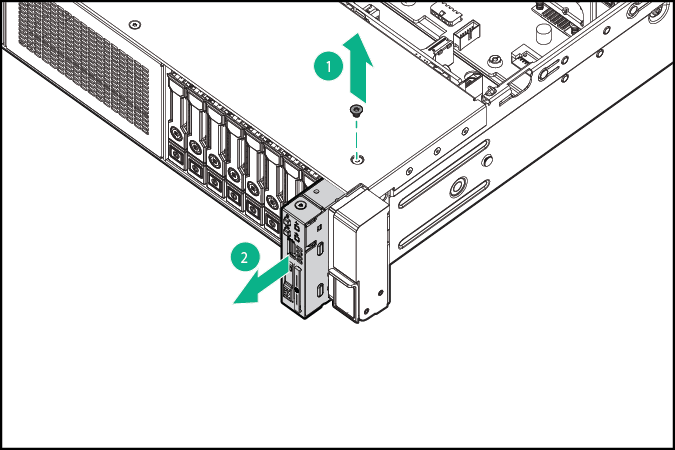
- Using a T-10 Torx screwdriver, remove the cabled power switch module. Retain the T-10 screw.
To replace the component:
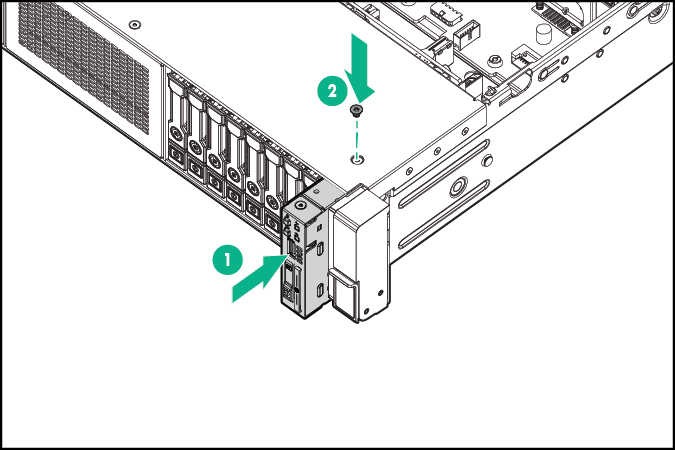
- Route the cable through the opening in the front of the server, and then install the SID power switch module. Secure the module using the existing T-10 screw.
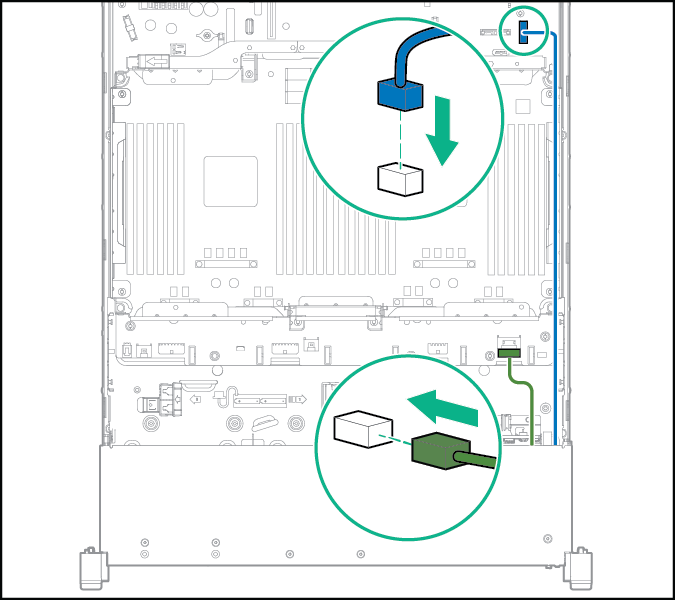
- Using the cable trough, connect the SID module cable to the front panel connector and to the power switch module connector.

CAUTION: When routing cables, always be sure that the cables are not in a position where they can be pinched or crimped.
- Install the fan cage.
- Depending on the server options installed, do one of the following:
- Install the access panel.
- Slide the server into the rack.
- Connect each power cord to the server.
- Connect each power cord to the power source.
- Power up the server.