|
|
|


Power adapter cables option
|
WARNING: Do not install these cables in servers that do not specifically identify them in the server documentation. Improper installation of these cables results in damage to the servers and connecting cards and voids the warranty. |
To install the component:
- Power down the server.
- Remove all power:
- Disconnect the power cord from the power source.
- Disconnect the power cord from the server.
- Remove the server from the rack.
- Remove the access panel.
- Locate the I/O board auxiliary power connectors.
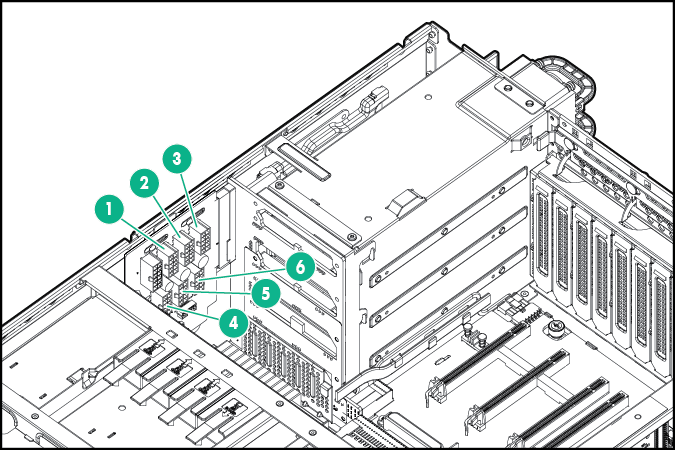
Item
Description
1
I/O board auxiliary power connector
2
I/O board auxiliary power connector
3
I/O board auxiliary power connector
4
I/O board auxiliary power connector
5
I/O board auxiliary power connector
6
I/O board auxiliary power connector

IMPORTANT: The PCIe slots provide 75W of power. The remaining wattage is supplied by the power cable to obtain the total wattage required.
IMPORTANT: High power PCIe cables report power allocation information used by the server to calculate power supply redundancy rules. For the server to calculate the accurate number of power supplies needed, use the lowest wattage power cable possible for the high- powered PCIe card.
For example: if a user installs a 150-W PCIe card in the server and connects it to a 300-W power cable, the server calculates the power needed as 300 watts instead of the 150 watts the card uses. This situation results in the server requiring more power supplies than needed for operation or redundancy when, in fact, the server may be sufficient with fewer power supplies. Hewlett Packard Enterprise recommends fully populating the server with power supplies when using high power PCIe cards.
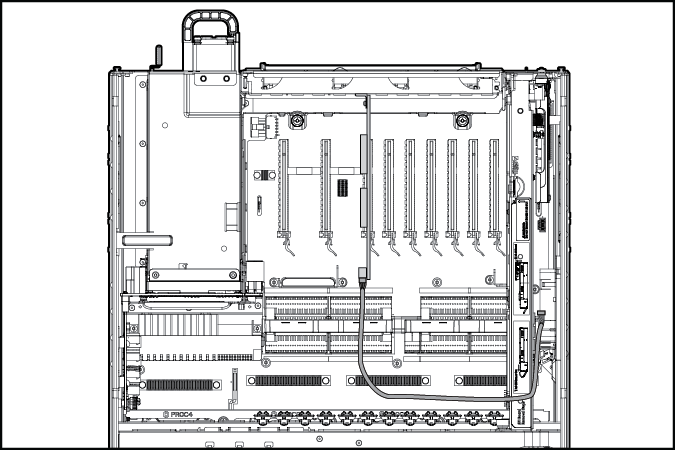
- Connect the power cable.
- Install the access panel.
- Install the server into the rack.
- Connect each power cord to the server.
- Connect each power cord to the power source.
- Power up the server.