|
|
|


DC power supply option
Adding an additional power supply provides redundant power support to the unit if the primary power supply fails. You do not have to power down the server before removing or installing a redundant hot-plug power supply.
|
WARNING: To reduce the risk of electric shock, fire, and damage to the equipment, you must install this product in accordance with the following guidelines:
|
|
WARNING: To reduce the risk of personal injury from hot surfaces, observe the thermal labels on each power supply or module. |
|
WARNING: To reduce the risk of injury from electric shock hazards, do not open power supplies. Refer all maintenance, upgrades, and servicing to qualified personnel. |
|
WARNING: Remove power from the power supply before performing any installation steps or maintenance on the power supply. |
|
CAUTION: Electrostatic discharge (ESD) can damage electronic components. Be sure that you are properly grounded (earthed) before beginning any installation procedure. |
The following optional input can be purchased from an authorized reseller:
J6X42A—3 m (9.85 ft) 48 VDC Power Cable Kit
If you are not using an optional input cable, then cabling should be made in consultation with a licensed electrician and be compliant with local code.
To install the component:
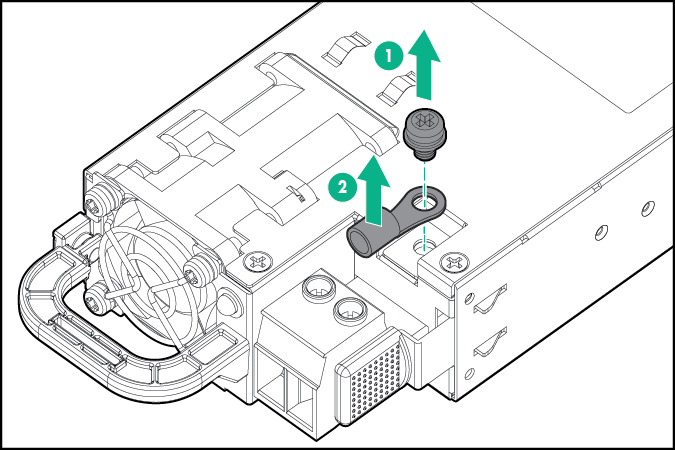
- Remove the blank.

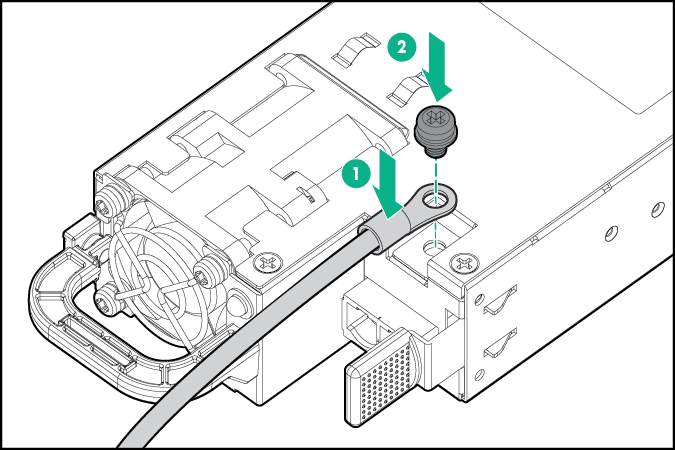
- Remove the ring tongue from the top of the PSU.
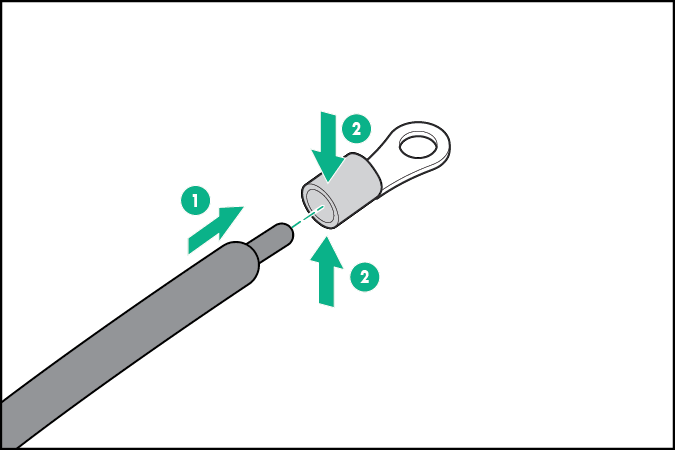
- Crimp the ring tongue to the ground cable from the 48 V power source.
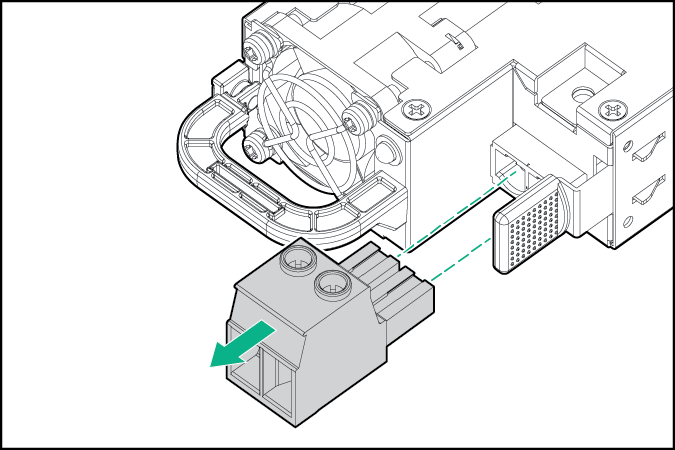
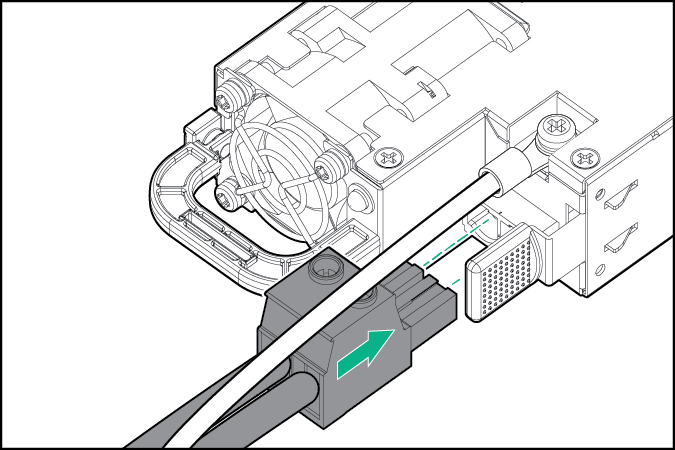
- Remove the black connector from the rear of the PSU.
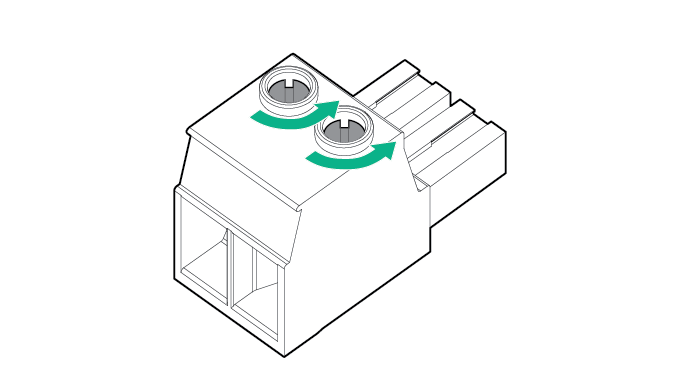
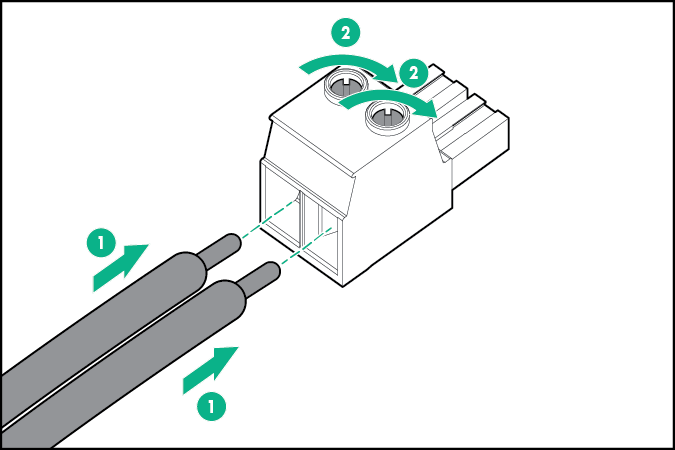
- Loosen the screws on the connector.
- Attach the ground (earthed) wire to the ground screw and washer and tighten to 13 lb-in of torque. The ground wire must be connected before connecting the positive or negative lead wires.
- Insert the wires into the connector block and tighten the screws to 10 lb-in of torque.
- Insert the connector into the PSU.
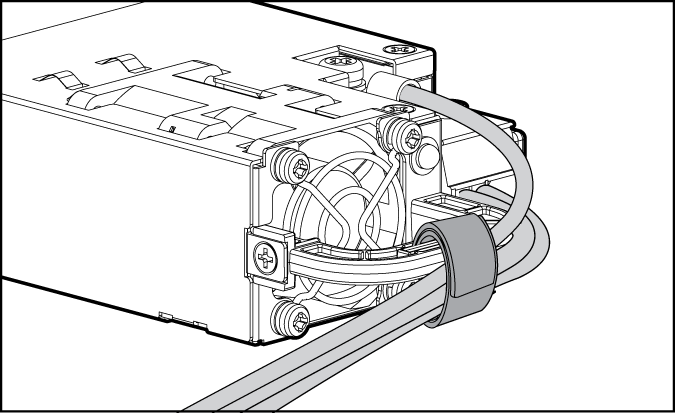
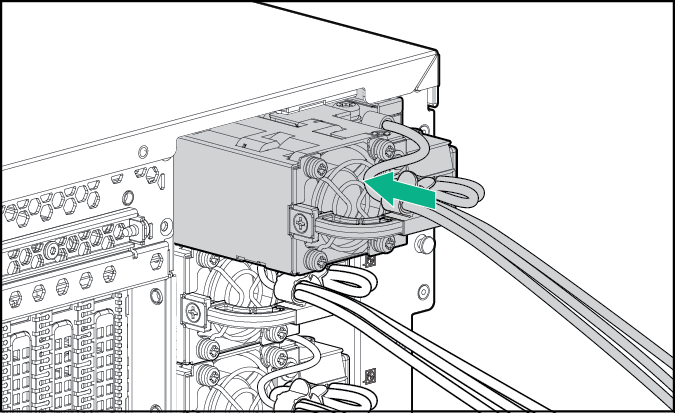
- Attach the cables to the power supply handle with the hook-and-loop strap.
- Insert the power supply into the power supply bay until it clicks into place.
- Route the power cord. Use best practices when routing power cords and other cables. A cable management arm is available to help with routing.
- Make sure the 48 V DC power source is off or the PDU breaker is in the off position, and then connect the power cord to the 48 VDC power source or PDU.
- Turn on the 48 V power source or switch the PDU breaker to the on position to supply 48 V to the power supply.
- Be sure that the green power supply LED is on.