|
|
|


System battery replacement
If the server no longer automatically displays the correct date and time, then replace the battery that provides power to the real-time clock. Under normal use, battery life is 5 to 10 years.
|
WARNING: The computer contains an internal lithium manganese dioxide, a vanadium pentoxide, or an alkaline battery pack. A risk of fire and burns exists if the battery pack is not properly handled. To reduce the risk of personal injury:
|
To remove the component:
- Power down the server.
- Remove all power:
- Disconnect each power cord from the power source.
- Disconnect each power cord from the server.
- Do one of the following:
- Remove the access panel.
- Locate the battery on the system board.

WARNING: Do not exert too much force to remove the system battery. The battery could pop out of the socket, or the tool could slip and damage the socket or the system board.
- Use a small flat-bladed, nonconductive tool to carefully remove the battery from the socket.

IMPORTANT: Replacing the system board battery resets the system ROM to its default configuration. After replacing the battery, use BIOS/Platform Configuration (RBSU) in the UEFI System Utilities to reconfigure the system.
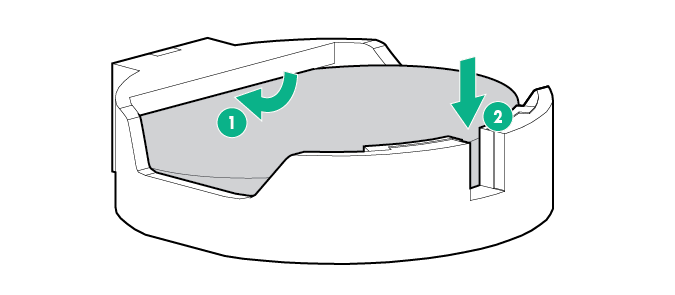
To install the component:
- Insert the battery with the "+" side facing up underneath the outer lip of the socket, and then press the battery down to secure it in place.
- Install the access panel.
- Do one of the following:
- Slide the server into the rack.
- Install the server into the rack.
- Power up the server.
For more information about battery replacement or proper disposal, contact an authorized reseller or an authorized service provider.