|
|
|


Install the PCI riser cages
|
CAUTION: To prevent damage to the server or expansion boards, power down the server, and disconnect all power cords before removing or installing the PCI riser cage. |
To install the component:
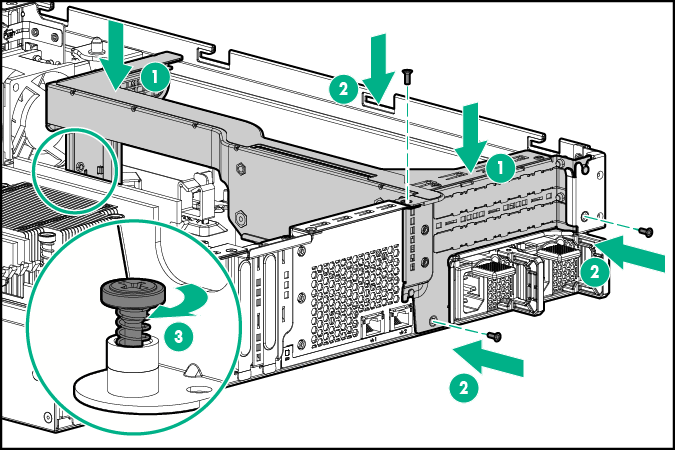
- If you are installing the GPU riser cage or the two-slot PCI riser cage in the primary PCIe riser location, do the following:
- Align the riser board with the corresponding connectors on the system board, and then press down the PCI riser cage.
- Secure the riser cage with the rear side screws.
- Tighten the captive thumbscrew on the front end of the riser cage.
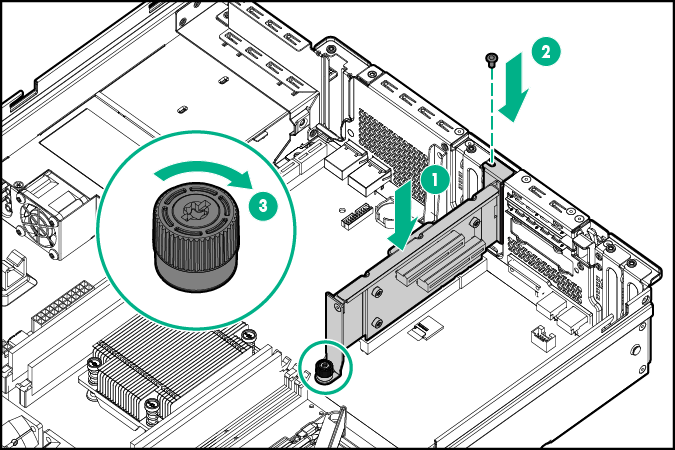
- If you are installing the FlexibleLOM riser cage in the secondary PCIe riser location, do the following:
- Align the riser board with the corresponding connectors on the system board, and then press down the PCI riser cage.
- Secure the riser cage with the rear side screw.
- Tighten the captive thumbscrew on the front end of the riser cage.
- If cabled expansion boards are installed on the PCI riser cage, connect all necessary internal cabling to the expansion boards.
For more information on these cabling requirements, see the documentation that ships with the option.
- Install the access panel.
- Do one of the following:
- Slide the server into the rack.
- Install the server into the rack.
- Power up the server.