Installing an LFF non-hot-plug drive

Prerequisites

Before you perform this procedure, make sure that you have a T-15 Torx screwdriver available.

Procedure
  1. Power down the server.
  2. Remove all power:
    1. Disconnect each power cord from the power source.
    2. Disconnect each power cord from the server.
  3. Disconnect all peripheral cables from the server.
  4. Do one of the following:
  5. Remove the access panel.
  6. Remove the front bezel.
  7. Remove the PCI air baffle.
  8. Remove the system air baffle.
  9. Disconnected all existing drive cage cables.
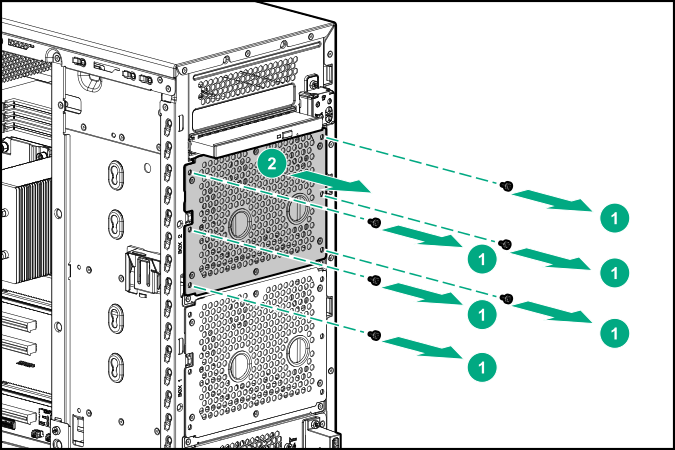
  10. Remove the installed drive cage.

    Removing the non-hot-plug drive cage
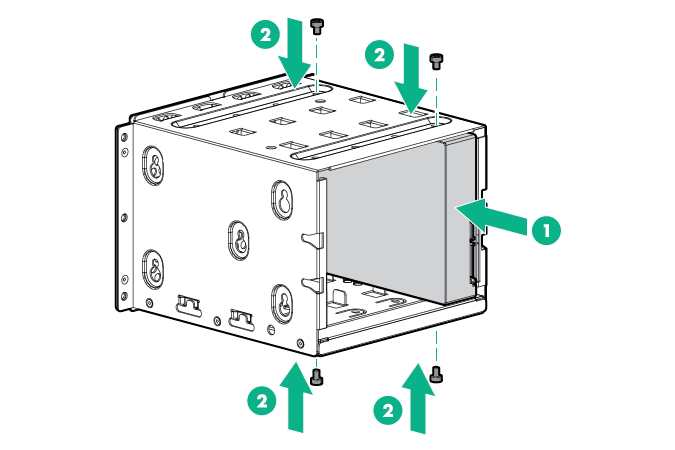
  11. Use the screws on the non-hot-plug drive cage to install the drives.

    Installing the non-hot-plug drives
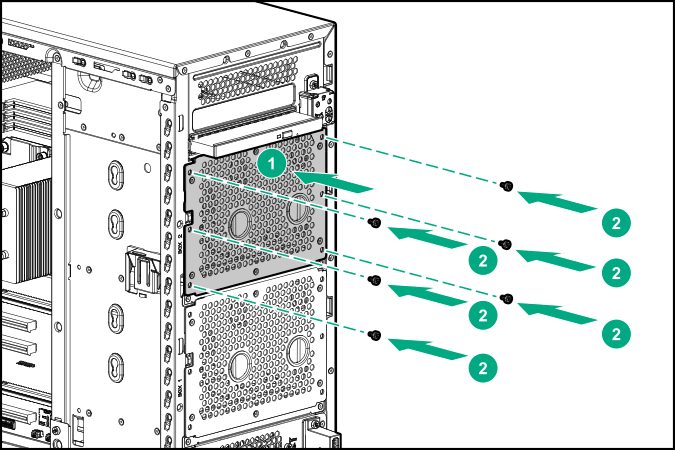
  12. Install the 4 LFF non-hot-plug drive cage assembly.

    Installing the non-hot-plug drive cage
  13. Connect the drive cables.
  14. Install the system air baffle.
  15. Install the PCI air baffle.
  16. Install the front bezel.
  17. Install the access panel.
  18. Do one of the following:
  19. Connect all peripheral cables to the server.
  20. Connect each power cord to the server.
  21. Connect each power cord to the power source.
  22. Power up the server.

The installation is complete.

To configure arrays, see the HPE Smart Array SR Gen10 Configuration Guide at the Hewlett Packard Enterprise website.