Remove the access panel
WARNING: To reduce the risk of personal injury from hot surfaces, allow the drives and the internal system components to cool before touching them.
CAUTION: To prevent damage to electrical components, take the appropriate anti-static precautions before beginning any installation, removal, or replacement procedure. Improper grounding can cause electrostatic discharge.
CAUTION:
Do not operate the server for long periods with the access panel open or removed. Operating the server in this manner results in improper airflow and improper cooling that can lead to thermal damage.
Prerequisites
Before you perform this procedure, make sure that you have a T-15 Torx screwdriver available.
Procedure
-
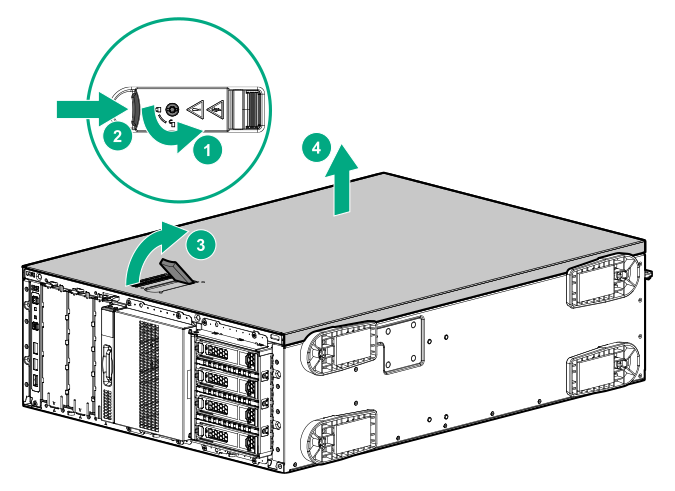
Remove the access panel:
- If necessary, unlock the access panel latch.
- Press the release button and pull up the latch to disengage the access panel from the chassis.
- Lift up the rear side of the access panel to remove the panel from the chassis.