Install a DC power supply
The following input power cord option might be purchased from an authorized Hewlett Packard Enterprise reseller:
J6X43A—HPE 12 AWG 48 V DC 3.0 m Power Cord
If you are not using an input power cord option, the power supply cabling should be made in consultation with a licensed electrician and be compliant with local code.
If you are replacing the factory installed ground lug, use the KST RNB5-5 crimp terminal ring or equivalent. Use an M5-0.80 x 8 screw to attach the ground lug to the power input module.
WARNING: To reduce the risk of electric shock or energy hazards:
- This equipment must be installed by trained service personnel.
- Connect the equipment to a reliably grounded secondary circuit source. A secondary circuit has no direct connection to a primary circuit and derives its power from a transformer, converter, or equivalent isolation device.
- The branch circuit overcurrent protection must be rated 27 A.
WARNING: To reduce the risk of personal injury from hot surfaces, allow the power supply or power supply blank to cool before touching it.
CAUTION: This equipment is designed to permit the connection of the earthed conductor of the DC supply circuit to the earthing conductor at the equipment.
If this connection is made, all of the following must be met:
- This equipment must be connected directly to the DC supply system earthing electrode conductor or to a bonding jumper from an earthing terminal bar or bus to which the DC supply system earthing electrode conductor is connected.
- This equipment must be located in the same immediate area (such as adjacent cabinets) as any other equipment that has a connection between the earthed conductor of the same DC supply circuit and the earthing conductor, and also the point of earthing of the DC system. The DC system must be earthed elsewhere.
- The DC supply source is to be located within the same premises as the equipment.
- Switching or disconnecting devices must not be in the earthed circuit conductor between the DC source and the point of connection of the earthing electrode conductor.
CAUTION: To prevent improper cooling and thermal damage, do not operate the
server unless all bays are populated with either a component or a blank.
Procedure
-
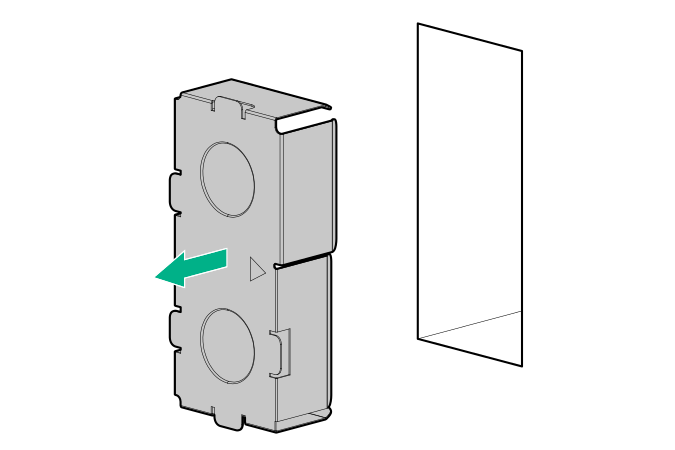
If you are installing a power supply in the power supply bay 2, remove the power supply blank.
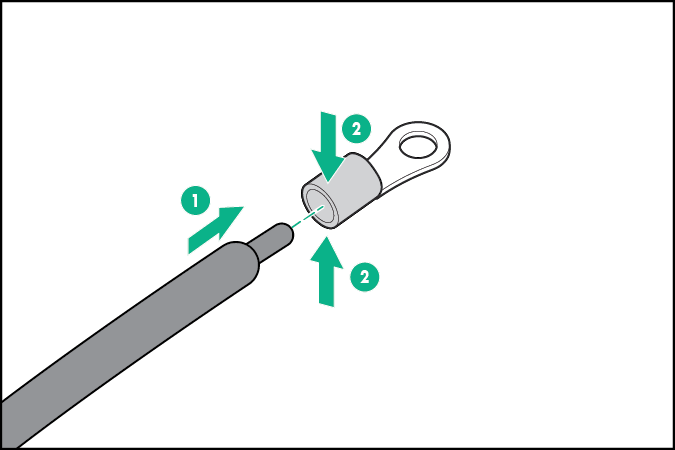
-
Remove the ring tongue.
-
Crimp the ring tongue to the ground cable from the -48 V DC power source.
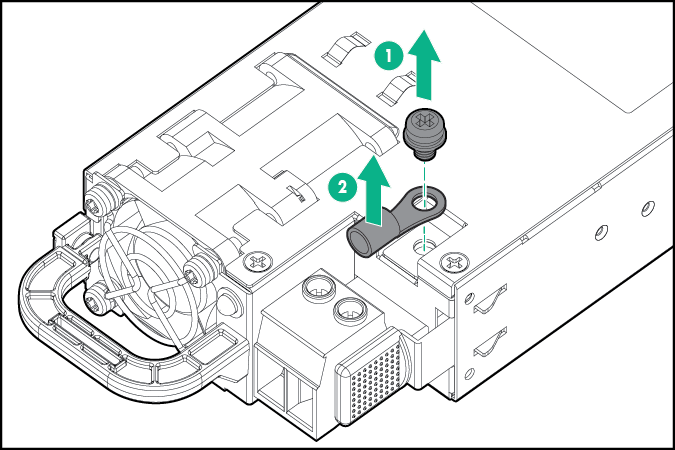
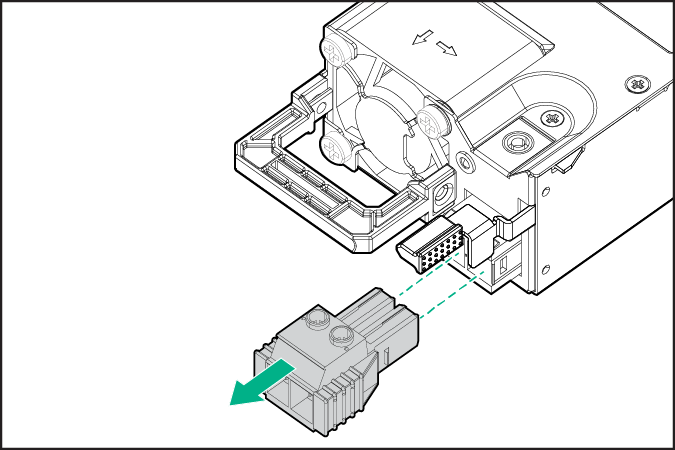
-
Remove the terminal block connector.
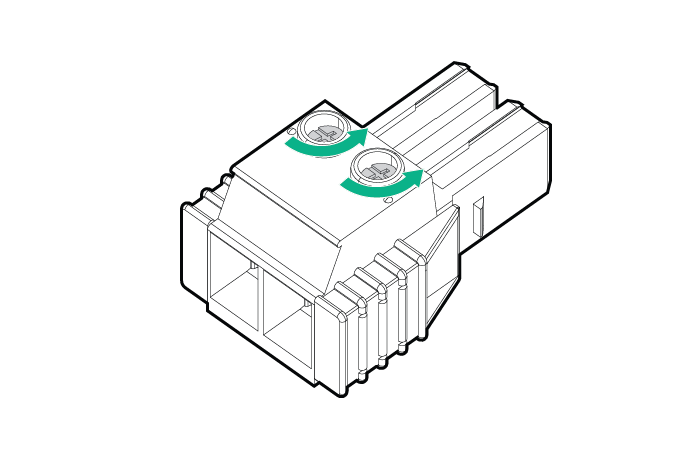
-
Loosen the screws on the terminal block connector.
-
Attach the ground (earthed) wire to the ground screw and washer and tighten to 1.47 N m (13 lb-in) of torque. The ground wire must be connected before the -48 V wire and the return wire.
The ground wire must be connected before the -48 V wire and the return wire.
-
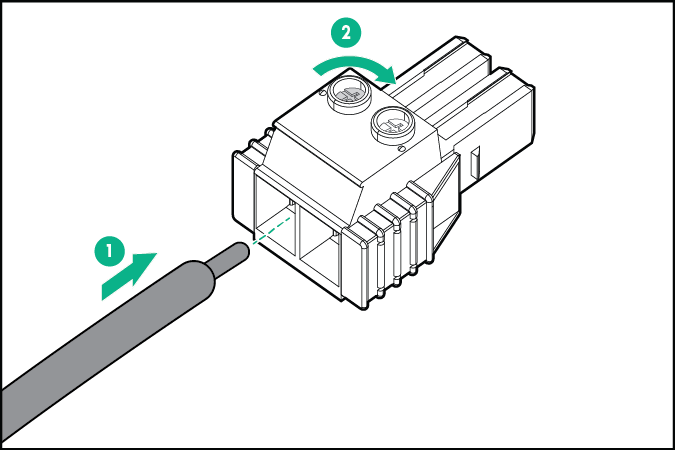
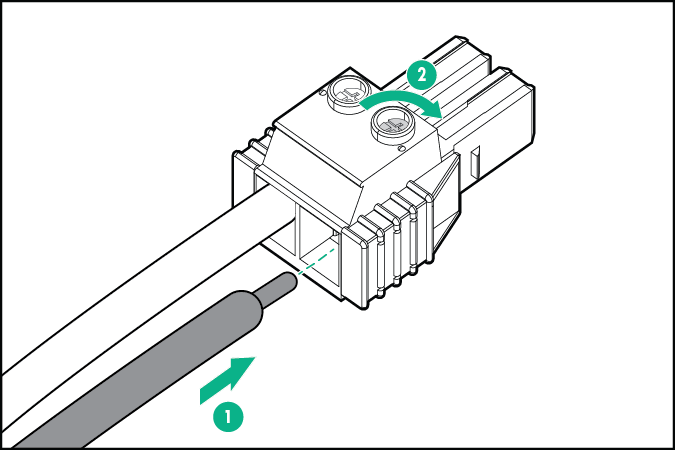
Insert the -48 V wire into the left side of the terminal block connector, and then tighten the screw to 1.3 N m (10 lb-in) of torque.
-
Insert the return wire into the right side of the connector, and then tighten the screw to 1.3 N m (10 lb-in) of torque.
-
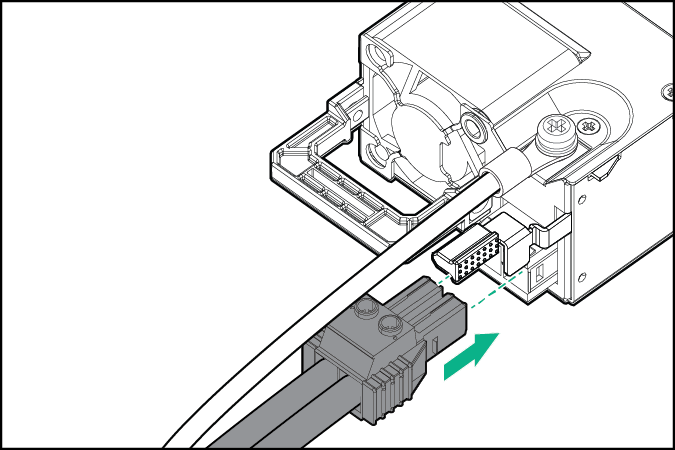
Install the terminal block connector in the power supply.
-
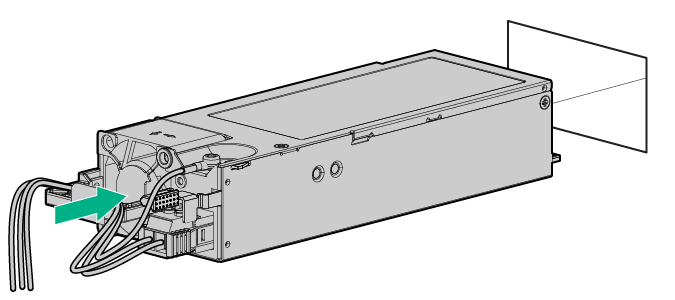
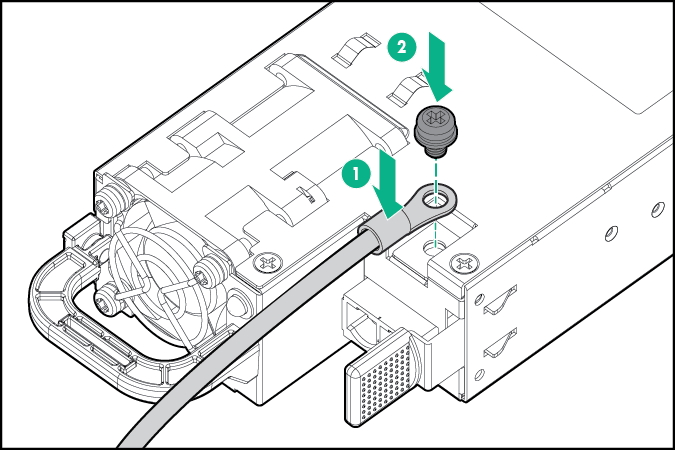
Secure the power cord, wires, and cables in the strain relief strap attached to the power supply handle:
- Secure the power cord, wires, and cables with the strain relief strap. Roll the extra length of the strap around the power supply handle.

- Secure the power cord, wires, and cables with the strain relief strap. Roll the extra length of the strap around the power supply handle.
-
Slide the power supply into the bay until it clicks into place.