|
|
|


Installing accelerator options in the rear accelerator cage
To install the component:
- Power down the server.
- Disconnect all peripheral cables from the server.
- Remove the server.
- Place the server on a flat, level work surface.
- Remove the rear accelerator cage.
- Remove the accelerator blank. Retain the accelerator blank for future use.
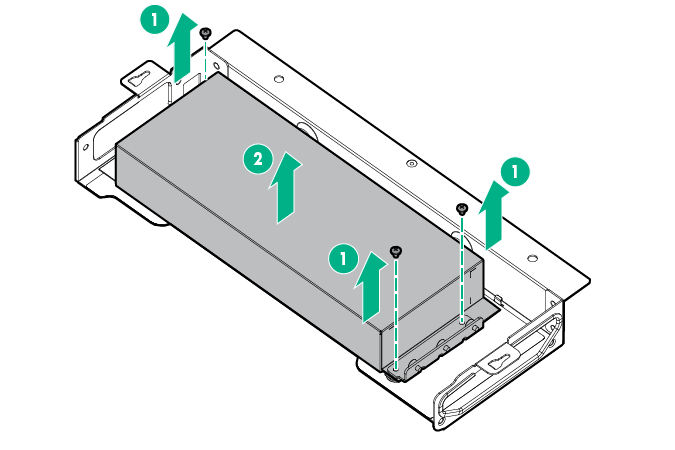
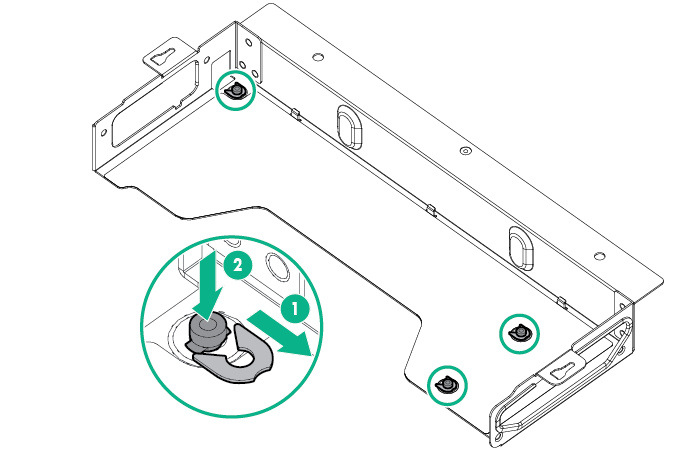
- Remove the three standoffs. Retain all standoffs for possible future use when installing the accelerator blank.
- For AMD accelerators, remove the front bracket from the accelerator:
- Remove the top cover of the accelerator.
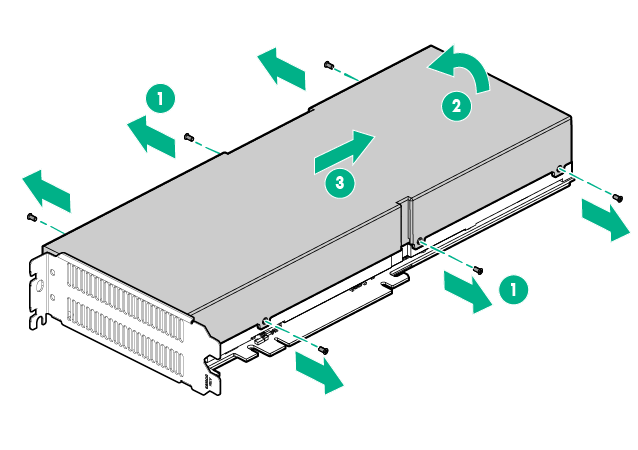

IMPORTANT: Always slide the tabs on the front bracket under the GPU board for installation.
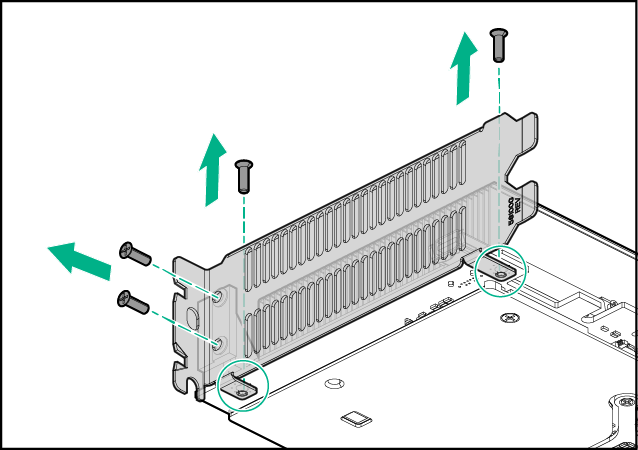
- Remove the existing front bracket from the accelerator. Retain the screws for future use.
- Remove the top cover of the accelerator.
- For Intel and NVIDIA accelerators, remove the existing front bracket from the accelerator. Retain the screws for future use.
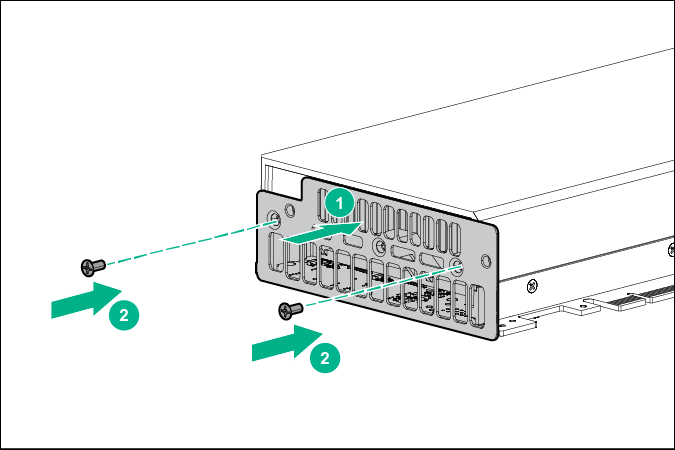
- Install the front bracket onto the accelerator according to the option being installed:
- Intel accelerator options

- NVIDIA Tesla M60 and M60-RAF accelerator options
IMPORTANT: Leave the center screw hole empty when installing NVIDIA Tesla M60 or M60-RAF accelerators.
- All other NVIDIA accelerator options
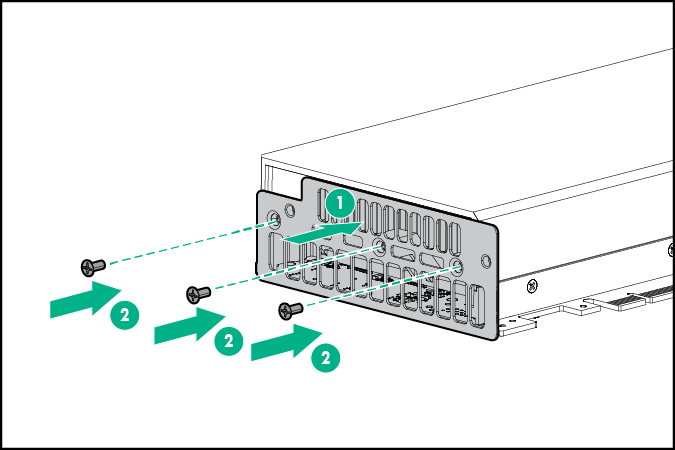
IMPORTANT: Always slide the tabs on the front bracket under the GPU board for installation.
- AMD accelerator options
- Intel accelerator options
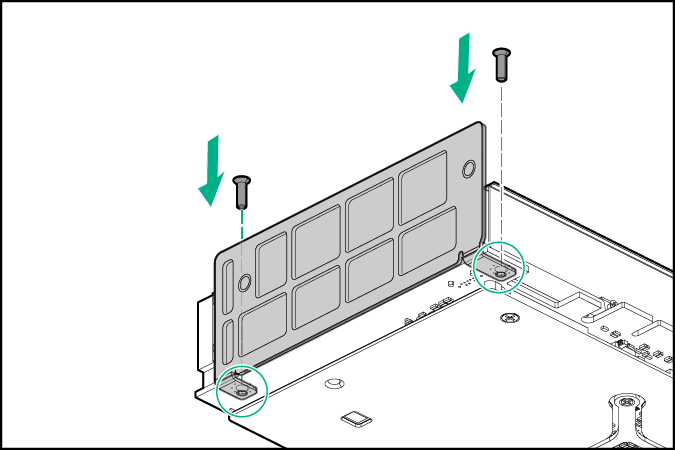
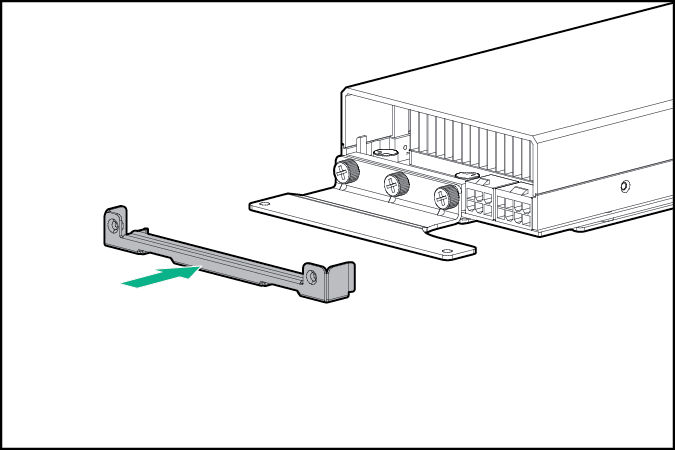
- Install the rear support bracket on the accelerator. The accelerator shown may look different than the accelerator being installed. The procedure is the same for all supported models.
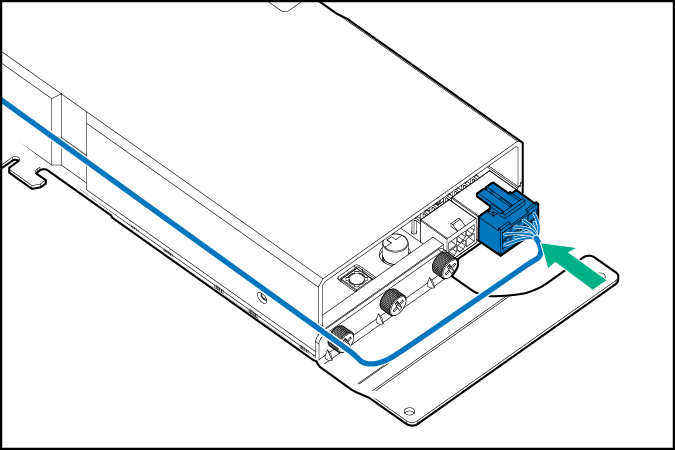
- Connect the power cable to the accelerator. Be sure to install the cable supported for the accelerator option being installed. For more information, see "Supported accelerator power cables."
IMPORTANT: Depending on the accelerator option installed, there might be two power cable connectors to connect to the accelerator.
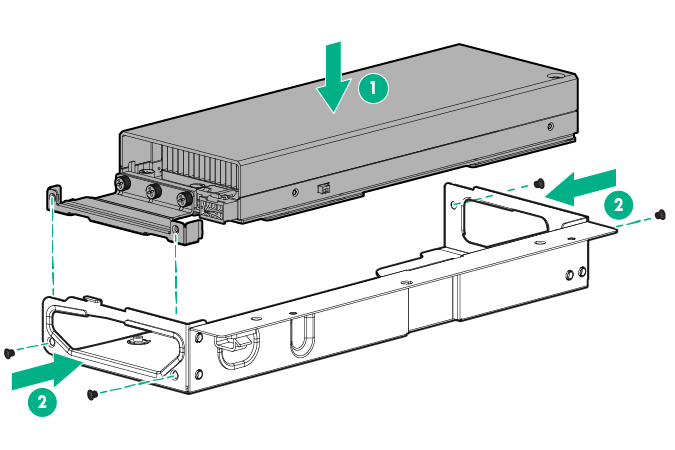
- Use a T-10 Torx screwdriver to install the accelerator into the accelerator cage.
- Install the rear accelerator cage.
- Remove the upper tray support bracket.
- Connect and route all accelerator cables to the power expander board.
- Install the upper server tray support bracket.
- Install the server into the chassis.
- Connect all peripheral cables to the server.
- Press the Power On/Standby button.
The server exits standby mode and applies full power to the system. The system power LED changes from amber to green.