Create a Flow to Populate a MySQL Database
Estimated reading time: 6 minutes
Use the steps provided in these instructions to create a flow to collect data and store it in a MySQL database. Note that you can access the MySQL database located on the OT Link Platform device or you can use an external database on the same network as the OT Link Platform device.
Prerequisites
- These steps assume that you have experience working with flows. See OT Link Platform Flows.
- Identify the device from which data will be collected and verify device connectivity. See Troubleshoot Device Connectivity Status.
- Familiarity with SQL queries.
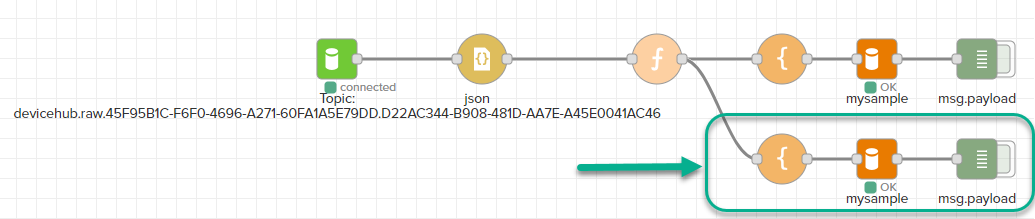
Configure Nodes
Configure the following nodes to connect to the device from which data will be collected and also to establish a connection to the MySQL database, where the data will be stored.

| Nodes | Steps to configure the nodes | |
|---|---|---|
DataHub SubscribeJSON |
|
Configure the DataHub Subscribe node with a topic for a connected device. This node connects with the device and collects the message, which the JSON node processes to ensure that it is in the proper JSON format required for further processing.
|
Function |
|
Use the function node to parse the incoming message.
|
Template |
|
Use the template node to write SQL statements to insert data into the database columns.
See also... |
MySQL |
|
Configure this node with a port and credentials to connect to the local OT Link Platform MySQL database, when using the marketplace application. When using an external MySQL database on the same network as the OT Link Platform device, configure the MySQL node with the IP address, port, and credentials for that database server.
Host: 127.0.0.1 Port: 3306 User: root Password: <Password for the MySQL database> Database: <Name of the database> |
Debug |
|
|


Validate Database Updates
To check that collected values are being inserted into the MySQL database, create a basic flow.
| Nodes | Steps to configure nodes | |
|---|---|---|
Template |
|
|
MySQL |
|
|
Debug |
|
|