Flow to Write to Tags
Estimated reading time: 3 minutes
Under certain circumstances, it may be necessary to control a device by updating values in registers (tags), for example, turning a switch on or off.
- Some device registers are read-only. For example, to write to a tag, select a Holding register tag, not an Input register tag. See DeviceHub Add a Tag.
- PLCs have a dedicated set of read-only registers, as well as a set of registers that can be updated. Refer to the device vendor’s documentation for register-specific details.
The following steps provide an example of how to create a basic OT Link Platform Flow to write to a device register/tag.
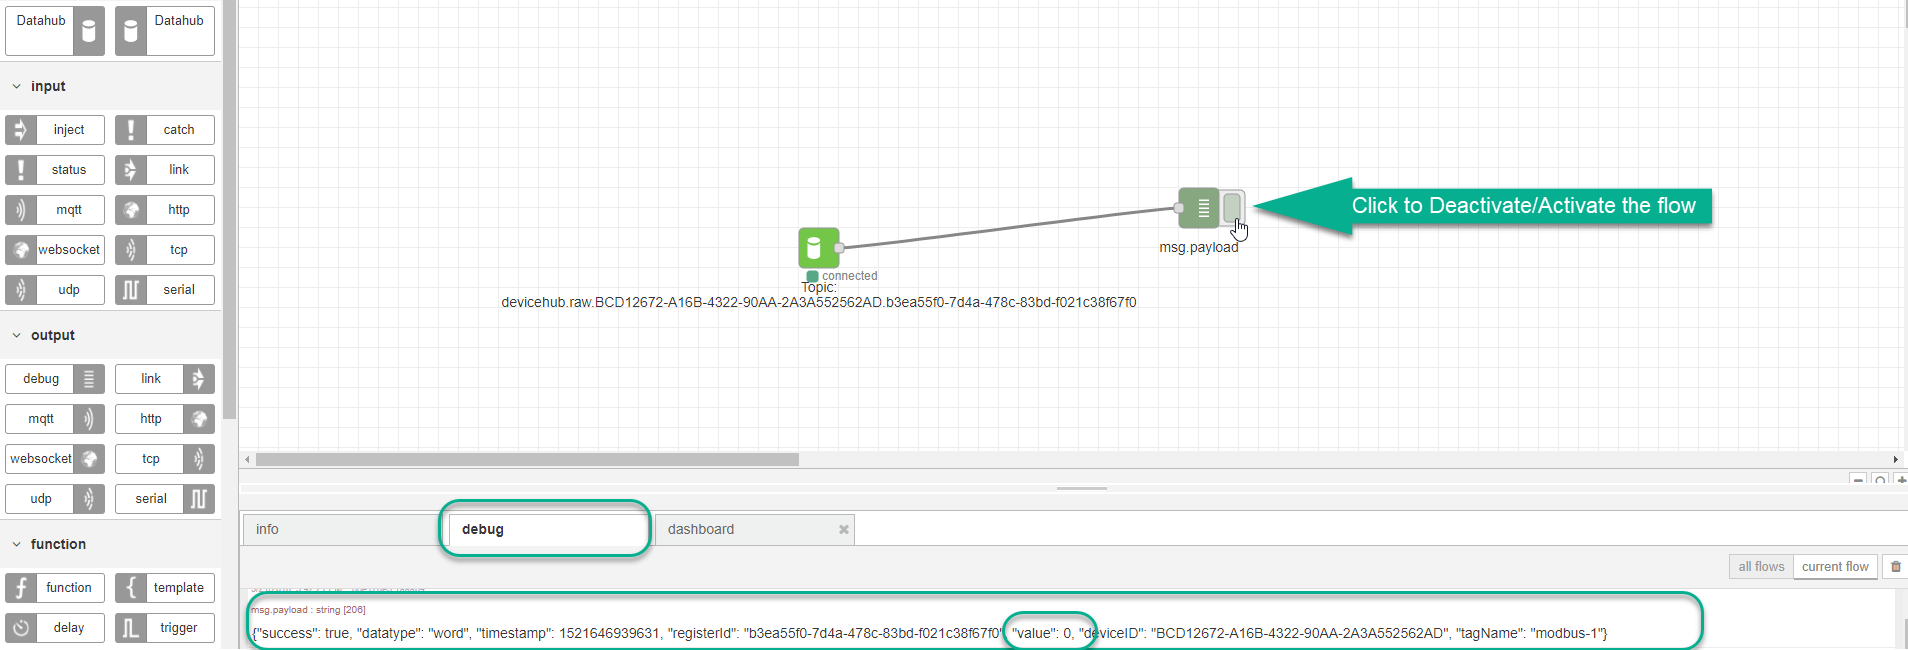
Subscribe to DeviceHub
- In the OT Link Platform navigation panel, click Flows.
- Click the + icon at the top right of the window to create a new flow with a blank canvas.
-
Drag the DataHub Subscribe node onto the canvas.

- Double-click the node to edit it. Use the procedure in Create a Flow for a OT Link Platform Device to:
- Update DataHub Connect.
- Copy a topic from a DeviceHub tag.
- Paste the topic into the DataHub Subscribe node.
- Click Done to save the node.
- Drag the debug node onto the canvas.
- Connect the two nodes.
- Click Save to save and activate the flow.
At this point, the DataHub node should be sending data to the Debug node. Go to the debug tab below the canvas to view the results.
Note: If you are not seeing messages in the debug area, check that the tag’s polling interval is greater than zero.
Publish to DataHub
-
Drag the DataHub Publish node onto the canvas.

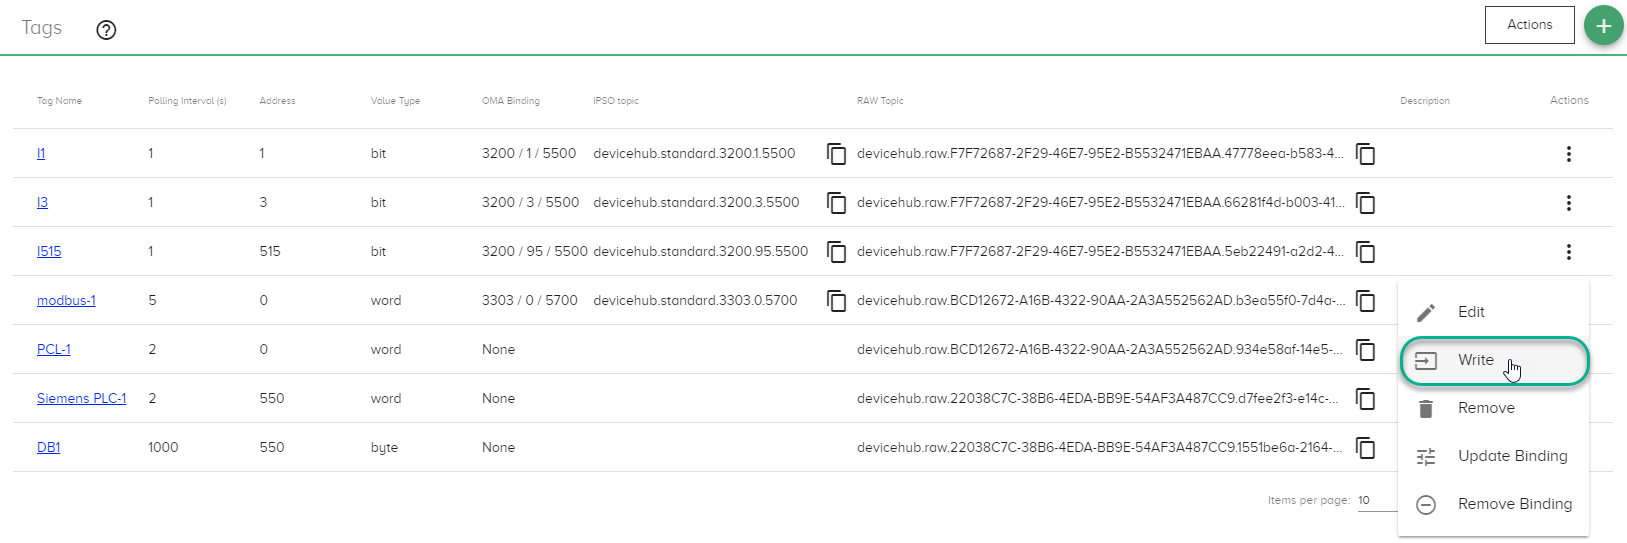
- Go to DeviceHub > Tags and locate the same tag used in Subscribe to DataHub.
-
In the Actions list for the tag, select Write.
-
In the Write pop-up, click
 to copy the write topic.
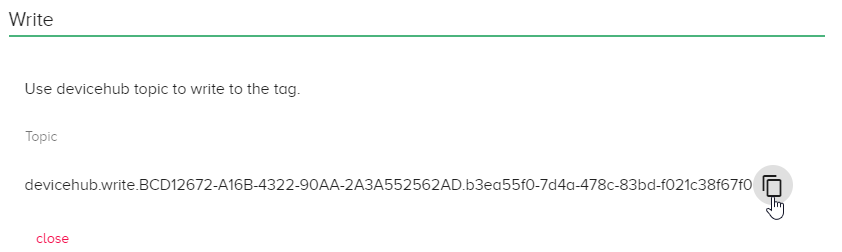
- Back in the canvas, double-click the DataHub Publish node, paste the write topic into the node, and click Done.
- Drag an inject (input) node onto the canvas.
- Connect the Inject and DataHub Publish nodes.
- Double-click the inject node and select String for the Payload.
-
Enter the text into the Payload field, following the format shown below, and click Done.
{ "value": 456 }Note: Any string value can be entered, as long as you adhere to the JSON format (shown above) for the payload text.
- Click Save to save and activate the flow.
At this point, the value should be changing. Go to the debug tab below the canvas to view the results.

View the Flow Results
This flow now contains two connections, as shown in the following illustration.
- The first connection shows the subscribe action.
- The second connection shows the publish to the device tag.

Troubleshoot the Write to Tag Flow
If you do not see the value changing, check the following:
- Have you saved recent flow changes? Click Save above the canvas.
- Is the device connected? Go to DeviceHub > Devices to check.
- Have you chosen a valid register that allows writes? Make sure you are not trying to write to an Input register. Go to DeviceHub > Tags, edit the tag, and verify the register name.
- Is the Debug node activated? Toggle the switch on the Debug node.