Prerequisites
-
Set up a Media Server and load the software that will be used in provisioning servers. For details on using the Media Server setup utility, see the Insight Control server provisioning Installation Guide.
-
Configure DHCP as needed. For details on DHCP, see the Insight Control server provisioning Installation Guide.
-
Add Windows product keys. For information, see Edit product key settings screen details.
Quick start tasks
The following sections demonstrate how to use Insight Control server provisioning to perform some basic tasks such as adding a server, running a Build Plan, and monitoring a job.
Task 1: Discovering a server
-
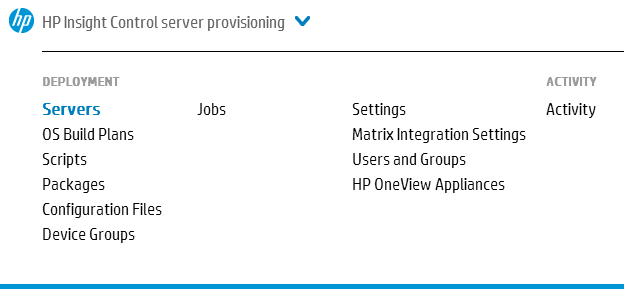
From the Main Menu, select Servers as shown in the screen example, to display the Servers Overview screen.
![[NOTE: ]](images/note.gif)
NOTE: For information on adding servers, see “Managing and provisioning servers” in the Insight Control server provisioning Administrator Guide.
-
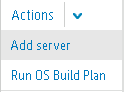
On the Servers Overview screen, select +Add server in the master pane. Alternatively, use the Actions menu to select Actions→Add server, as shown in the screen example.
-
Enter the iLO IP address and credentials, click OK, and wait for the server to be added.
See Add a server for complete details.
Task 2: Selecting an OS Build Plan to run on a target server
-
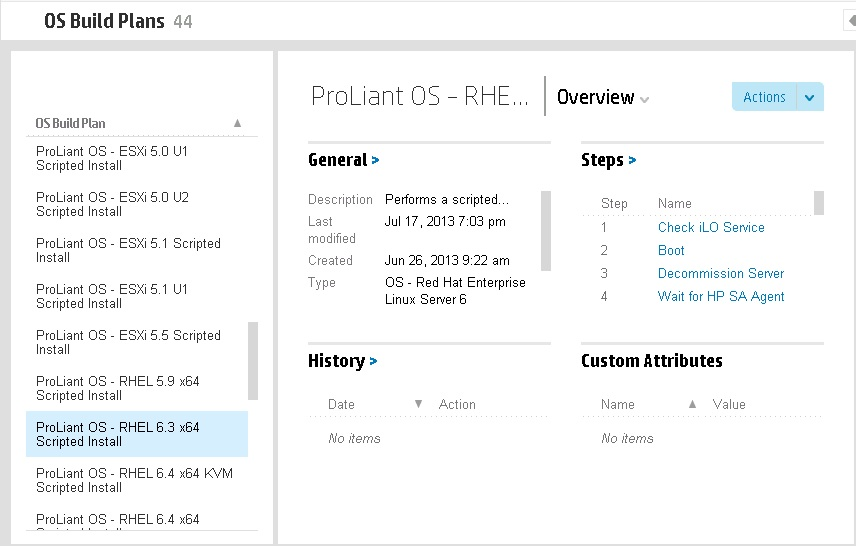
Select OS Build Plans from the Main Menu to display the OS Build Plans screen as shown in the following figure.
Hewlett Packard Enterprise provides Build Plans for use in provisioning and configuring servers. A Build Plan is made up of steps. There are different types of actions; but the majority of steps consist of running scripts, deploying configuration files and installing zip packages.
-
Be sure you have the OS distribution loaded on the Media Server and ready for use by the Build Plan. Then select an OS Build Plan that meets your requirements from the master pane list of OS Build Plans.
Task 3: Running an “out-of-the-box” OS Build Plan
-
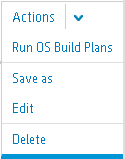
From the OS Build Plans screen and with the Build Plan selected, select Actions→Run OS Build Plans as shown in the screen example, to display the Run OS Build Plans dialog box.
-
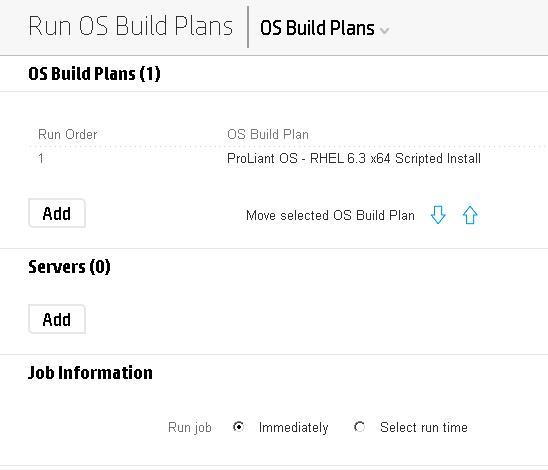
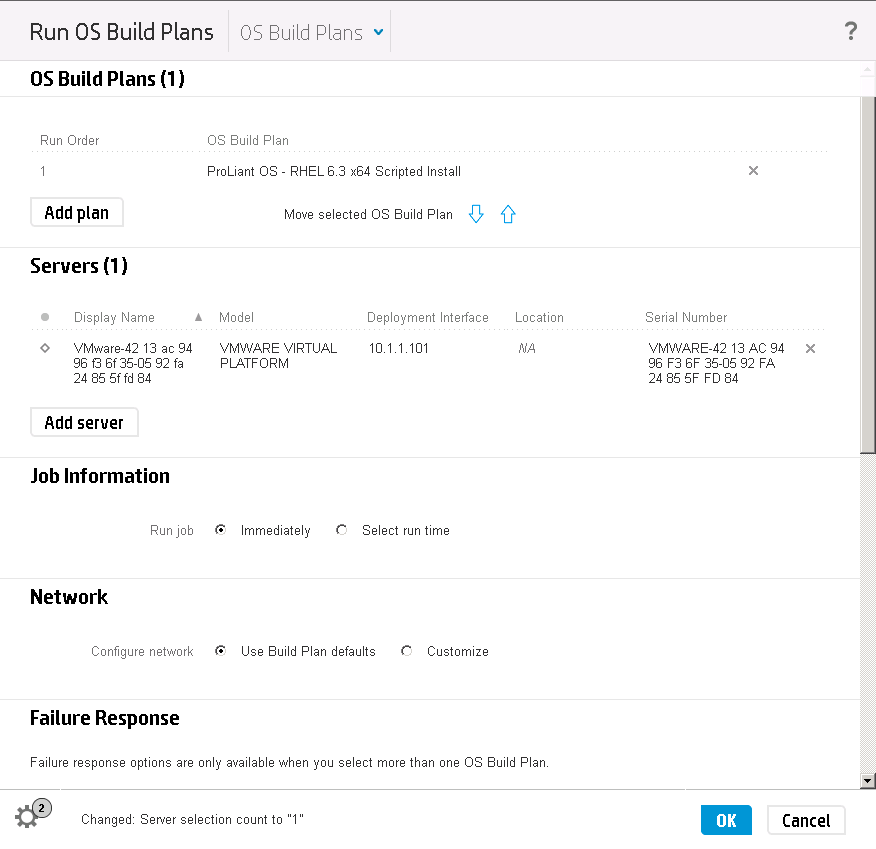
The Build Plan you selected is shown in the OS Build Plans section of the Run OS Build Plans dialog box. Select the server you want to run the Build Plan on by clicking Add Server in the Servers section, as shown in the screen example.
-
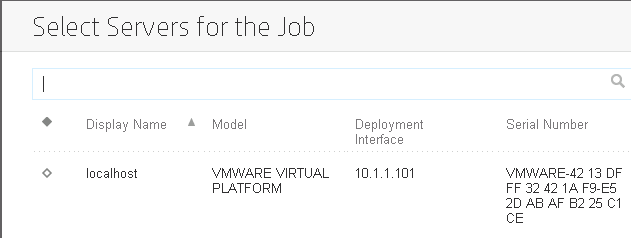
Select the target server from the Select Servers for the Job dialog box, as shown in the screen example. To help find the server in the list, enter any part of the server name, model, management IP address, or serial number in the search box. When the target server is selected, click Add.
-
The Run OS Build Plan dialog box is displayed with the Build Plan and target server listed as shown in the screen example below.
You can optionally configure the NICs on your target server by selecting Customize in the Network section (for details see Configure Networking). You also have the option to either run the job immediately or schedule the job for a future date and time.
-
Click OK and Yes, run to run the OS Build Plan to provision the selected server.
Task 4: Monitoring a job
-
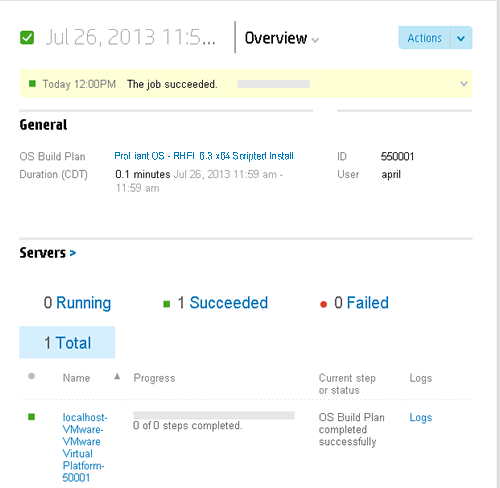
After selecting Yes, run from the Run OS Build Plan dialog box, the Jobs screen is automatically displayed so you can monitor the progress of the job.
However, at any time you may go to the Jobs screen by selecting Jobs from the Main Menu and then selecting a job of interest from the master pane list of jobs as shown in the screen example. For information about monitoring a job from the Jobs screen, see Jobs screen details.
-
To check the log output of the job, select the Logs link in the Jobs screen. For details, see Find log output for a job.
NOTE: Log output for a job is not available until the job is complete.
Task 5: Modifying the kickstart file in a Hewlett Packard Enterprise provided Build Plan
The Hewlett Packard Enterprise provided Build Plans are provided as basic templates. You can modify the Hewlett Packard Enterprise provided Build Plans to create custom Build Plans that can be run on your servers. This enables you to create Build Plans that meet your organization's specific needs.
To modify a Hewlett Packard Enterprise provided Build Plan, you must save a copy and then modify the copy because the Hewlett Packard Enterprise provided Build Plans are read-only. Use the following steps to create a customized Build Plan.
-
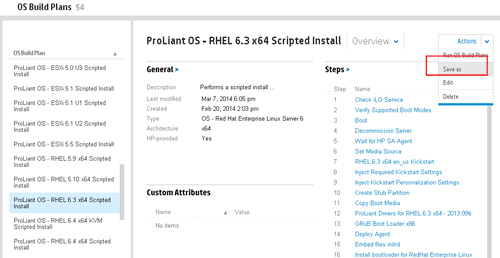
From the OS Build Plans screen, select a Build Plan to modify. To customize the installation of Red Hat Linux on a server, select the HP ProLiant OS – RHEL 6.3 x64 Scripted Install Build Plan. Then select Actions→Save as.
-
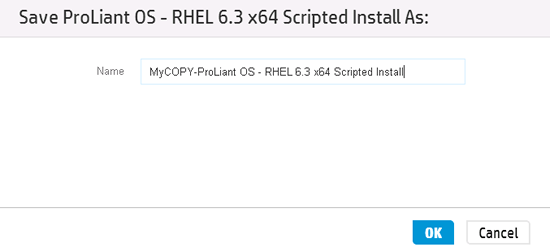
In the Save as dialog box, rename the Build Plan to be unique, for example MyCopy-HP ProLiant OS – RHEL 6.4 x64 Scripted Install and click OK. You can now make changes to the Build Plan you copied. The following steps demonstrate how to change the kickstart file, which is a typical modification.
-
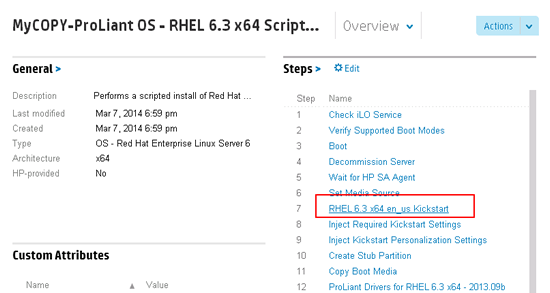
Select the copied Build Plan and in the Steps pane select the Kickstart file (RHEL 6.3 x64 en_us Kickstart) in the list of steps. This is a configuration file.
-
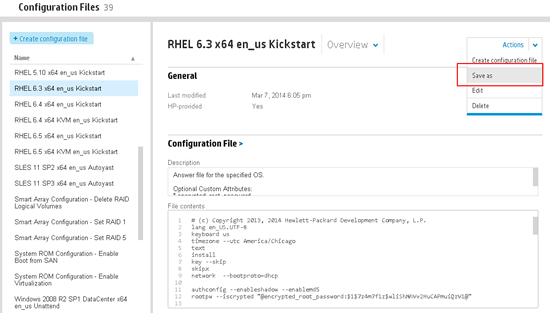
When you click on the step name, the Configuration File screen is displayed with the RHEL x64 en_us Kickstart file selected. To modify this configuration file you must first save a copy. Select Actions→Save as.
-
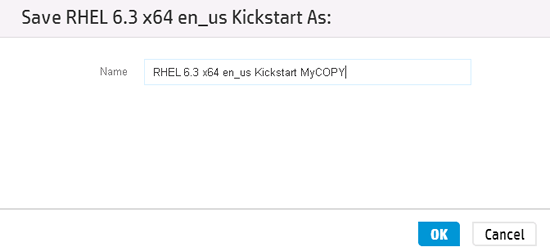
In the Save as dialog box, rename the configuration file to be unique, for example, RHEL 6.3 x64 en_us Kickstart MyCOPY and click OK. You can now make changes to this new configuration file.
-
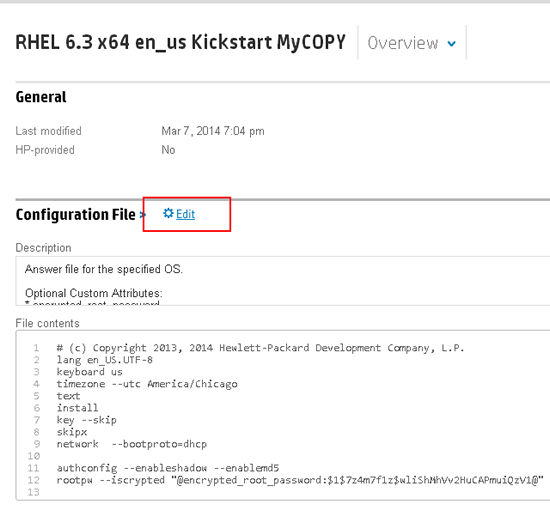
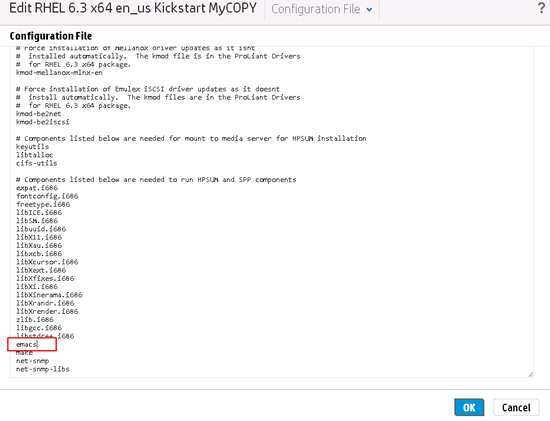
In the Configuration Files screen, with the new configuration file selected, select Edit in the Configuration File pane.
-
In the Edit screen make the necessary changes. For this example, scroll down to the end and add emacs to the list of components. Click OK.
A message indicates that the configuration file is updating.
-
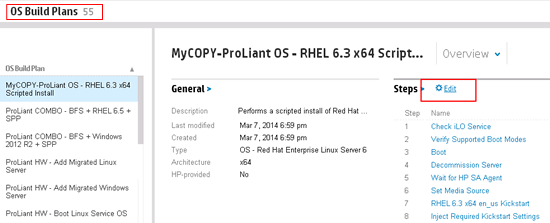
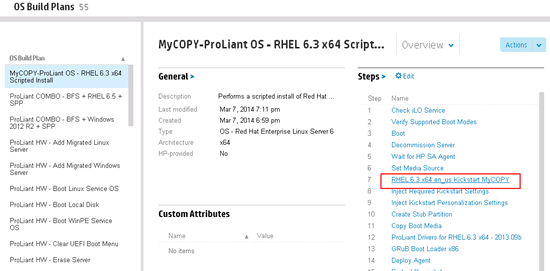
Select OS Build Plans from the Main Menu and then select the copy of the Build Plan you created earlier. It should already be selected when you go to the Build Plans screen.
-
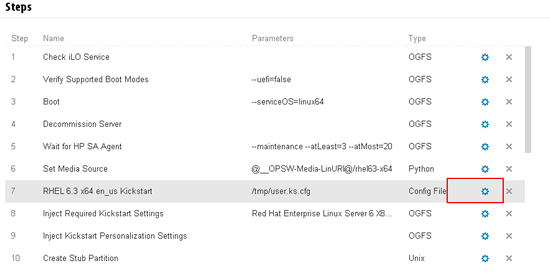
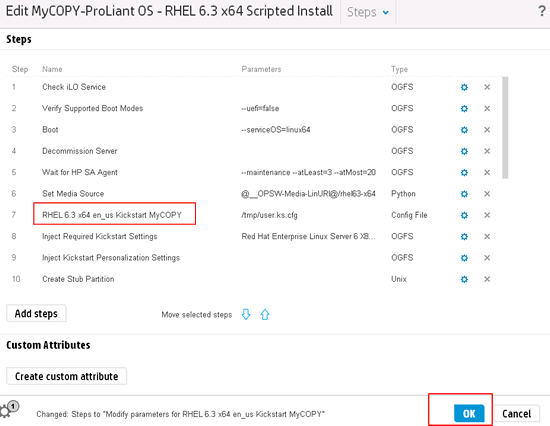
In the Steps dialog box locate the step RHEL 6.3 x64 en_us Kickstart and select the Edit icon.
-
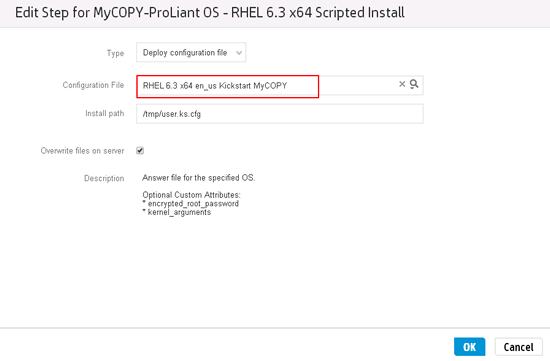
In the Edit Step dialog box, select the modified Kickstart configuration file RHEL 6.3 x64 en_us Kickstart MyCOPY and click OK.
-
The Edit OS Build Plan dialog box is displayed. In the list of steps, the default configuration file is replaced with the modified Kickstart file. Click OK. A message indicates the Build plan is updating.
-
On the OS Build Plans screen you will now see the modified Kickstart configuration file listed in the steps.
You can run this customized Build Plan just as you would a Hewlett Packard Enterprise provided Build Plan.
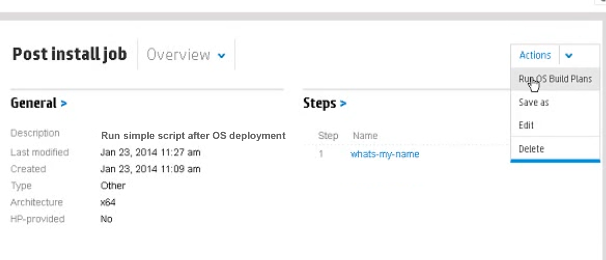
Task 6: Creating a new Build Plan to perform an operation on a server after OS deployment
Another feature of IC server provisioning is the ability to perform operations on servers after OS installation. You can create scripts to perform a variety of actions on a server after OS installation. You can then create a new Build Plan (rather than copying a Hewlett Packard Enterprise provided Build Plan) that includes the scripts and run the Build Plan against a server after the server has been deployed.
The following example shows how to create a simple script, create a new Build Plan, add a step to the Build Plan to run the script, and save the Build Plan to run on a server after OS deployment.
This is a simple example, but you can create complex build plans to perform nearly any action on a target server.
-
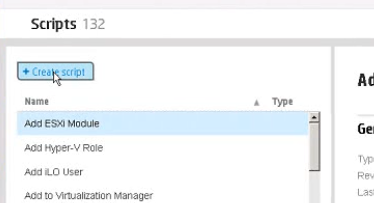
In the Create scripts dialog box enter the following:
-
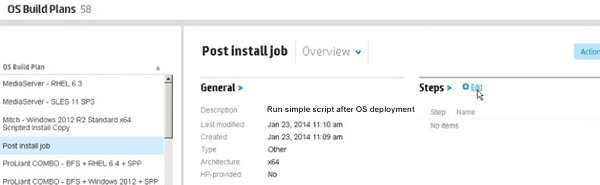
Go to the OS Build Plans screen and select Create OS Build Plan to create a new Build Plan. In the Create OS Build Plan dialog box give the Build Plan a name (in this example Post Install Job) and enter a description.
-
Select the Build Plan you created and then select Edit in the Steps pane to add a step to the Build Plan that will run the script you created.
-
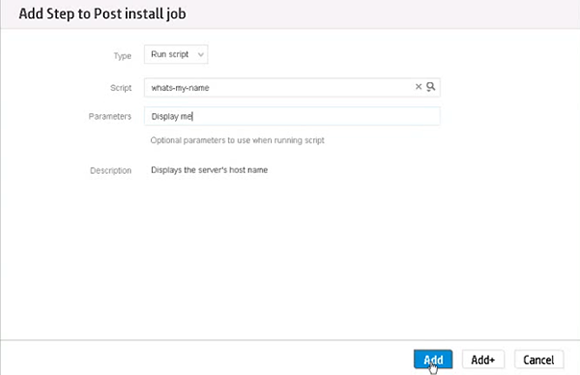
In the Add Step dialog box enter the following:
-
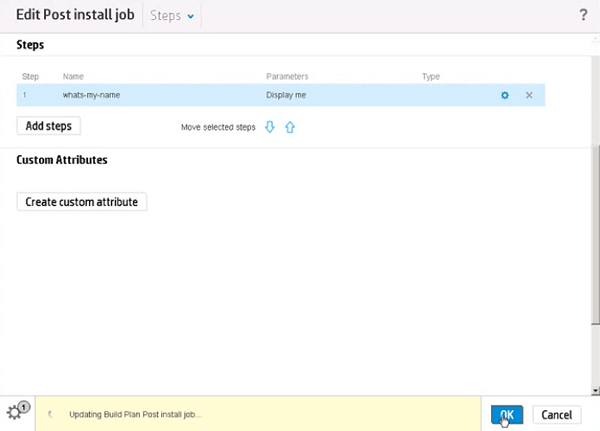
In the Edit step dialog box you will now see one step listed. Click OK to save the edited Build Plan.
-
Now you can run this Build Plan on a server that already has an OS running on it. Select Run OS Build Plans and add a server to run it on. It can be run against a production server or one in the service OS.
-
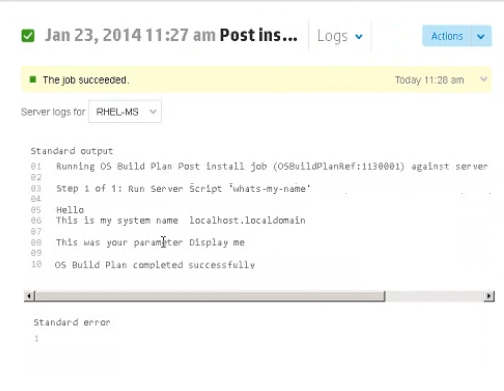
After the job runs, select the Logs link on the Jobs screen which should indicate that the job succeeded. You can see that the script was run and the parameter is displayed.