|
|
|
Hard drive cage option
A SAS expander card or an additional SAS controller option is required to support the hard drive cage option.
To install the component:
- Power down the server.
- Remove all power:
- Disconnect each power cord from the power source.
- Disconnect each power cord from the server.
- Extend the server from the rack.
- Remove the access panel.
- Release the full-length expansion board retainer, and then remove the PCI riser cage.
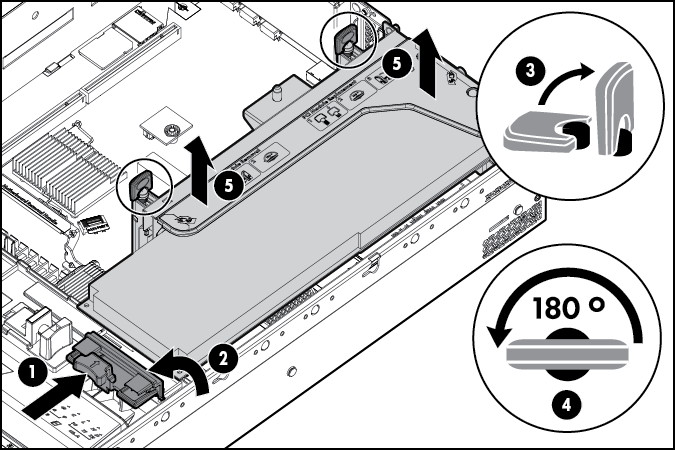
- Remove the air baffle.
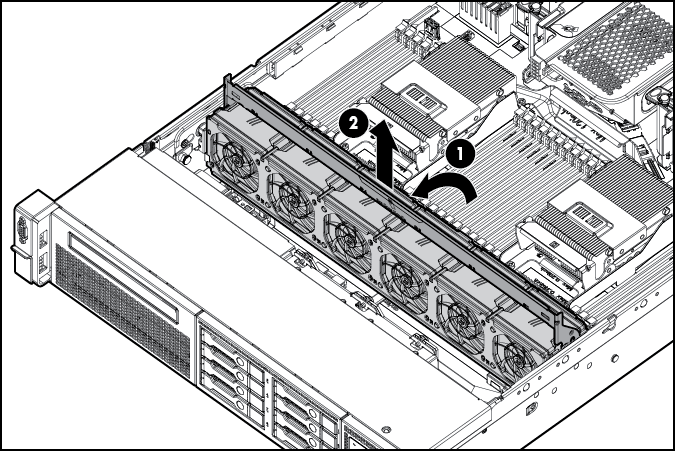
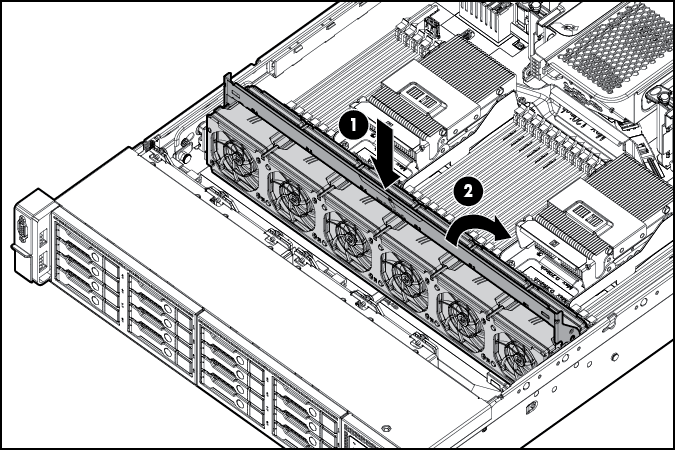
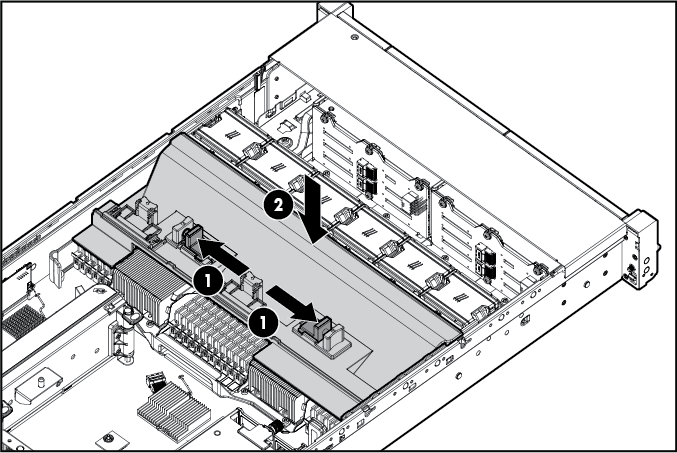
- Remove the fan cage.
- Disconnect and remove the optical drive cable, if installed.
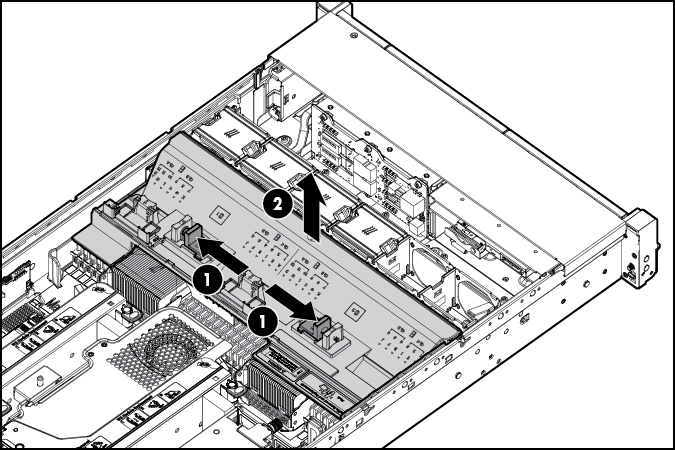
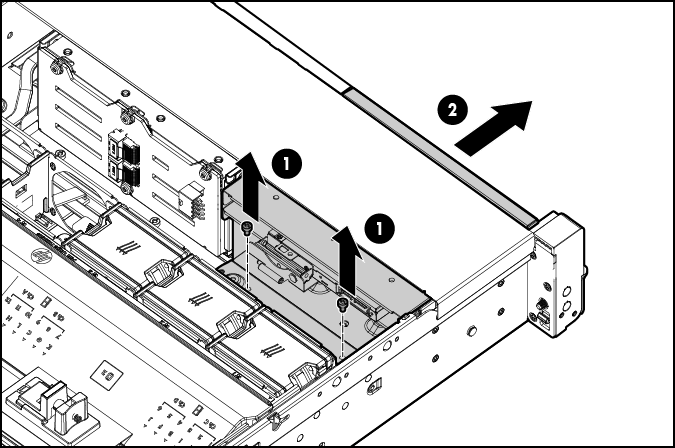
- Using a T-15 Torx screwdriver, remove the two optical drive retaining screws, and then remove the optical drive cage.
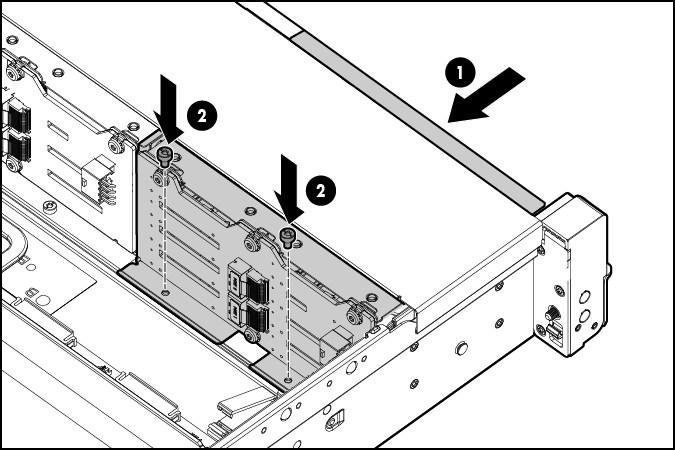
- Install the optional hard drive cage.
- Install the hard drives and hard drive blanks.
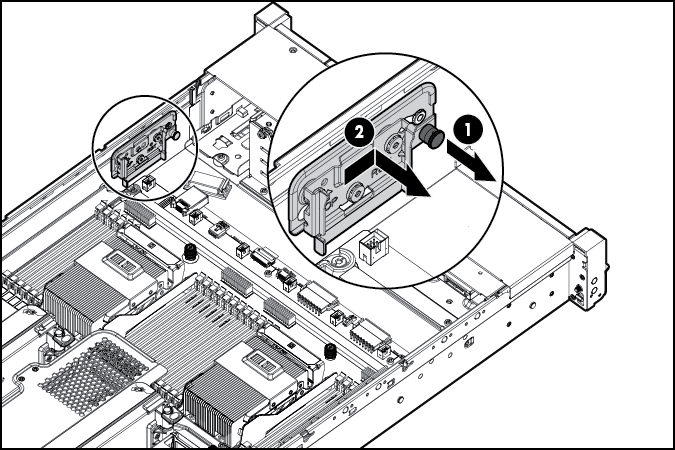
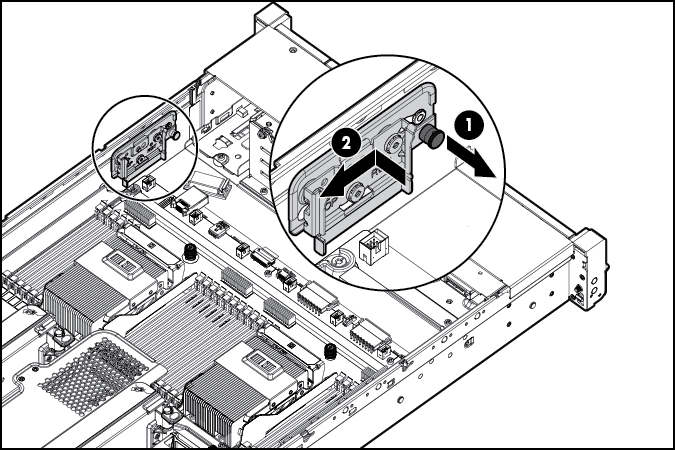
- To access the cables, remove the fan bracket on the right side of the chassis.
- Connect the cables:
- Connect one end of the power cable to the SAS backplane and the other end to the power connector on the system board.
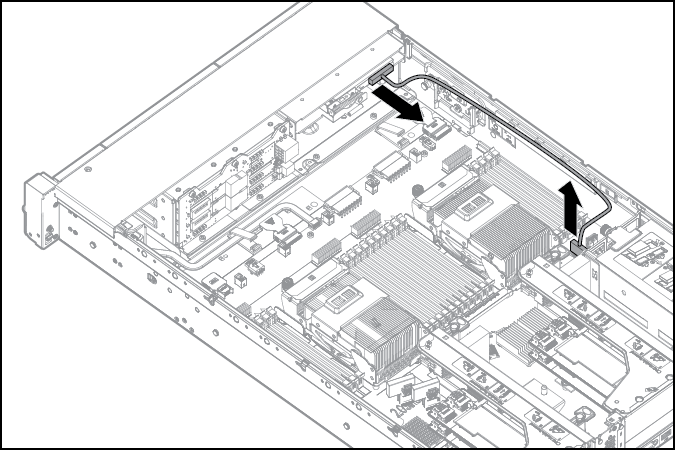
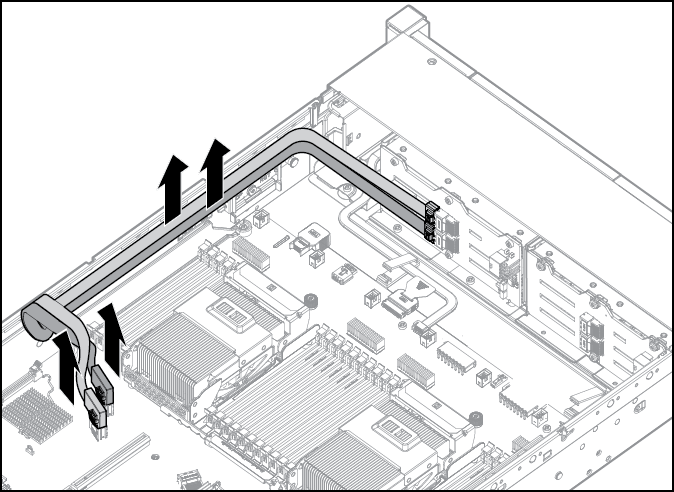
- Remove the existing SAS cable from the cable guide and from the system board.
- Connect one end of the power cable to the SAS backplane and the other end to the power connector on the system board.
- Connect the end of each SAS signal cable to the SAS backplane, and then route the SAS signal cables behind the cable guide. Do not connect the other ends yet.
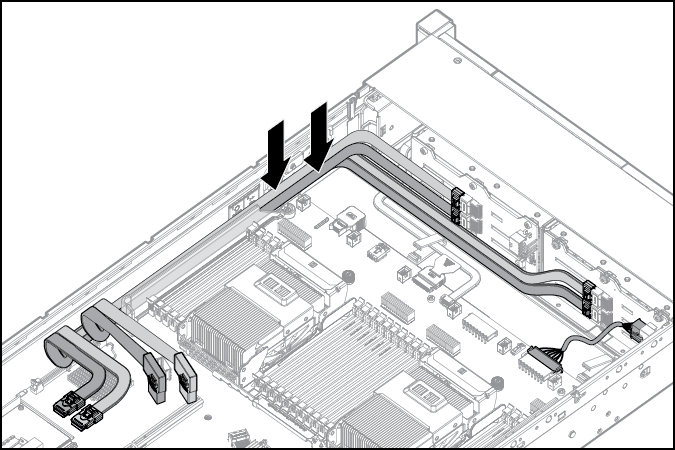
- Install the fan bracket. Be sure that the cables are properly routed in the channel along the fan bracket.
- Remove the blank from the PCI riser cage.

- Install the SAS controller board into the PCI riser cage.

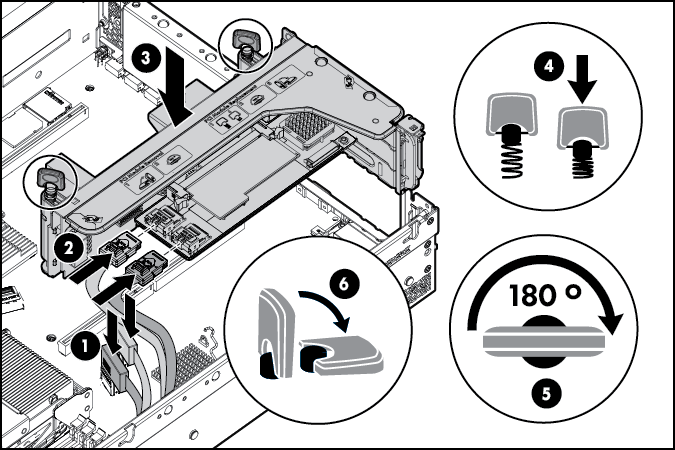
- Install the fan cage.
- Install the air baffle.
If you do not have a full-length expansion board, the air baffle can be installed last.
- Connect the other end of the SAS signal cables to the SAS controller board and to the system board. Then, install the PCI riser cage.
SAS cables can be connected to the PCI riser cage and the system board before or after the PCI riser cage is installed. For ease of accessing connectors, HP recommends connecting the cables before the PCI riser cage is installed.
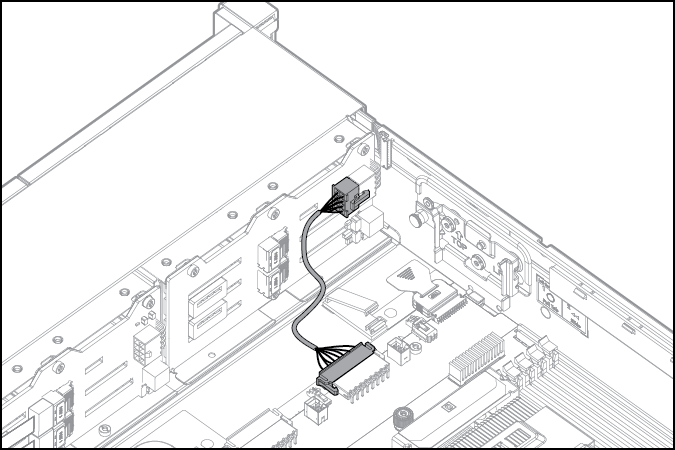
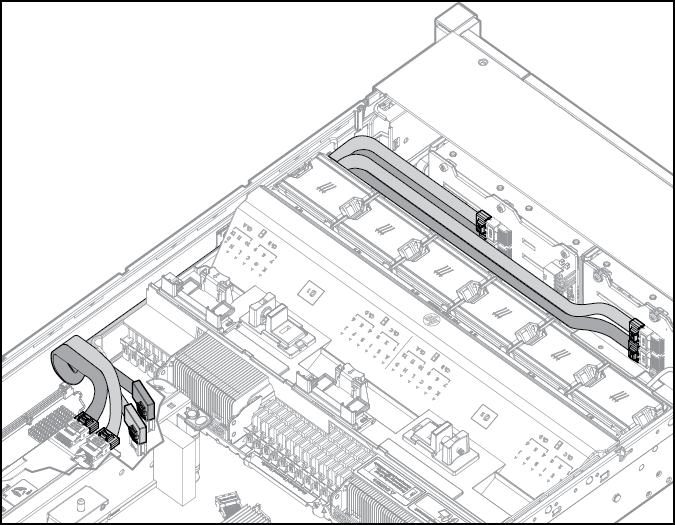
Completed SAS cabling:
- Make sure any installed full-length expansion boards are seated in the retainer clip on the air baffle.
- Install the access panel.
- Install the server into the rack.
- Connect each power cord to the server.
- Connect each power cord to the power source.
- Power up the server.