Installing a DIMM
The server has 32 DIMM slots.
Prerequisites
Before installing this option, be sure you have the components included with the hardware option kit.
Procedure
-
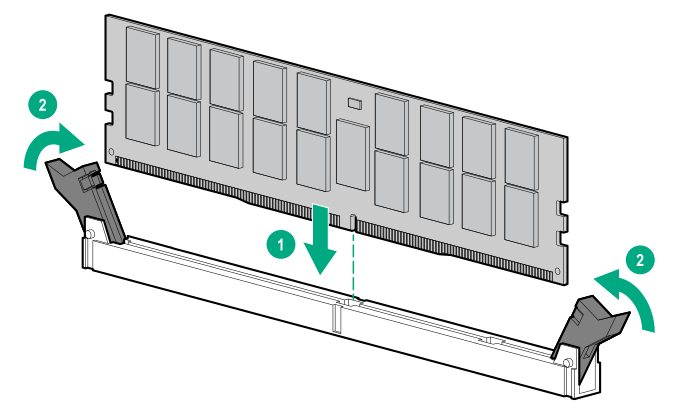
Install the DIMM:
- Align the notch on the bottom edge of the DIMM with the keyed surface of the DIMM slot, and then fully press the DIMM into the slot until the latches snap back into place.
The DIMM slots are structured to ensure proper installation. If you try to insert a DIMM but it does not fit easily into the slot, you might have positioned it incorrectly. Reverse the orientation of the DIMM and insert it again.
- Align the notch on the bottom edge of the DIMM with the keyed surface of the DIMM slot, and then fully press the DIMM into the slot until the latches snap back into place.
Use the BIOS/Platform Configuration (RBSU) in the UEFI System Utilities to configure the memory mode.
For more information about LEDs and troubleshooting failed DIMMs, see “Systems Insight Display combined LED descriptions”.