|
|
|


Universal media bay with two-bay SFF drive cage
- Power down the server.
- Remove all power:
- Disconnect each power cord from the power source.
- Disconnect each power cord from the server.
- Extend the server from the rack.
- Remove the access panel.
- Depending on the server options installed, do one of the following:
- Remove the fan cage.
- Remove all drives.
- Disconnect the drive cage power cables.
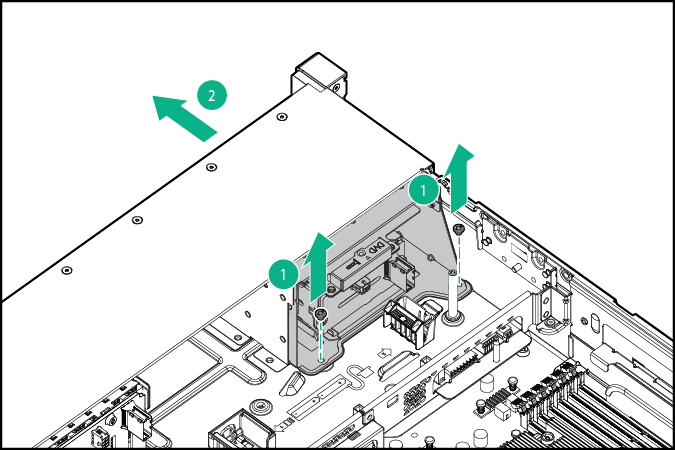
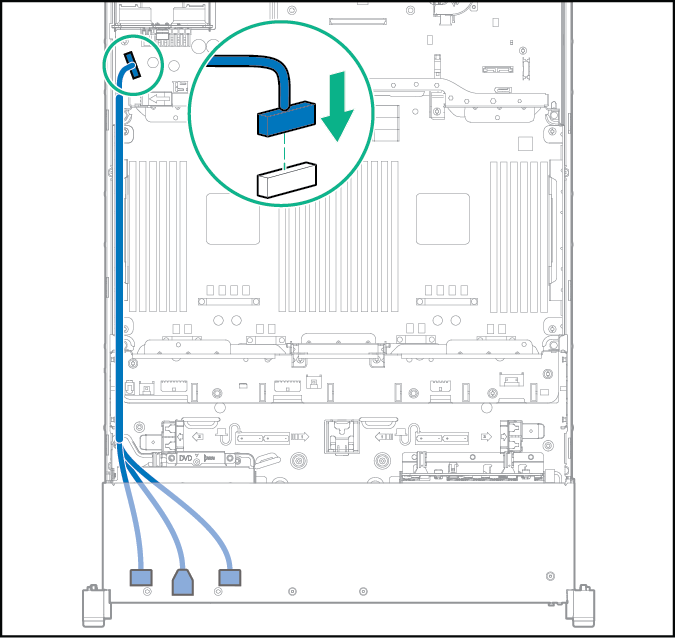
- Disconnect the USB/VGA through the universal media bay opening, and then remove the universal media bay.
To replace the component:
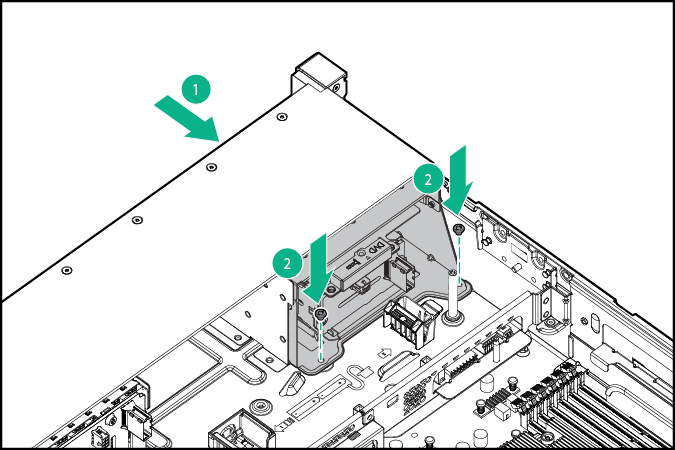
- Route the USB/VGA through the universal media bay opening, and then install the universal media bay.
- Connect the drive cage power cable.
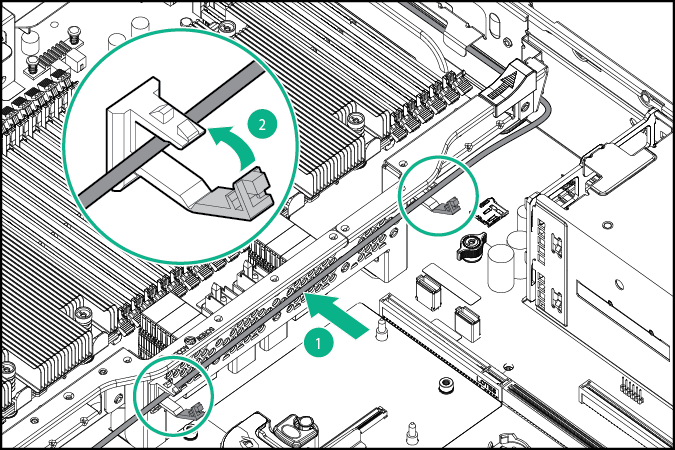
- Use the cable trough and routing clips on the mezzanine support bracket to route the drive cage data cable.
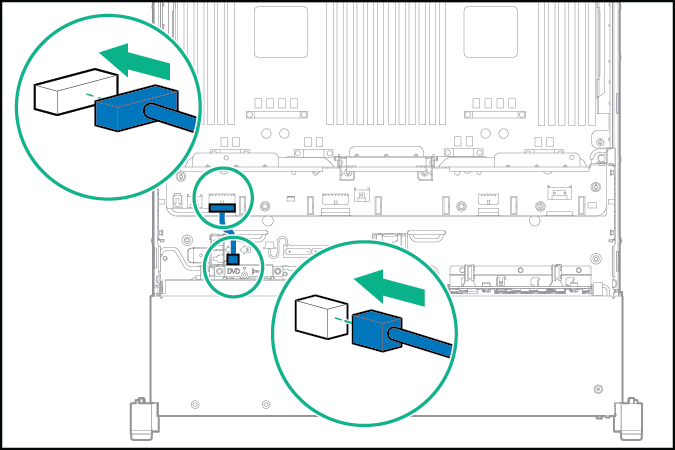
- Using the cable trough, connect the cable to the front VGA/USB 2.0 connector on the system board.
- Connect the data cable:
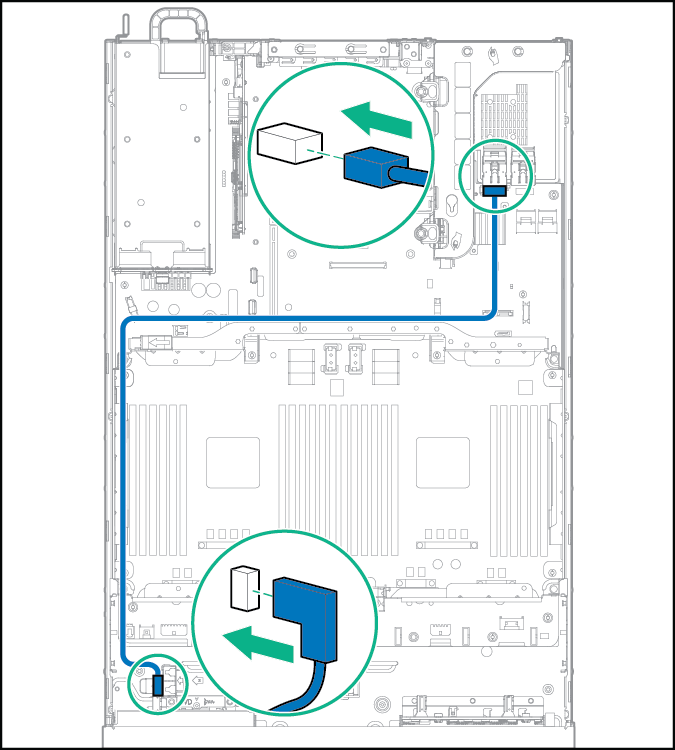
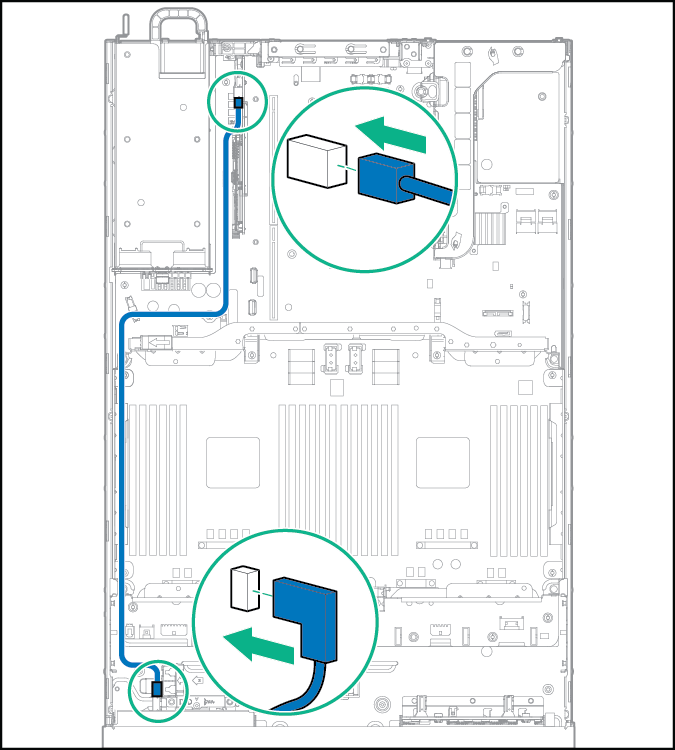
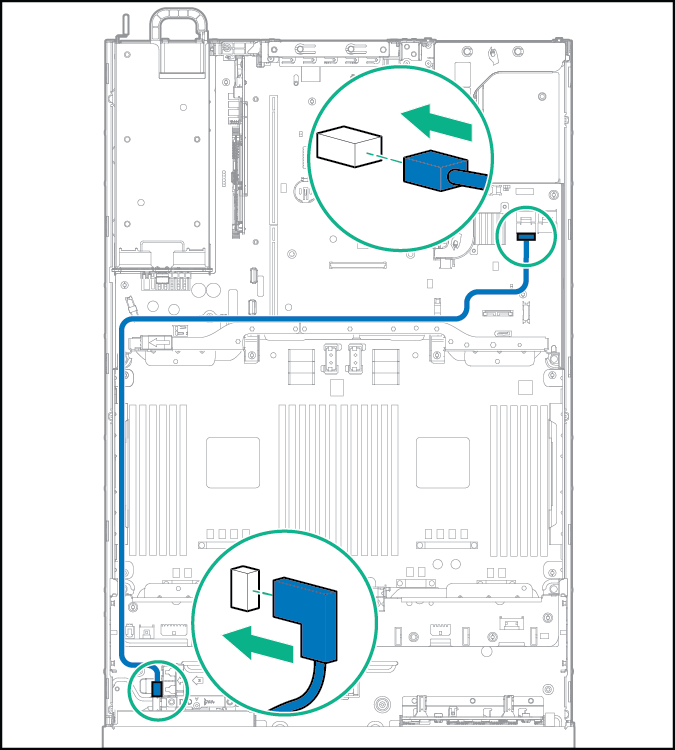
- Drive cage SAS cable:
- Configuration 1—Connecting to a controller
- Configuration 2—Connecting to the system board

- Configuration 3—Connecting to a PCI card in slot 7
- Configuration 4—Connecting to the system board
- Configuration 1—Connecting to a controller
- Drive cage SAS cable:
- Install drive blanks or drives.

CAUTION: To prevent improper cooling and thermal damage, do not operate the server unless all bays are populated with either a component or a blank.
- Install the fan cage.
- Depending on the server options installed, do one of the following:
- Install the access panel.
- Slide the server into the rack.
- Connect each power cord to the server.
- Connect each power cord to the power source.
- Power up the server.