|
|
|


HPE ATX 550 W power supply option
This section provides instructions for installing an ATX 550 W power supply option.
|
WARNING: To reduce the risk of personal injury from hot surfaces, allow the drives and the internal system components to cool before touching them. |
|
CAUTION: To prevent damage to electrical components, take the appropriate anti-static precautions before beginning any installation, removal, or replacement procedure. Improper grounding can cause electrostatic discharge. |
For more information about product features, specifications, options, configurations, and compatibility, see the product QuickSpecs on the Hewlett Packard Enterprise website.
To install the component:
- Power down the server.
- Remove all power:
- Disconnect each power cord from the power source.
- Disconnect each power cord from the server.
- Place the server on a sturdy, level surface.
- Remove the access panel.
- If installed, remove the PCI air baffle.
- Remove the system air baffle.
- Disconnect all power supply cables from the system board, drive cages, and devices.
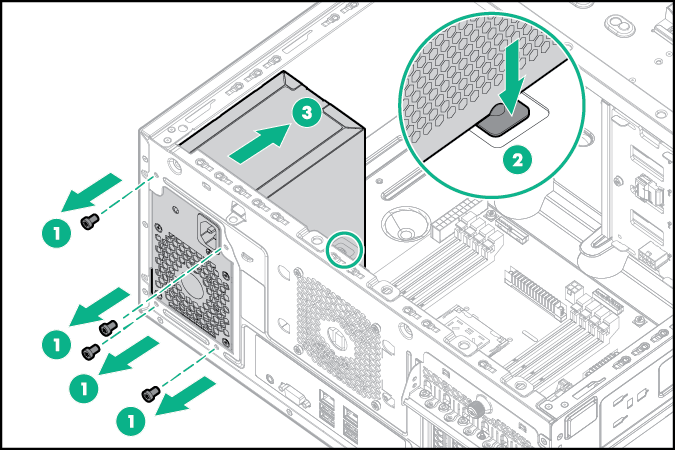
- Remove the existing power supply.
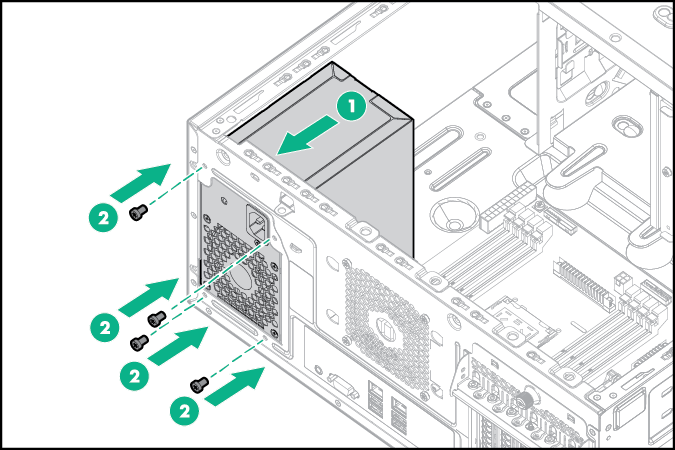
- Install the ATX 550 W power supply.
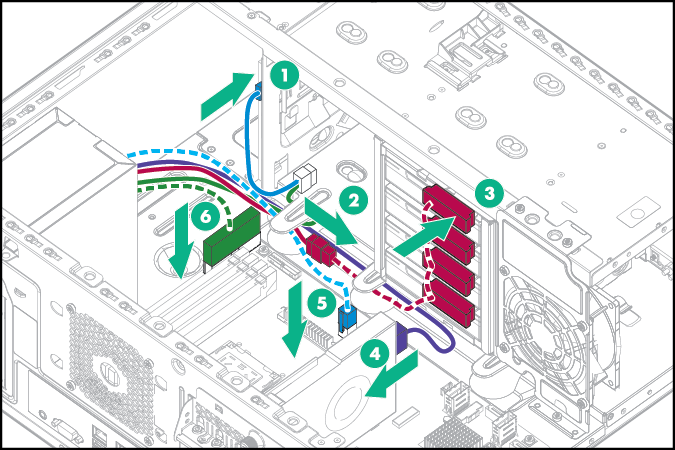
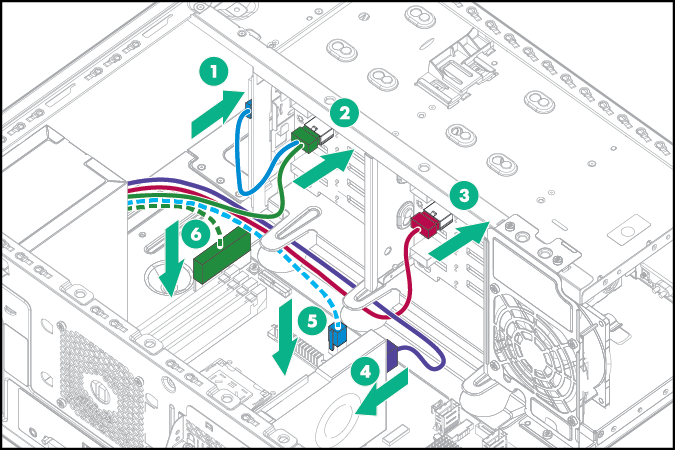
- Connect the 550 W ATX power cables and then route the cables underneath the metal tabs:
- 4 LFF non-hot-plug configuration
- Optical drive power cable to optical drive
- 8-pin drive power cable to the non-hot-plug drive power connector
- 6-pin power cable connecting to GPU, if installed
- 4-pin power cable connecting to system board
- 24-pin power cable connecting to system board
- 4 LFF and 8 SFF hot-plug configuration
- Optical drive power cable to optical drive
- 8-pin drive power cable to the hot-plug drive backplanes
- 6-pin power cable connecting to GPU, if installed
- 4-pin power cable connecting to system board
- 24-pin power cable connecting to system board
4 LFF hot-plug configuration
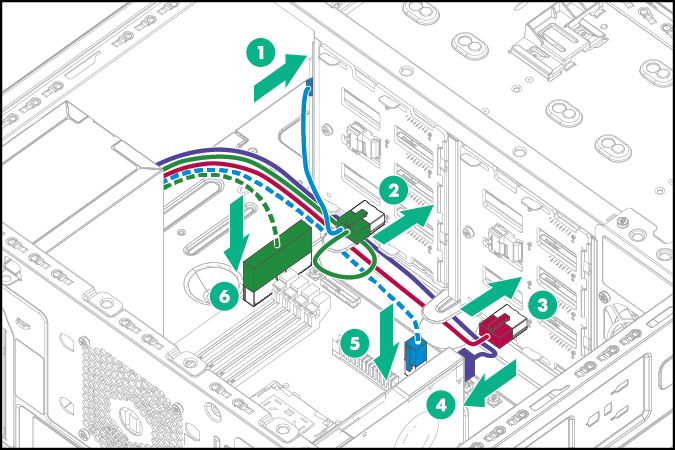
8 SFF hot-plug configuration

CAUTION: To prevent improper cooling and thermal damage, do not operate the server unless all bays are populated with either a component or a blank.
- 4 LFF non-hot-plug configuration
- Install the system air baffle.
- If removed, install the PCI air baffle.
- Install the access panel.
- Connect the power cords to the power supplies.
- Connect the power cords to the AC power source.
- Employ best practices to route and manage the power cords and other cables in the server rear panel.
- Power up the server.