Prerequisites
-
Set up a Media Server and load the software you want to use in provisioning servers: See the HP Insight Control Server Provisioning Installation Guide for details on using the Media Server setup utility.
-
Generate WinPE and upload it to the appliance: See the HP Insight Control Server Provisioning Installation Guide for details on using the WinPE generation utility and uploading WinPE to the appliance.
-
Configure DHCP as needed: See the HP Insight Control Server Provisioning Installation Guide for details on DHCP.
-
Add Windows product keys: Edit product key settings screen details
The following walks you through how to use Insight Control server provisioning to perform some basic tasks.
|
|
|
![[NOTE: ]](images/note.gif) |
NOTE: Refer to the Troubleshooting if necessary. |
|
|
Task 1: Discover a server
-
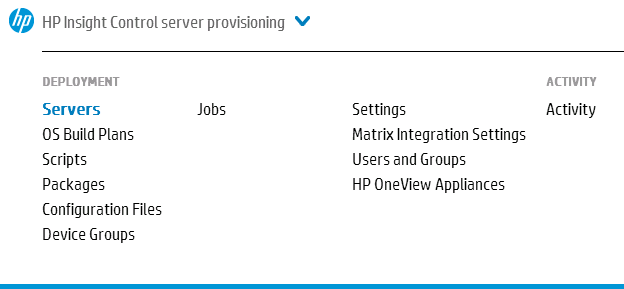
From the Main Menu, select Servers as shown in Figure 1 to display the Servers screen.
NOTE: For some background information on adding servers, see “Managing and Provisioning Servers” in the HP Insight Control Server Provisioning Administrator Guide.
-
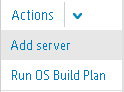
Select the +Add server link in the master pane. This link is available in the master pane whether or not there are servers already discovered. Alternatively, the Add server link is available by selecting Actions→Add server, as shown in Figure 2
-
Enter the iLO IP address and credentials, click OK and wait for the server to be added.
See Add a server for complete details.
-
Select the server and select Configure network from the Actions menu to do server and NIC configuration. Make sure your server is ready to be provisioned as described in Make sure a target server is ready for an OS Build Plan.
Task 2: Select an OS Build Plan
-
Select OS Build Plans from the Main Menu to display the OS Build Plan dialog box as shown in the following Figure 3.
HP provides Build Plans for use in provisioning and configuring servers. A Build Plan is made up of steps. Each step is an action performed in sequence. There are different types of actions; the vast majority of steps consist of running scripts, configuration files and installing zip packages.
-
Be sure you have the OS distribution loaded on the Media Server and ready for use by OS Build Plans. Select an OS Build Plan that meets your requirements from the master pane list of OS Build Plans.

Task 3: Run an “out-of-the-box” OS Build Plan
-
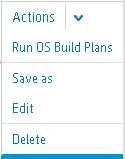
From theOS Build Plans screen and with your Build Plan selected, select Actions→Run OS Build Plans as shown in Figure 4 to display the Run OS Build Plans dialog box.
-
From the Run OS Build Plans dialog box, select the Add button in the Servers section, as shown in Figure 5.
-
Select your target server from the Select Servers for the Job dialog as shown in Figure 6. To help find your server in the list, enter any part of the server name, model, management IP address, or serial number in the search box. When you have your target server selected, click Add.
-
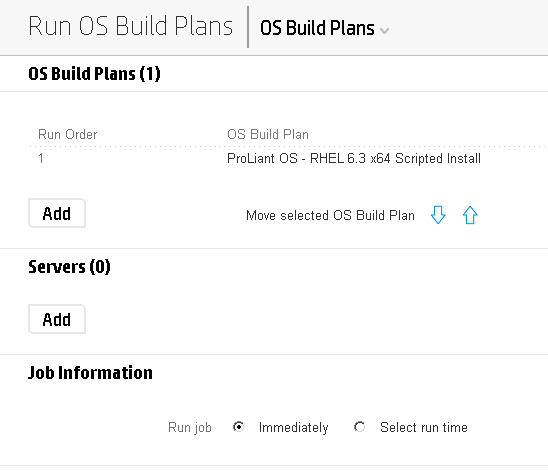
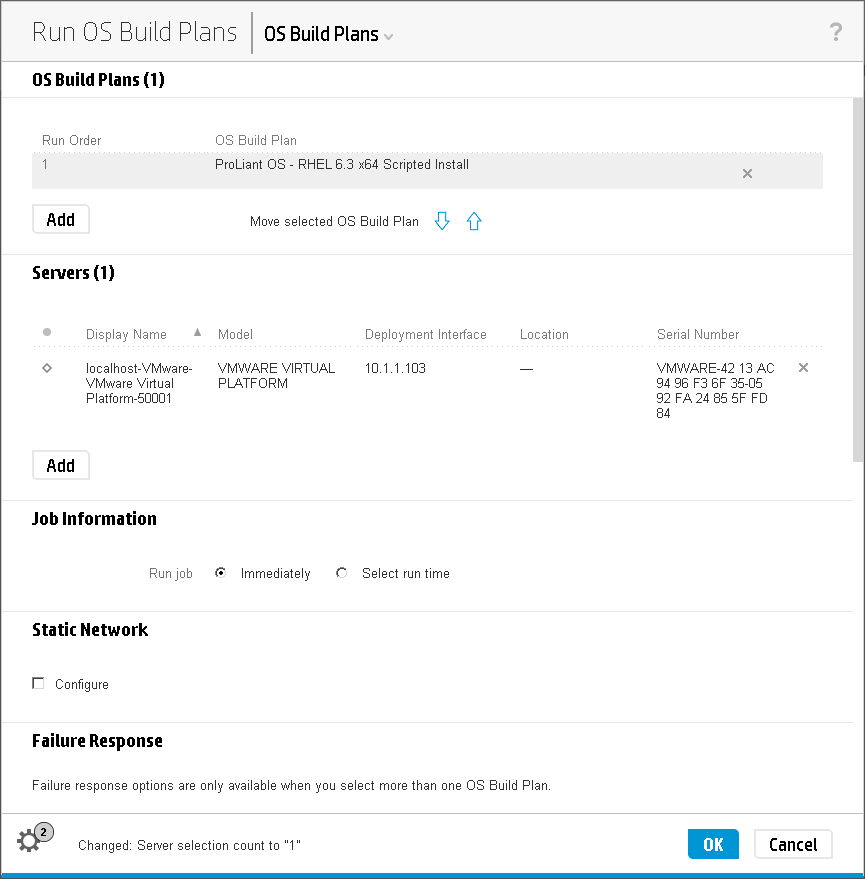
The Run OS Build Plan dialog box will display with your Build Plan and target server listed as shown in Figure 7.
If you like, you may configure the networking of your target server at this time. Select the Configure network check box and set up server networking as described in Configure static networking information and change host name. You also have the option to either run the job immediately or schedule the job for a future date and time.
Click OK and Yes, run to run the OS Build Plan to provision the selected server.

Task 4: Monitor your job
-
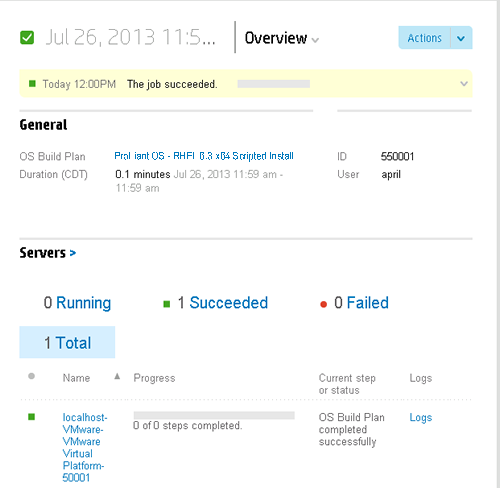
After you select Yes, run from the Run OS Build Plan dialog box, the Jobs screen will automatically be displayed so you can monitor the progress of your job. However, at any time you may go to the Jobs screen by selecting Jobs from the main menu and then selecting a job of interest from the master pane list of jobs as shown in Figure 8. See Jobs screen details for information about monitoring a job from the Jobs screen.
-
If you wish, check the log output for your job by selecting the Logs link in the Jobs screen. See Find log output for a job for details.
NOTE: Log output for a job is not available until the job is complete.
Task 5 Modify an HP-provided Build Plan
The HP-provided Build Plans are read-only. You can modify an HP-provided Build Plan to create custom Build Plans that you can run on servers just as you do the HP-provided Build Plans.
See Customize a Build Plan to meet your needs for an example of how to create a custom build plan.
Helpful background information
Additional introductory information can be found by selecting the following links: