|
|
|


Heatsink
|
WARNING: To reduce the risk of personal injury from hot surfaces, allow the drives and the internal system components to cool before touching them. |
|
WARNING: To reduce the risk of personal injury, electric shock, or damage to the equipment, remove the power cord to remove power from the server. Pressing the Power On/Standby button does not shut off system power completely. Portions of the power supply and some internal circuitry remain active until AC power is removed. |
|
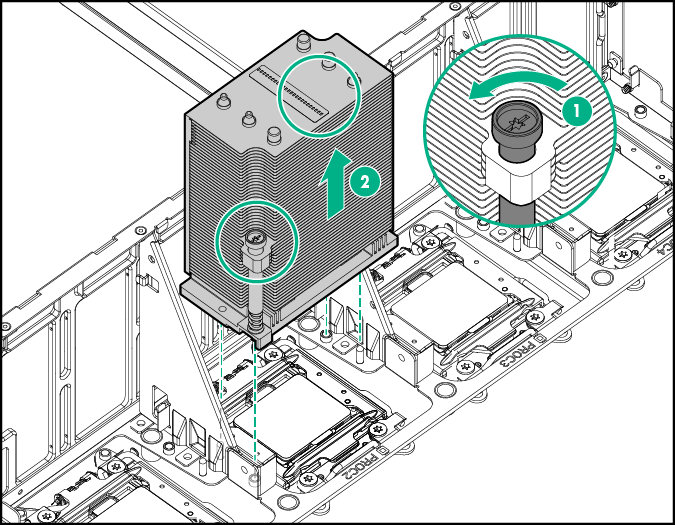
CAUTION: The heatsink thermal interface media is not reusable and must be replaced if the heatsink is removed from the processor after it has been installed. |
To remove the component:
- Remove all power:
- Disconnect each power cord from the power source.
- Disconnect each power cord from the server.
- Remove the processor memory drawer shipping screws.
- Remove the processor memory drawer.
- Remove the processor memory drawer cover.
- Remove the heatsink.
To replace the component:
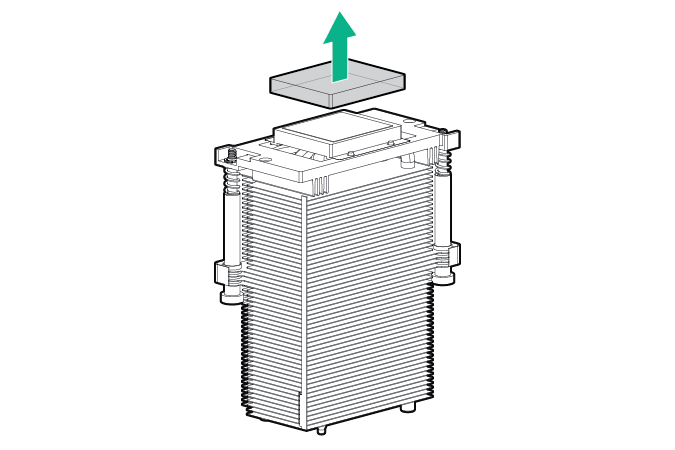
- Remove the thermal interface protective cover from the heatsink.

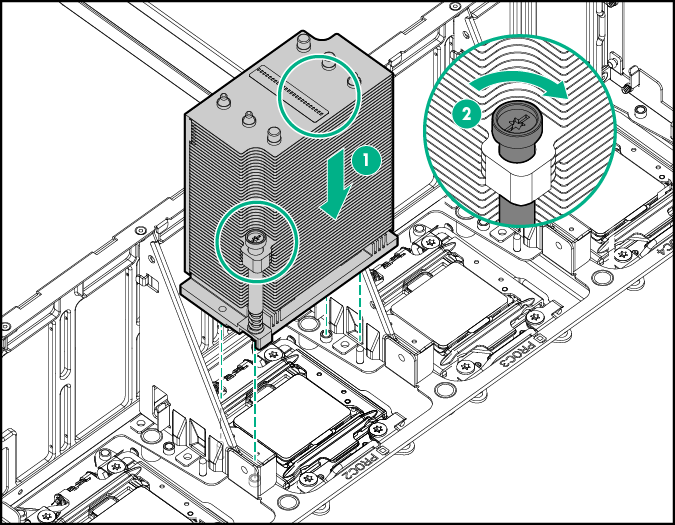
CAUTION: To prevent the heatsink from tilting to one side during installation and removal procedures, use a diagonally opposite pattern (an “X” pattern) when loosening and tightening the two spring-loaded screws. To prevent the screws from breaking off, do not over-tighten the screws. A maximum torque of 0.45 N m (4 in-Ib) is set for the system.
- Install the heatsink.
- Install the processor memory drawer cover.
- Install the processor memory drawer.
- Connect each power cord to the server.
- Connect each power cord to the power source.
- Power up the server.