Optical drive option
Procedure
- Back up all server
data.
- Do one of the following:
- Power down the server.
- Remove all power:
- Disconnect each power cord from the power source.
- Disconnect each power cord from the server
.
- Do one of the following:
- Remove the access panel.
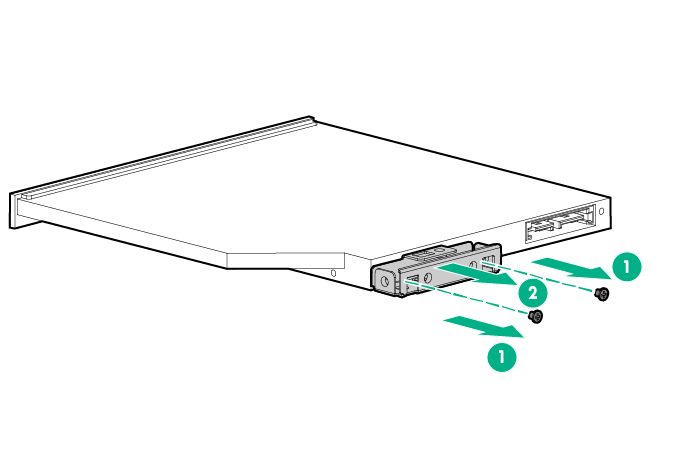
- Using a Philips #1 screwdriver, remove the 9.5 mm optical drive rear side carrier.
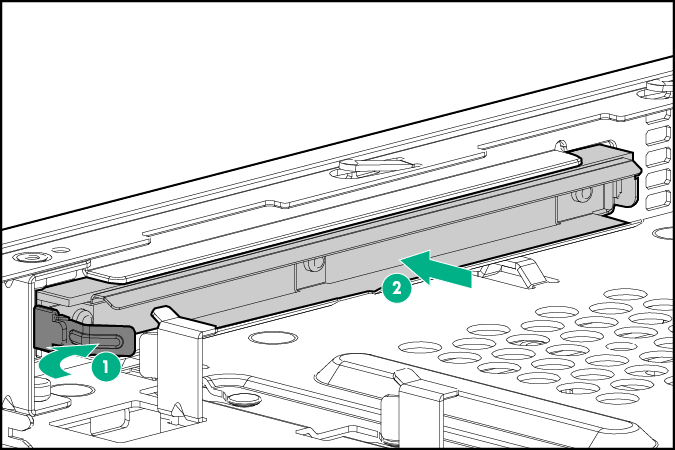
- Remove the optical drive blank from the front panel:
- Open the latch securing the drive blank.
- Push out the blank from inside the server, and then remove it from the front panel.
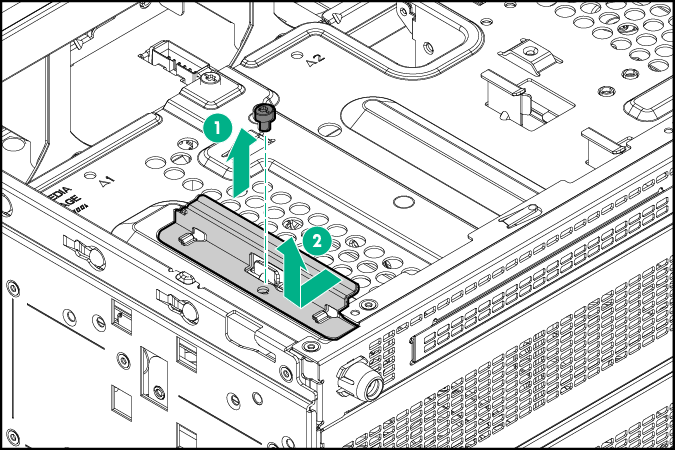
- Remove the screw from the optical drive carrier.
- Remove the optical drive carrier.
- Install the 9.5mm optical drive into the optical drive carrier.
- Tighten the screws on the optical drive carrier.
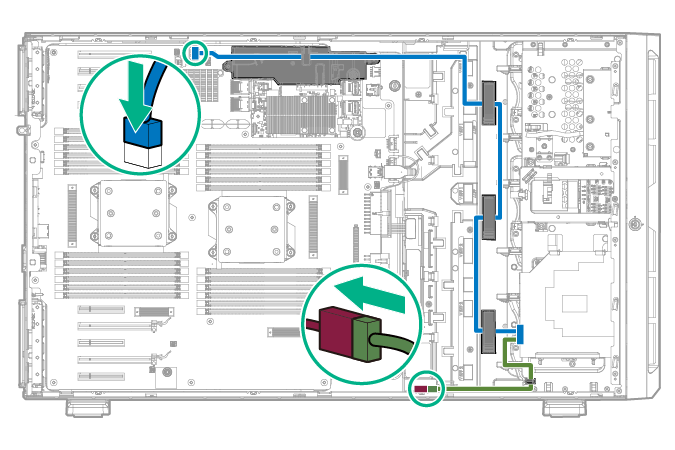
- Connect the SATA and power cables to the optical drive.
- LFF configuration
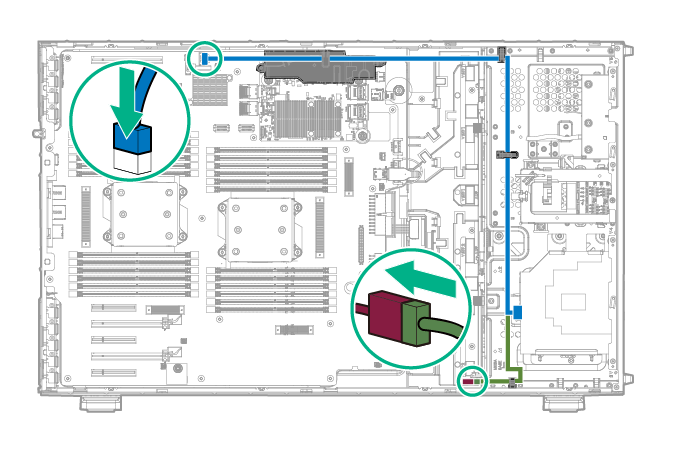
- SFF configuration
- Install the access panel.
- Do one of the following:
- If the server is in a tower configuration, return the server to an upright position.
- If the server is in a rack configuration, slide the server
into the rack.
- Connect each power cord to the server
.
- Connect each power cord to the power source.
- Power up the server.
- Do one of the following: