|
|
|


8-bay SFF hot-plug drive cage option
For more information about product features, specifications, options, configurations, and compatibility, see the product QuickSpecs on the Hewlett Packard Enterprise website.
To install the component:
- Power down the server.
- Remove all power:
- Disconnect each power cord from the power source.
- Disconnect each power cord from the server.
- Do one of the following:
- If installed, remove the security bezel.
- Remove the access panel.
- Use a T-10 Torx screwdriver to remove the box 2 SFF drive cage blank screws, and then remove the blank.
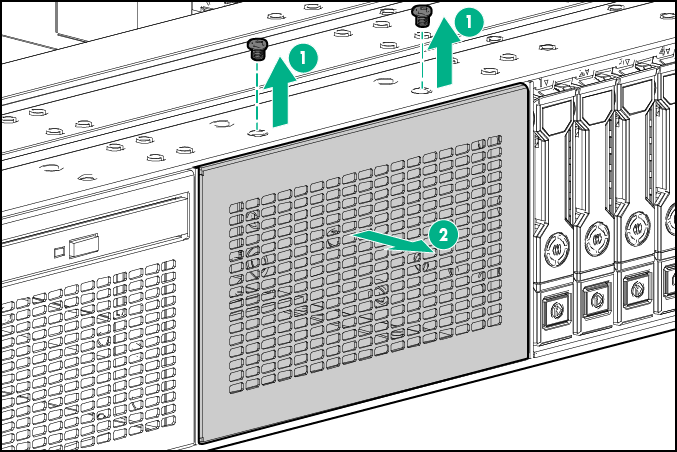
Retain the blank for future use.
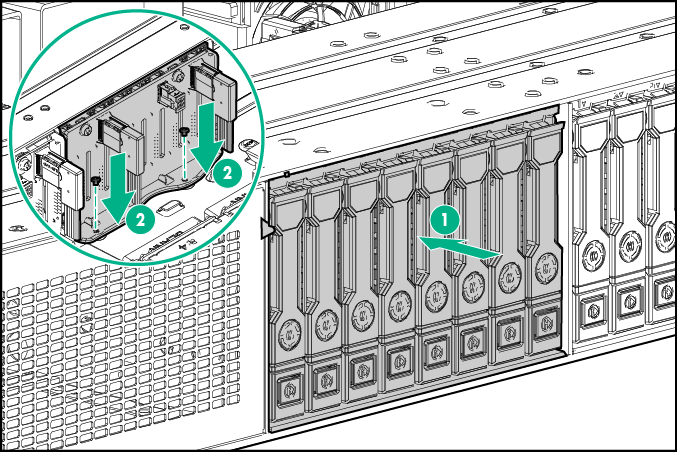
- Install the SFF hot-plug drive cage.
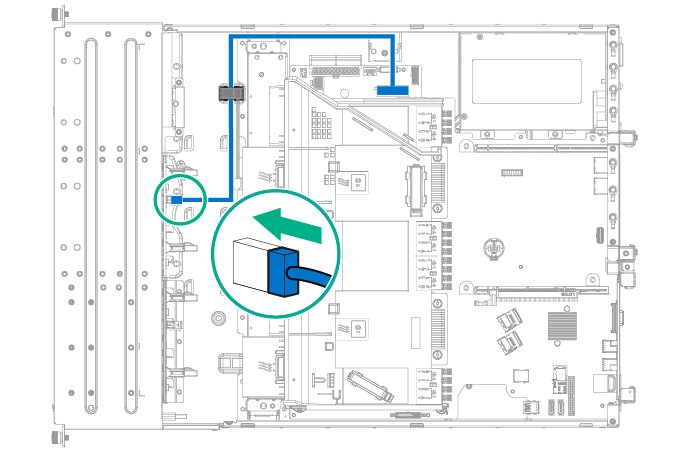
- Connect the power cable to the new 8-bay SFF hot-plug drive cage:
- Secure the power cable in the left front chassis cable clip.
- Connect the BP2 power connector of the SFF power cable to the 8-bay SFF backplane on box 2.
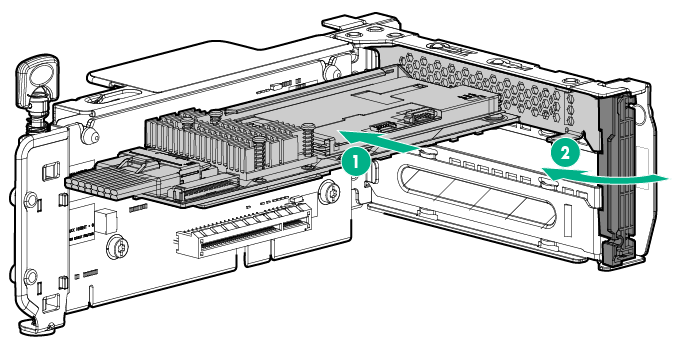
- Remove the primary PCI riser cage.
- Install the storage controller:
- Identify the expansion slot compatible with the new option, and then remove the cover opposite that slot.
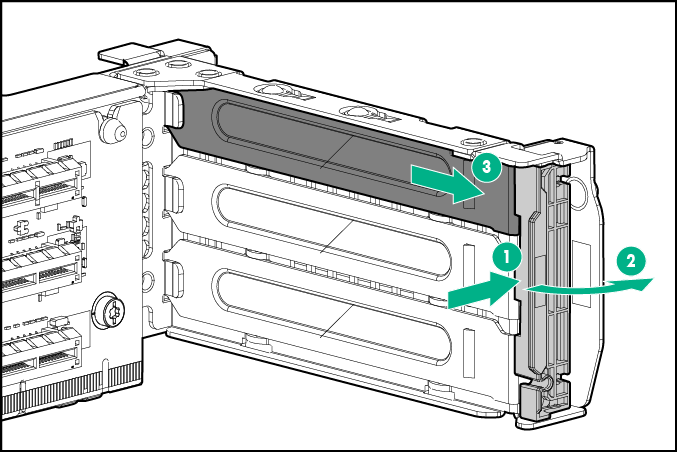
- Install the storage controller. Verify that the board is firmly seated in the slot.
For more information about the integrated storage controller and its features, select the relevant user documentation on the Hewlett Packard Enterprise website.
- Identify the expansion slot compatible with the new option, and then remove the cover opposite that slot.
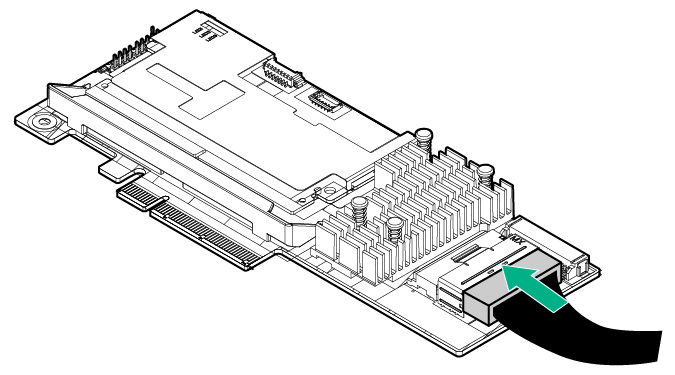
- Connect the 630-mm Mini-SAS Y-cable:
- Connect the common end of the Mini-SAS Y-cable to the controller option.
- Install the primary PCI riser cage.
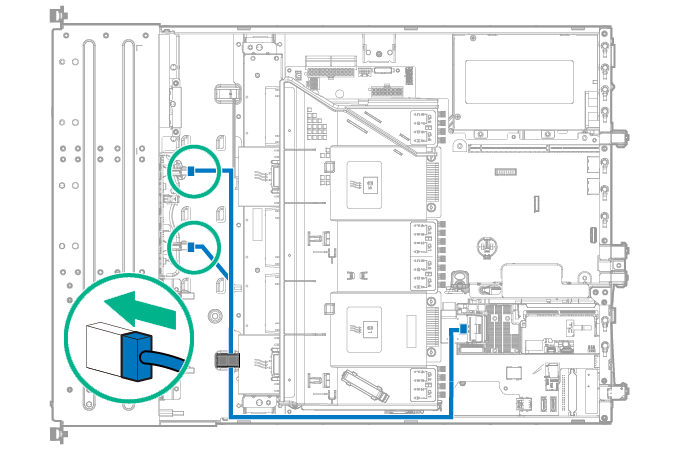
- Route the Mini-SAS Y-cable along the side of the system board towards the front chassis, and then connect the cable to the drive backplane.
- Secure the Mini-SAS Y-cable in the right front chassis cable clip.
- Connect the common end of the Mini-SAS Y-cable to the controller option.
- Install the access panel.
- If removed, install the security bezel.
- Do one of the following:
- Slide the server into the rack.
- Install the server into the rack.
- Power up the server.
- Install the drives.