Installing a Flexible Smart Array Controller option

CAUTION: Hewlett Packard Enterprise recommends performing a complete backup of all server data before performing a controller or adapter installation or removal.

An HPE Smart Array P440ar Controller or HPE H240ar Smart Host Bus Adapter provides support for up to 8 internal SAS/SATA drives without using a PCIe slot.

An HPE Flexible Smart Array Controller Mini-SAS cable option is required to install an HPE Flexible Smart Array Controller option. Before installing the controller, observe the following requirements:

  • To ensure cables are connected correctly, observe the labels on the cable and component connectors.
  • Check that you have installed the latest firmware for the controllers, HBAs, and the expander card. To download the latest firmware, see the Hewlett Packard Enterprise website.

To install the component:

Procedure

  1. Back up all server data.
  2. Do one of the following:
  3. Power down the server.
  4. Remove all power:
    1. Disconnect each power cord from the power source.
    2. Disconnect each power cord from the server .
  5. Do one of the following:
  6. Remove the access panel.
  7. Remove the air baffle.
  8. Remove the fan cage.
  9. Disconnect the Mini-SAS cables from the embedded Smart Array controller.
  10. Remove the cable management clip:
    1. Release any cable secured by the clip.
    2. Remove the screws on the clip.
    3. Lift and remove the clip.
      Removing the cable clips and screws from the system board
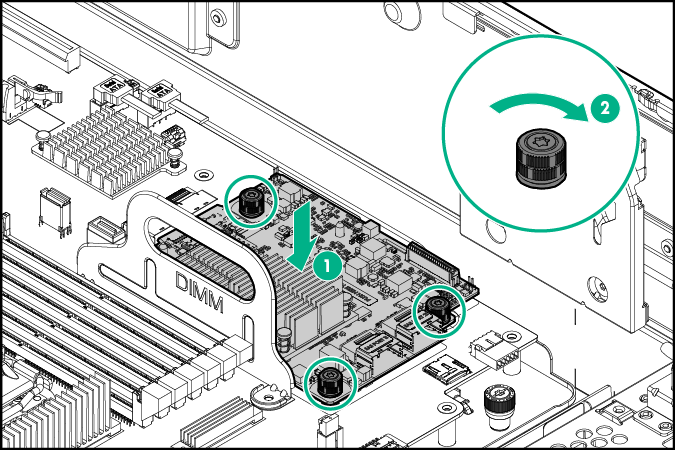
  11. Install the Flexible Smart Array Controller.
    Installing a P440ar Smart Array SAS Controller
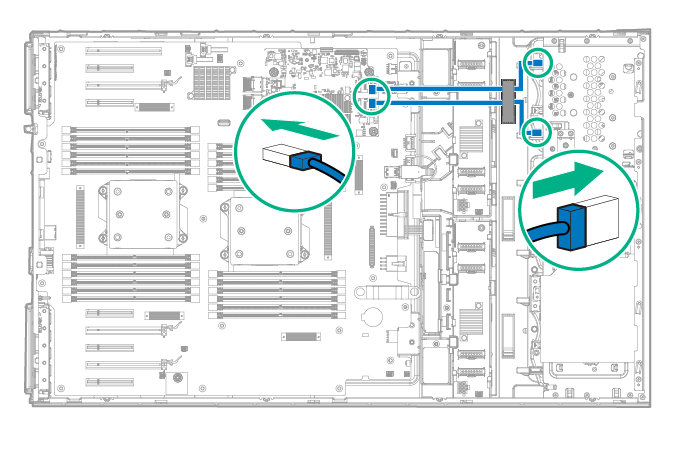
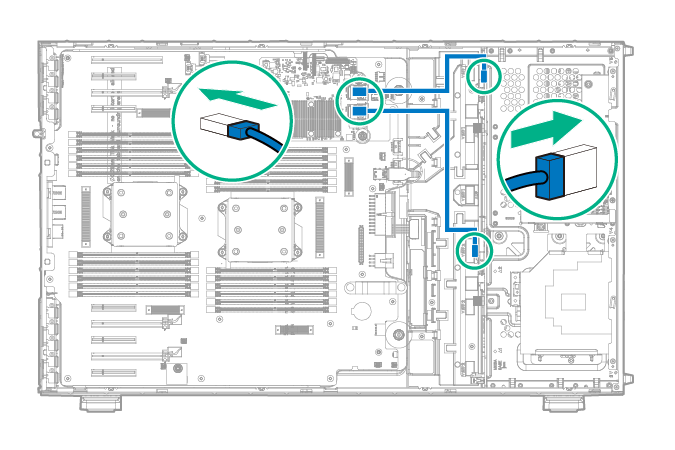
  12. Connect the Mini-SAS cables from the drive backplane to the Flexible Smart Array Controller.
    • SFF configuration
      Connecting the Flexible Smart Array Controller Mini-SAS cables from the drive backplane to the system board (SFF configuration)
    • LFF configuration
      Connecting the Flexible Smart Array Controller Mini-SAS cables from the drive backplane to the system board (LFF configuration)
  13. Install the cable management clip and secure the cable previously removed from the clip.
  14. Install the fan cage.
  15. Install the air baffle.
  16. Install the access panel.
  17. Do one of the following:
    • If the server is in a tower configuration, return the server to an upright position.
    • If the server is in a rack configuration, slide the server into the rack.
  18. Connect each power cord to the server .
  19. Connect each power cord to the power source.
  20. Power up the server.
  21. Do one of the following:

Results