|
|
|


Optical drive cage option
For more information about product features, specifications, options, configurations, and compatibility, see the product QuickSpecs on the Hewlett Packard Enterprise website.
To install the component:
- Power down the server.
- Remove all power:
- Disconnect each power cord from the power source.
- Disconnect each power cord from the server.
- Do one of the following:
- If installed, remove the security bezel.
- Remove the access panel.
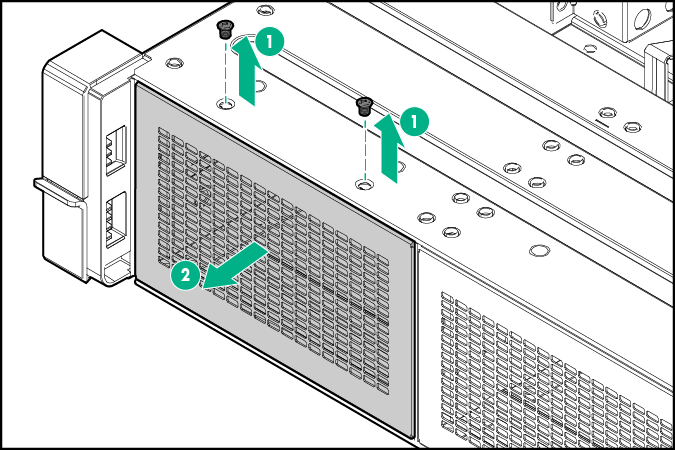
- Remove the Universal Media Bay blank.
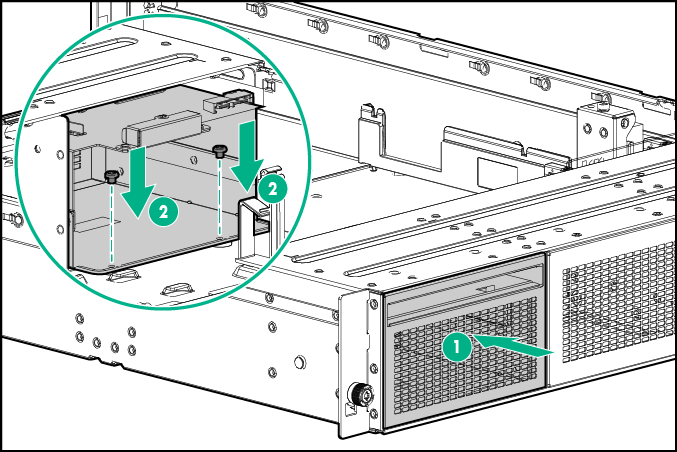
- Install the optical drive cage.
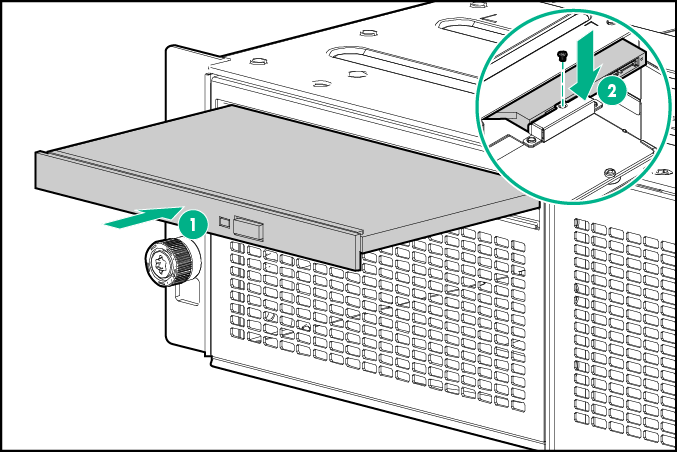
- Install the optical drive into the bay.
- If an expansion board is installed in the primary PCI riser cage, then remove the PCI riser cage.
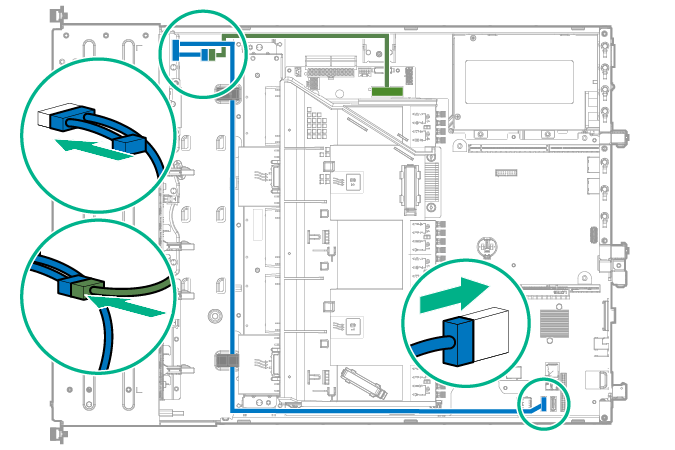
- Connect the optical drive cable:
- Connect the optical drive cable to the optical drive.
- Connect the four-pin (2x2) power supply cable to the power connector of the optical drive cable.
- Secure the optical drive cable in the two front chassis cable clips.
- Connect the cable to the SATA connector on the system board.
- If removed, install the primary PCI riser cage.
- Install the access panel.
- If removed, install the security bezel.
- Do one of the following:
- Slide the server into the rack.
- Install the server into the rack.
- Power up the server.