Prerequisites
Before installing this option, be sure that you have the following:
The components included with the hardware option kit
Procedure
-
Observe the following alerts:
WARNING: To reduce the risk of personal injury from hot surfaces, allow the drives and the internal system components to cool before touching them.
CAUTION: To prevent damage to electrical components, properly ground the
server before beginning any installation procedure. Improper grounding can cause electrostatic discharge.
-
Back up all
server data.
-
Power down the server (Power down the server).
-
Disconnect all peripheral cables from the
server.
-
Remove the system board module from the chassis (Removing the system board module from the chassis).
-
Place the module on a flat, level work surface.
-
Remove the riser cage (Removing the riser cage).
-
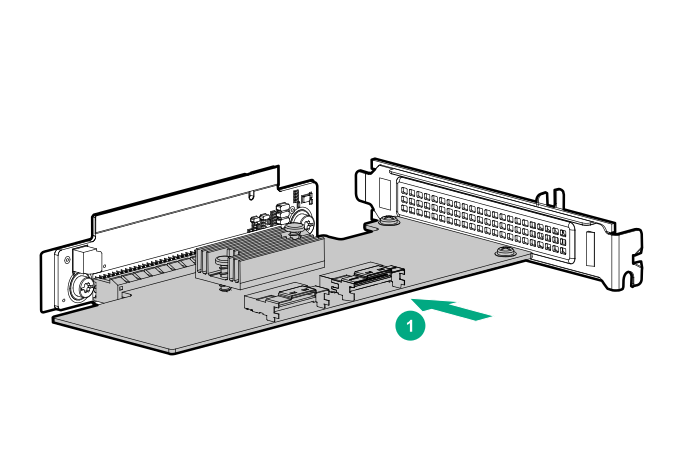
Install the NVMe riser board.
-
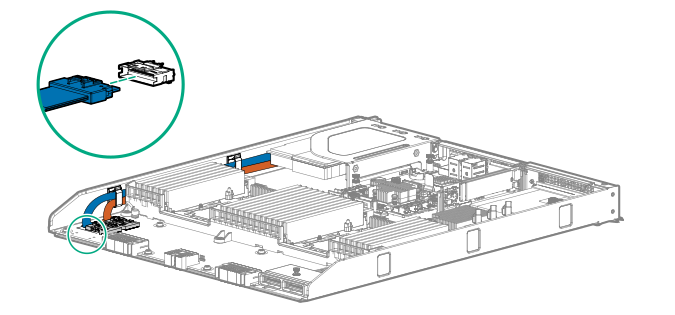
Connect the cables to the storage controller.
In the following illustration, the orange cable connects to port J3. The blue cable connects to port J4.
-
Connect the cables to the system board.
- Connect the cable from port J3 on the riser board to NVMe drive port J19 on the system board.
- Connect the cable from port J4 on the riser board to NVMe drive port J13 on the system board.
-
Install the riser cage.
-
Install the system board module.
-
Connect all peripheral cables to the
server.
-
Power up the server (Power up the server).