Prerequisites
Before you perform this procedure, make sure that you have the following items available:
Procedure
Power down the server .
Remove all power:
Disconnect each power cord from the power source.
Disconnect each power cord from the
server .
Do one of the following:
Remove the access panel (Removing the access panel ).
CAUTION: Do not operate the
server for long periods with the access panel open or removed. Operating the
server in this manner results in improper airflow and improper cooling that can lead to thermal damage.
Disconnect all cables attached to the expansion boards in the PCIe riser cage.
Remove the riser cage (Removing a PCIe riser cage ).
If installed, remove any expansion boards installed on the riser board.
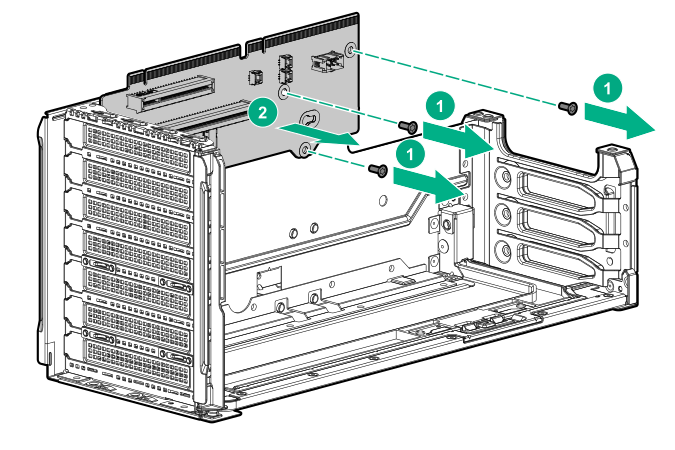
Remove the riser board installed in the riser cage.
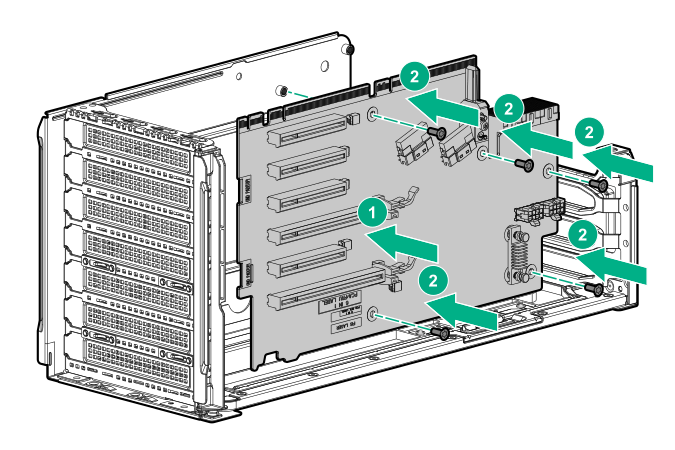
Align the screw holes on the riser board with the holes on the riser cage, and then install the riser board.
NOTE: Your riser board might appear different.
Install the riser cage (Installing the primary PCIe riser cage ).
Install the access panel (Installing the access panel ).
Install the
server into the rack (Installing the server into the rack ).
Connect each power cord to the
server .
Connect each power cord to the power source.
Power up the server .