Prerequisites
Before installing this option, be sure you have the following:
Procedure
-
Observe the following alerts:
WARNING: To reduce the risk of personal injury from hot surfaces, allow the drives and the internal system components to cool before touching them.
CAUTION: To prevent damage to electrical components, properly ground the
server before beginning any installation procedure. Improper grounding can cause electrostatic discharge.
-
Back up all
server data.
-
Power down the
server (Power down the server).
-
Remove all power:
- Disconnect each power cord from the power source.
- Disconnect each power cord from the
server.
-
Do one of the following:
- Extend the
server from the rack (Extend the server from the rack).
- Remove the
server from the rack (Remove the server from the rack).
-
Remove the access panel (Remove the access panel).
-
Remove the serial cable blank.
-
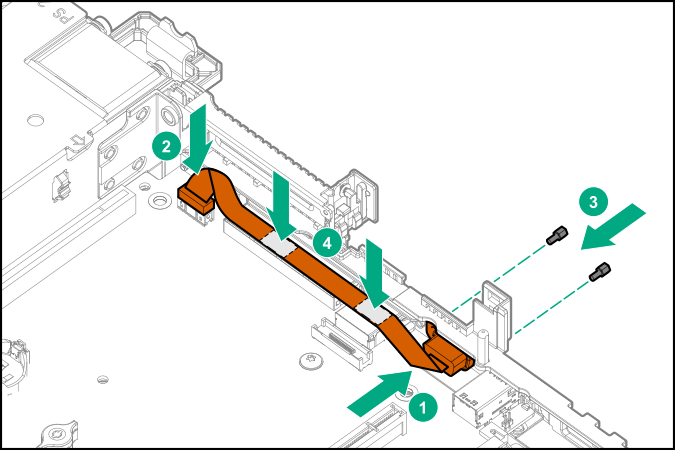
Connect the serial cable option, and then secure the cable with two T-10 screws. Then, remove the backing from the double-sided tape and press down where indicated.
A 5 mm socket is required for this step.
-
Install the access panel (Install the access panel).
-
Install the
server in the rack.
-
Connect each power cord to the
server.
-
Connect each power cord to the power source.
-
Power up the
server (Power up the server).