Installing an HPE Smart Array P816i-a SR Gen10 Controller option

Prerequisites

Before installing this option, be sure that you have the following:

  • The components included with the hardware option kit

  • Additional cables, as required. For more information, see Cabling

  • T-15 Torx screwdriver

Procedure
  1. Observe the following alerts:
    WARNING: To reduce the risk of personal injury from hot surfaces, allow the drives and the internal system components to cool before touching them.
    CAUTION: To prevent damage to electrical components, properly ground the server before beginning any installation procedure. Improper grounding can cause electrostatic discharge.
  2. Back up all server data.
  3. Power down the server (Power down the server).
  4. Remove all power:
    1. Disconnect each power cord from the power source.
    2. Disconnect each power cord from the server.
  5. Do one of the following:
    1. Extend the server from the rack (Extend the server from the rack).
    2. Remove the server from the rack (Remove the server from the rack).
  6. Remove the access panel (Remove the access panel).
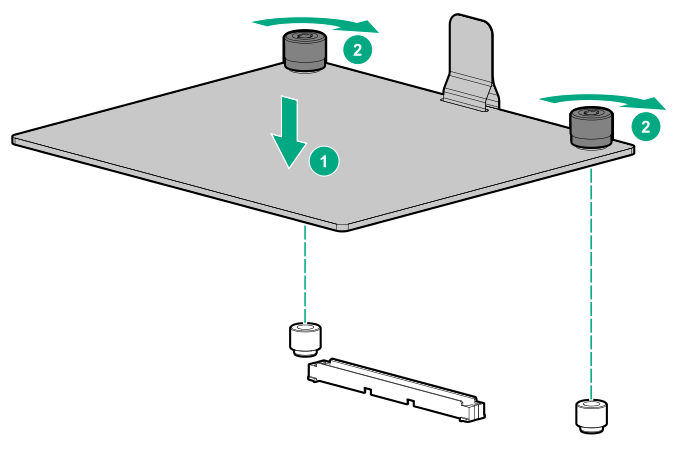
  7. Install the controller.
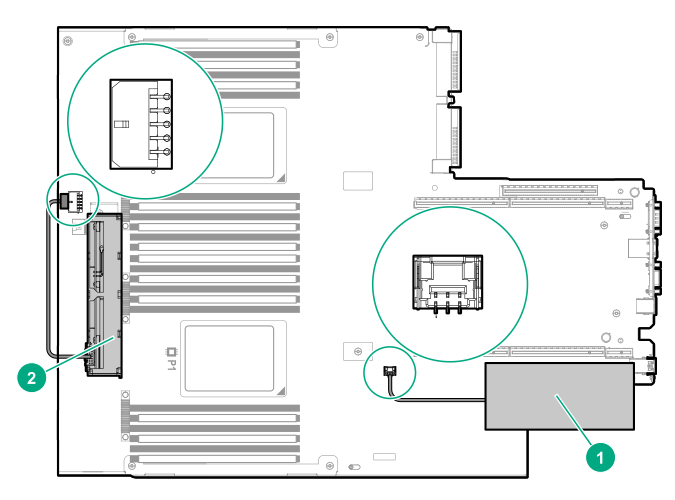
    Installing a type - a controller

  8. Connect the cables.

    The following illustration shows the 8+2 SFF backplane configuration connected to the controller. Additional cabling options are available. For more information, see the HPE DL360 Gen10 Server cabling matrix on the Hewlett Packard Enterprise website (http://www.hpe.com/info/CablingMatrixGen10).

    8+2 SFF cable routing

    IMPORTANT:
    To enable SmartCache or CacheCade in a P-class type-p Smart Array controller, you must:
    • Connect the controller backup power cable to the controller backup power connector on the system or riser board.

    • Connect the energy pack cable to the connector on the system board.

  9. Install the access panel (Install the access panel).
  10. Install the server in the rack.
  11. Connect each power cord to the server.
  12. Connect each power cord to the power source.
  13. Power up the server (Power up the server).