Installing a secondary full-height PCI riser cage option

When installed, this riser cage supports full-height, 3/4-length expansion boards up to 9.5". PCIe3 slot 2 is no longer available.

Prerequisites

This option requires a dual processor configuration.

Before installing this option, be sure you have the following:

  • The components included with the hardware option kit

  • Any expansion boards or controllers you plan to install

  • T-10 Torx screwdriver

  • T-15 Torx screwdriver

Procedure
  1. Power down the server (Power down the server).
  2. Remove all power:
    1. Disconnect each power cord from the power source.
    2. Disconnect each power cord from the server.
  3. Do one of the following:
    1. Extend the server from the rack (Extend the server from the rack).
    2. Remove the server from the rack (Remove the server from the rack).
  4. Remove the access panel (Remove the access panel).
  5. Remove the primary PCI riser cage (Remove the primary PCI riser cage).
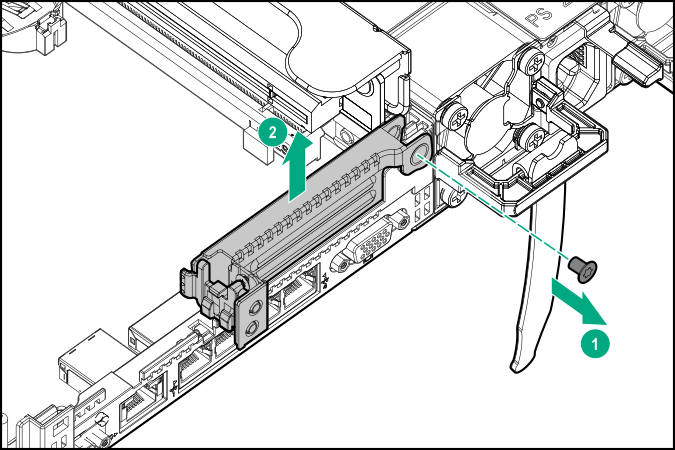
  6. Use a T-10 Torx screwdriver to remove the slot 2 bracket from the primary riser cage.
    Remove the slot 2 bracket from the primary riser cage
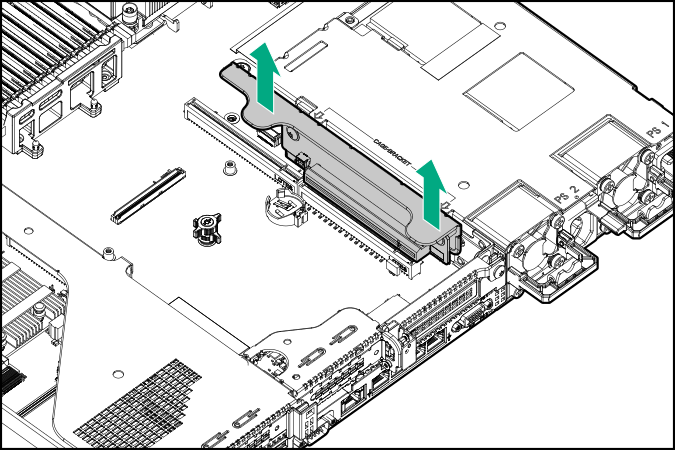
  7. If installed, remove the low-profile riser cage.
    Removing the low-profile riser cage
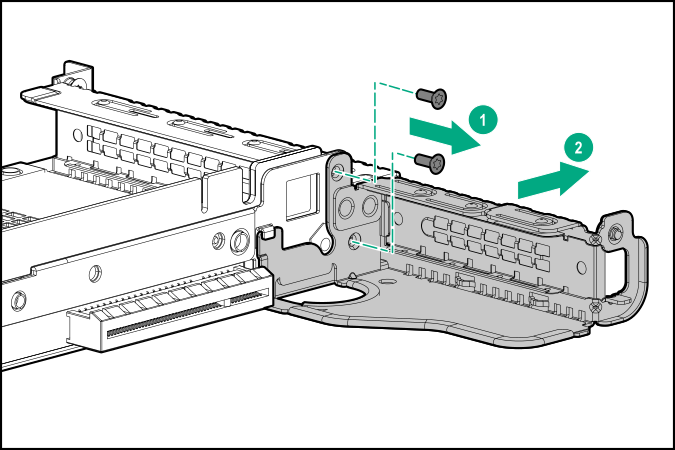
  8. Lift and remove the secondary riser cage latch.

    Use a T-15 Torx screwdriver to remove the riser cage screw.

    Lifting and removing the secondary riser cage latch
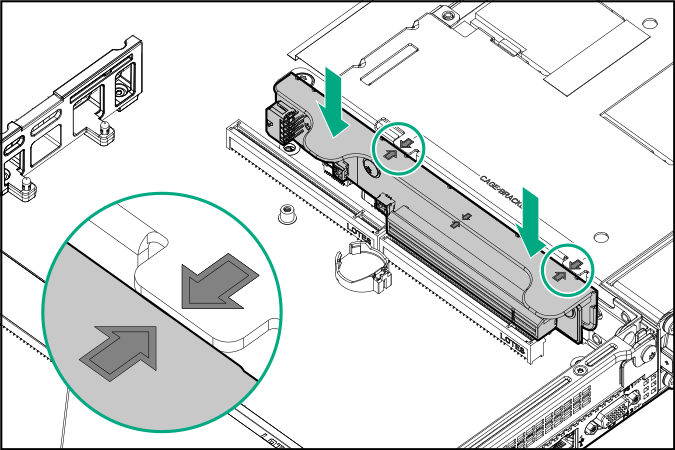
  9. Install the full height PCIe x16 riser cage latch.

    Use a T-15 Torx screwdriver to remove the riser cage screw.

    Installing the full height riser cage latch
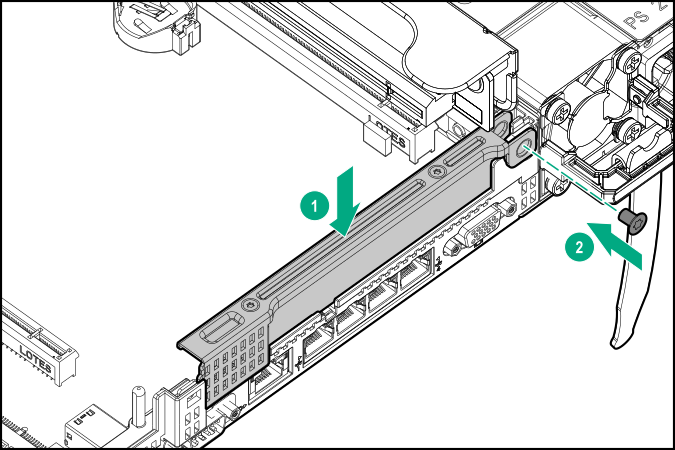
  10. Install the riser cage.
    Installing the secondary riser cage
  11. Install one of the following, as needed:
  12. Install the access panel (Install the access panel).
  13. Install the server in the rack.
  14. Connect each power cord to the server.
  15. Connect each power cord to the power source.
  16. Power up the server (Power up the server).