Prerequisites
Before installing this option, be sure that you have the following:
The components included with the hardware option kit
T-10 Torx screwdriver
T-15 Torx screwdriver
Additional cables, as needed. For more information, see
SFF cables.
NVMe drives
For more information, contact a Hewlett Packard Enterprise authorized reseller.
Procedure
-
Back up all server data.
-
Power down the
server (Power down the server).
-
Remove all power:
- Disconnect each power cord from the power source.
- Disconnect each power cord from the
server.
-
Do one of the following:
- Extend the
server from the rack (Extend the server from the rack).
- Remove the
server from the rack (Remove the server from the rack).
-
Remove the access panel (Remove the access panel).
-
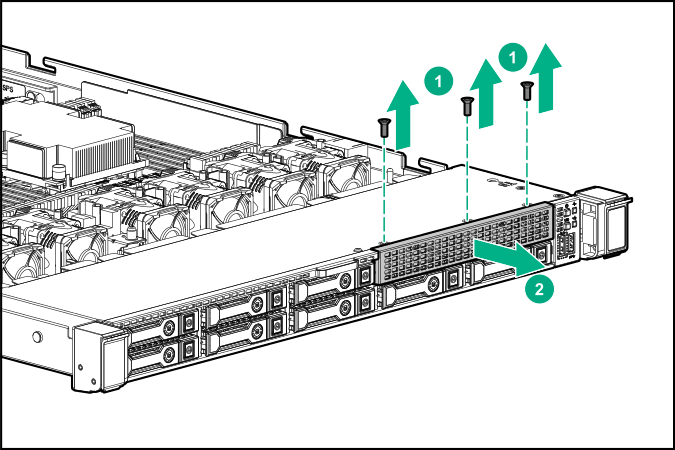
Use a T-10 Torx screwdriver to remove the universal media bay blank.
-
Use a T-10 Torx screwdriver to install the 2 SFF NVMe drive cage.
-
Remove the primary PCI riser cage (Remove the primary PCI riser cage).
-
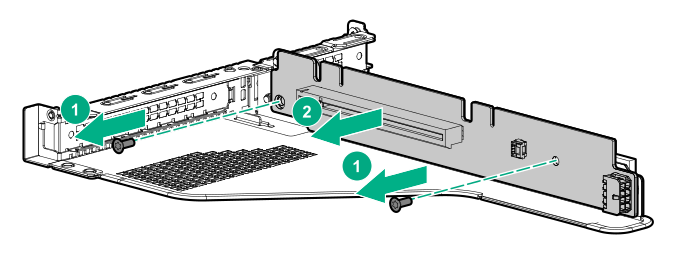
Use a T-15 Torx screwdriver to remove the existing riser board.
-
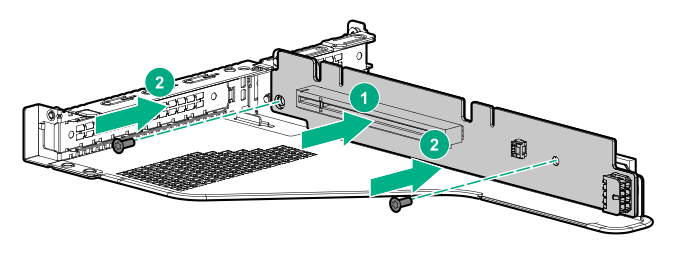
Use a T-15 Torx screwdriver to install the riser provided in the kit in the primary PCI riser cage.
-
Observe the following:
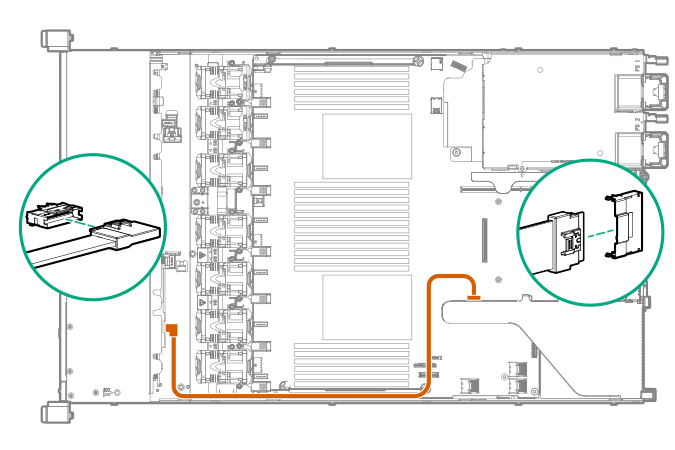
NOTE: The following information describes the standard cable routing for this component. For more information on optional cable routing, see the
HPE ProLiant DL360 Gen10 Server
cabling matrix on the Hewlett Packard Enterprise website (http://www.hpe.com/info/CablingMatrixGen10).
-
Route and connect the data cable.
-
Install the primary PCI riser cage.
-
Install the access panel (Install the access panel).
-
Install the
server in the rack.
-
Connect each power cord to the
server.
-
Connect each power cord to the power source.
-
Power up the
server (Power up the server).
-
Install drives.