Removing and replacing the drive drawer assembly
Procedure
-
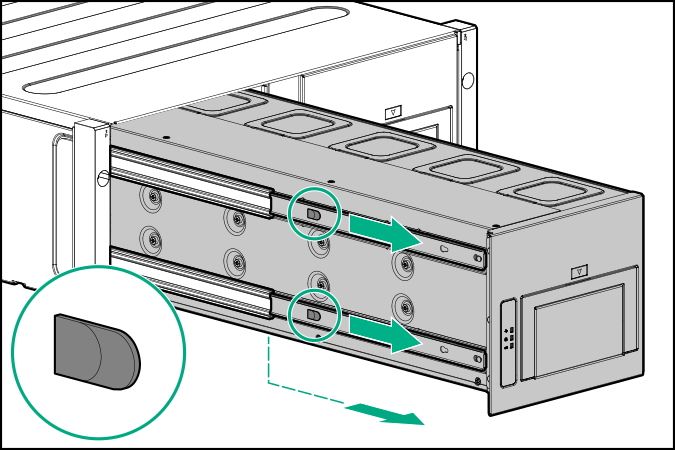
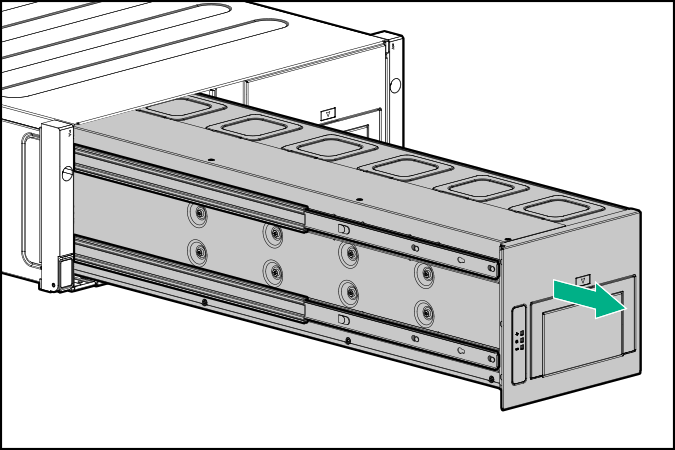
Release the rails together, and then extend the drive drawer further.
-
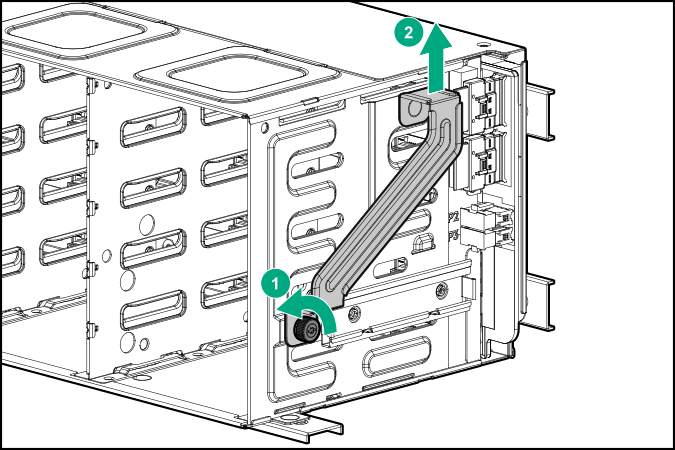
Remove the cable retention bracket.
-
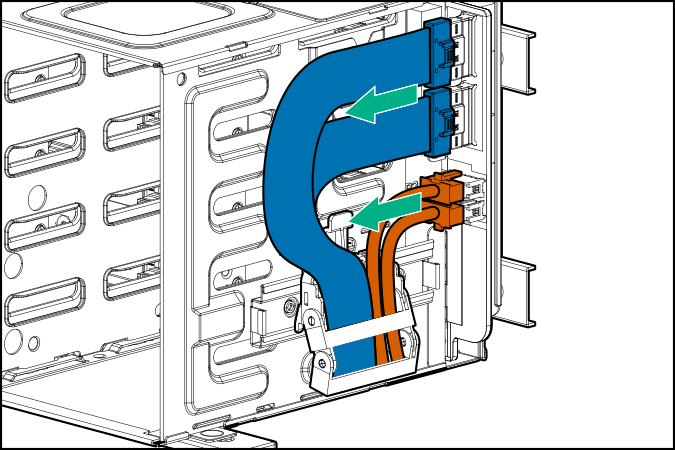
Disconnect the drive cables.
-
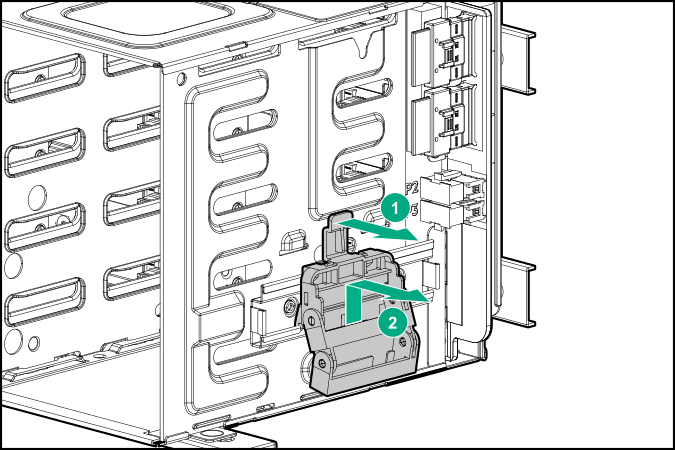
Remove the cable retention clip.
-
Remove the drive drawer from the rails.
-
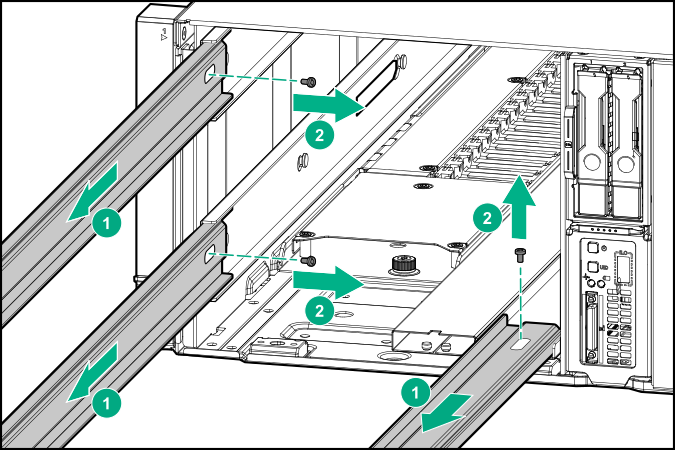
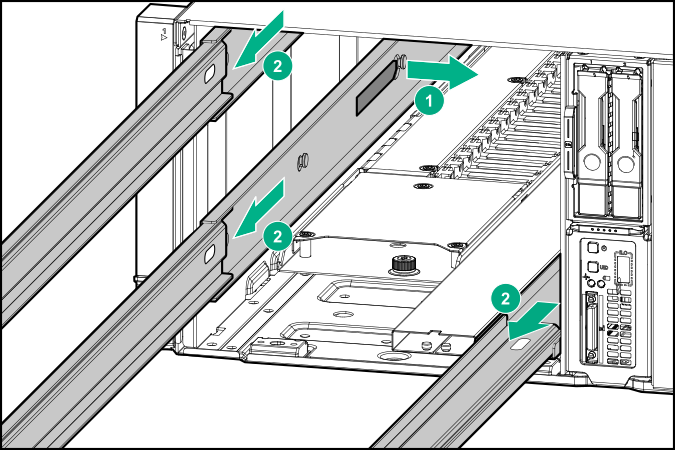
Extend the rails, and then remove the outer rail screws.
-
Remove the outer rail latch, and then remove the rails.
-
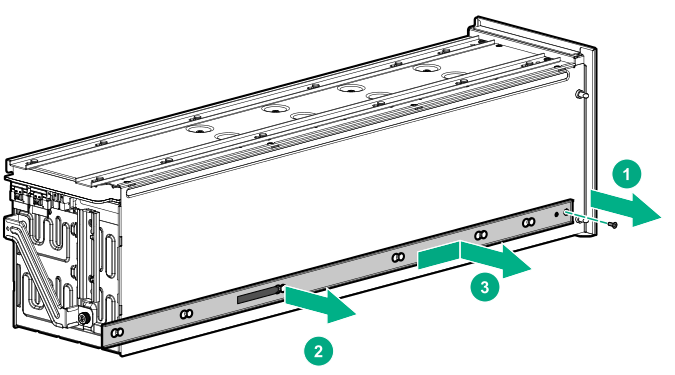
Remove the drive drawer bottom rail.
-
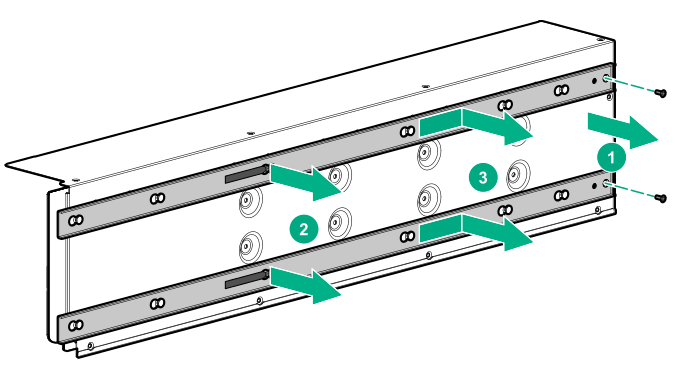
Remove the drive drawer backplane bracket.
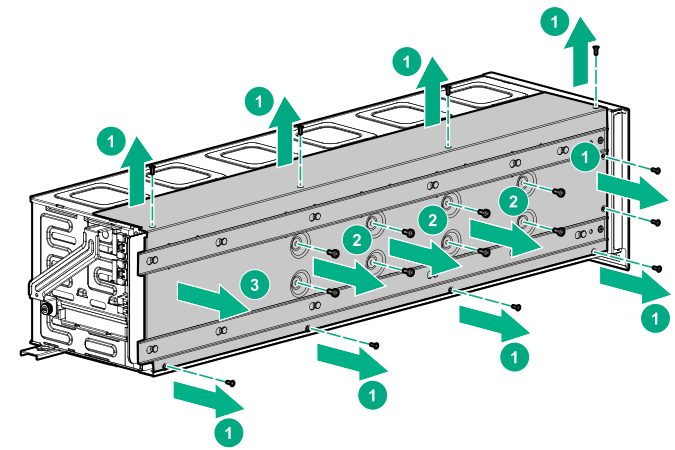
-
Remove the rails from the drive drawer backplane.
To replace the component, reverse the removal procedure.