Replacing a midplane assembly

Procedure
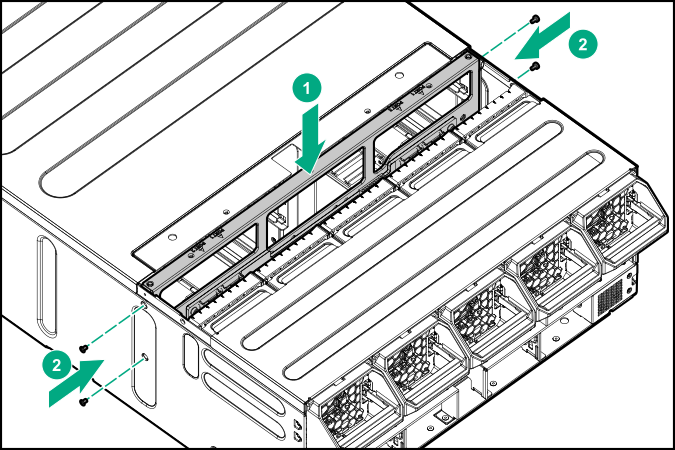
  1. Install the midplane assembly in the chassis, and then secure the assembly by installing the two screws on the sides of the chassis.

    Installing the midplane assembly in the chassis
  2. Connect the four drive data cables that connect to the midplane.

    For drive cabling information, see Drive drawer cabling.

  3. Connect the two fan cables that connect to the midplane.

    For fan cabling information, see Fan cabling.

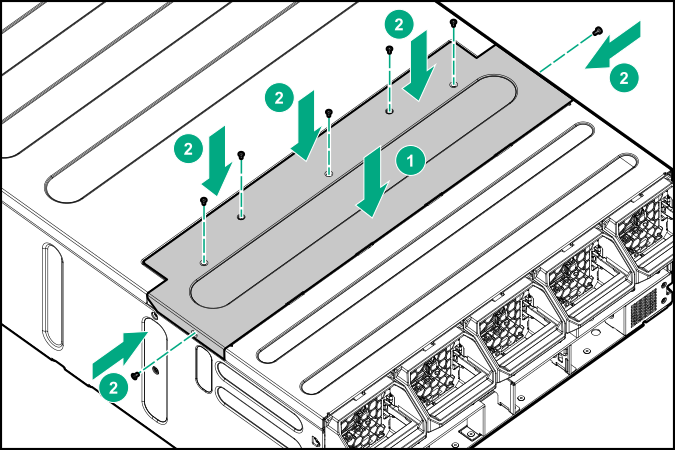
  4. Install the midplane assembly cover by installing the five screws on the top and the two screws on the sides.

    Installing the midplane assembly cover
  5. Install the chassis into the rack.
  6. Install the following components:
    1. Servers (Remove the server from the chassis)
    2. Power supplies (Removing and replacing a power supply)
    3. System fans (Removing and replacing the system fan)
    4. I/O module (Removing and replacing the I/O module)
    5. Management module (Removing and replacing the management module)
  7. Connect all cables that were disconnected from the ports on the rear of the chassis.
  8. Connect the power cables to the power supplies on the rear of the chassis.
  9. Power up the server.