Removing the system board
CAUTION: To avoid ESD damage, when removing electrostatic-sensitive components from the failed system board, place the components on a static-dissipating work surface or inside separate antistatic bags.
NOTE: Replace a failed system board with the same model of replacement system board. See the label of the failed system board for the spare part number.
Procedure
-
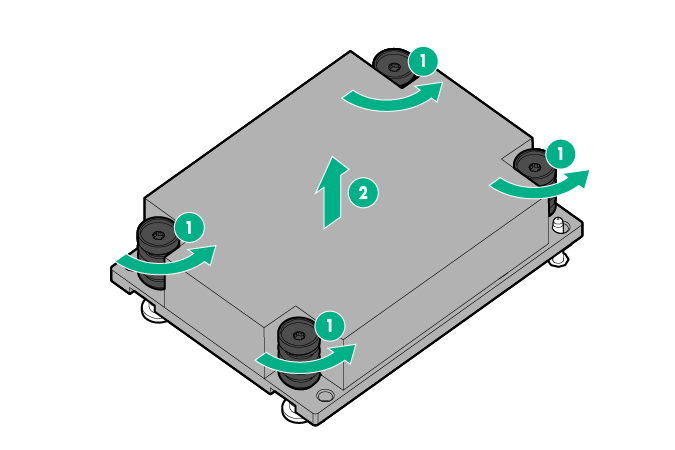
Remove the heatsink:
- Loosen one pair of diagonally opposite screws halfway, and then loosen the other pair of screws.
- Completely loosen all screws in the same sequence.
-
Remove the heatsink from the processor backplate.
-
Open each of the processor locking levers in the order indicated, and then open the processor retaining bracket.
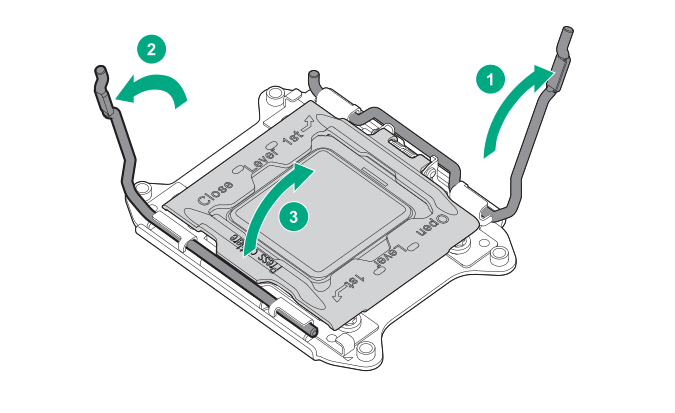
CAUTION:THE PINS ON THE SYSTEM BOARD ARE VERY FRAGILE AND EASILY DAMAGED. To avoid damage to the system board, do not touch the processor or the processor socket contacts.
-
Remove the processor from the processor retaining bracket.
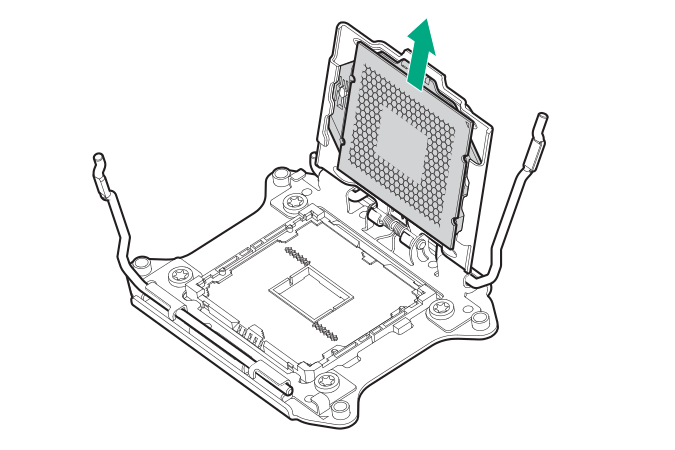
CAUTION: When returning a damaged system board to Hewlett Packard Enterprise, always install all processor socket covers to prevent damage to the processor sockets and system board. -
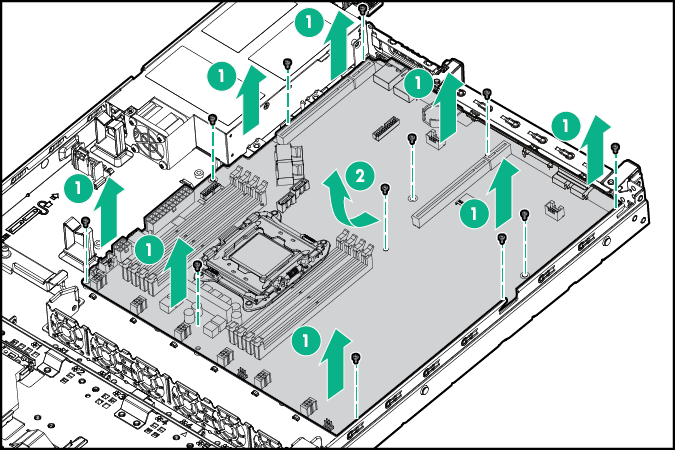
Remove the system board.
- Remove the system board screws.
-
Lift the system board out of the chassis.