Installing the HPE Smart Array P824i-p MR Gen10 Controller
The HPE Smart Array P824i-p MR Controller is supported in the r2600 chassis where it supports 12 drives per node. Install two P824i-p controllers to support the maximum 24 drive configuration. P824i-p controller is supported in the secondary riser slot 3 transfer board.
The maximum inlet ambient temperature for most components installed in the system is 35°C (95°F). Some components, however, are subject to thermal limitations depending on the chassis model and the fan configuration. There are some hardware configurations where it is necessary to limit the number of drives installed in the chassis. For more information, see Temperature requirements.
Before installing this option, make sure that you have a T-10 and a T-15 Torx screwdrivers available.
If you are installing a Smart Array P-class Gen10 controller, an energy pack option is required. For more information, see the chassis user guide on the Hewlett Packard Enterprise website (https://www.hpe.com/info/Apollo2000-Gen10-docs).
Before you perform this procedure, perform the following steps:
Back up data on the system.
Close all applications.
Update the server firmware if it is not the latest revision.
Do one of the following:
If the new Smart Array is the new boot device, install the device drivers.
If the new Smart Array is not the new boot device, go to the next step.
Ensure that users are logged off and that all tasks are completed on the server.
-
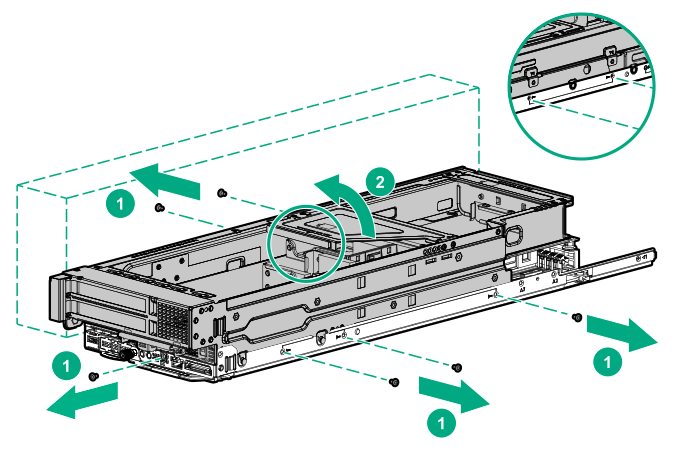
Disengage the secondary riser cage from the server tray, and then lay it on its side with the riser board facing up.
-
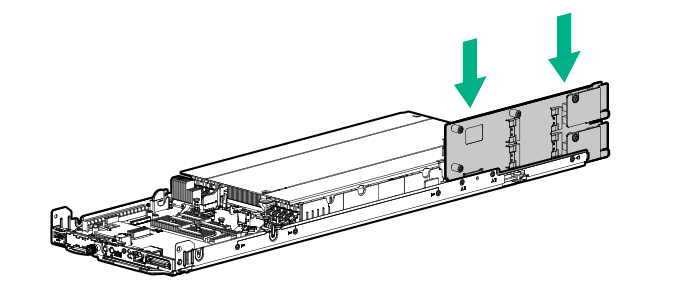
Install the bayonet board.
-
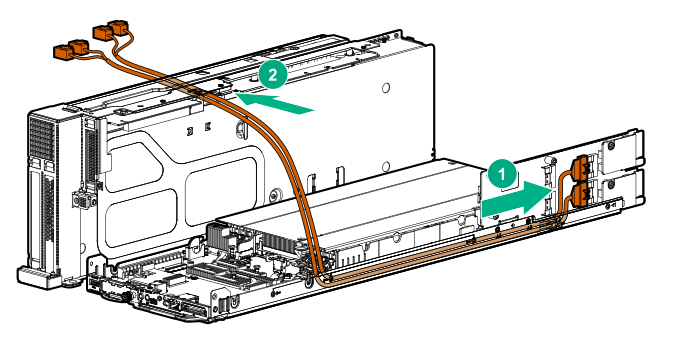
Connect the P824i-p Mini-SAS cables to the bayonet board:
- Connect the Mini-SAS cables to the bayonet board, and then secure them along the inner edge of the server tray.
- Insert the Mini-SAS cables through the opening on the secondary riser cage.
-
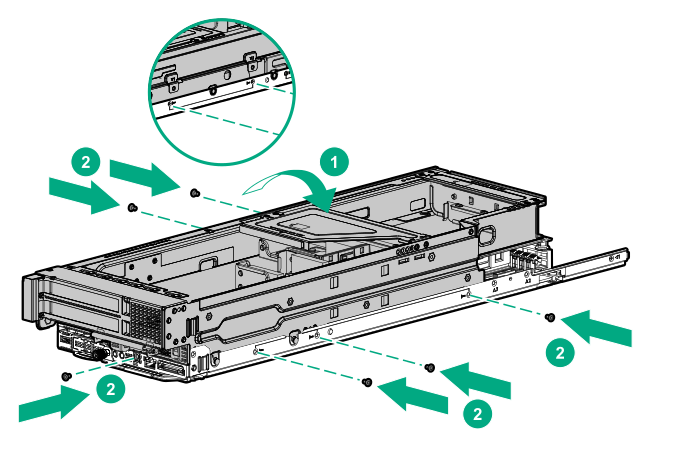
Install the secondary riser cage. Make sure that the riser board is firmly seated in its system board connectors.
-
Install the bayonet board cover:
- Install the cover, and then and install the screws to secure it to the server tray.
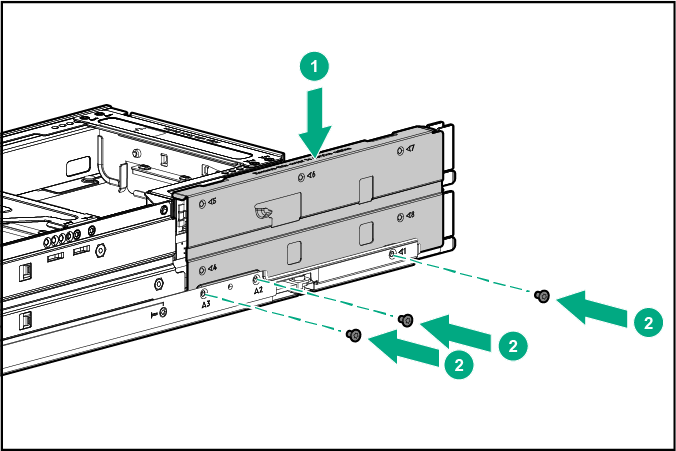
- Install the screws to secure the cover to the bayonet board.
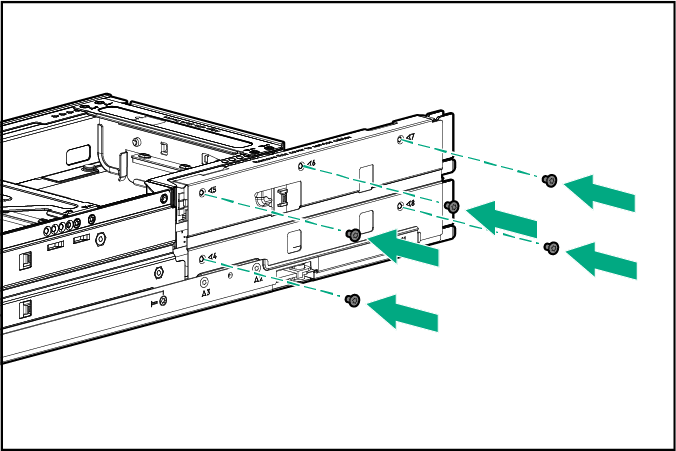
- Install the cover, and then and install the screws to secure it to the server tray.
-
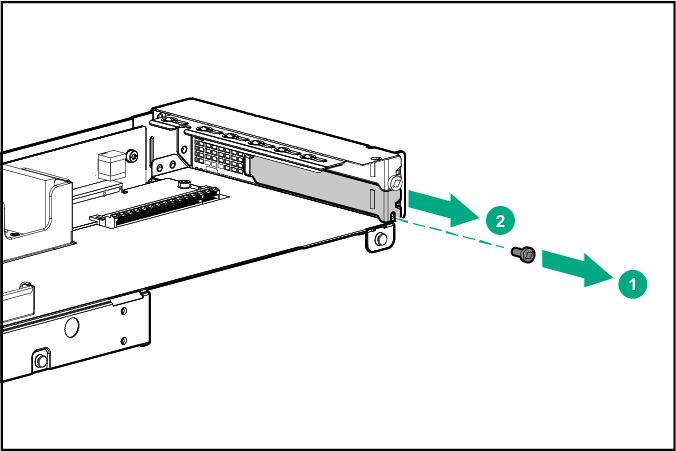
Remove the secondary riser slot 3 blank.
-
Install the controller in the secondary riser slot 3 transfer board. Make sure that the board is firmly seated in the slot.
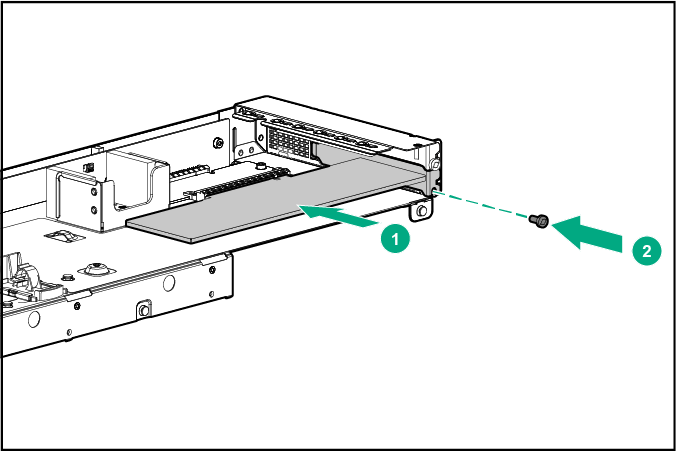
The installation is complete.