Installing a DIMM
Prerequisites
Note the following regarding the server memory support:
A dual-processor server configuration requires the installation of at least two DIMMs.
This server does not support the earlier DDR3 memory generation.
If you are installing a processor 1(B) DIMM and an OCP network adapter is installed, make sure that you have a T-15 Torx screwdriver available.
Procedure
-
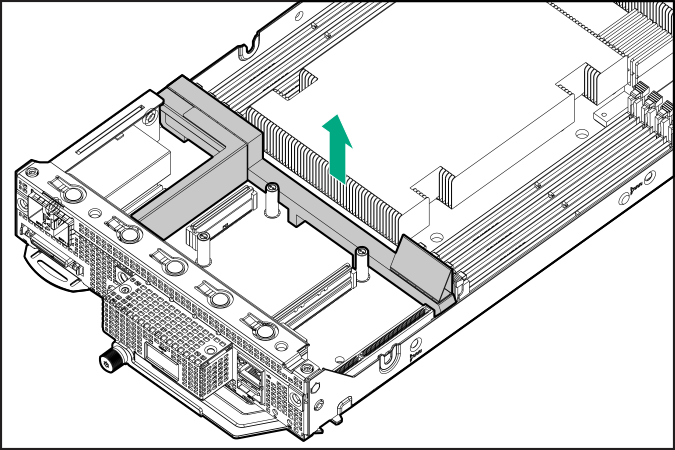
Remove the
server air baffle.
-
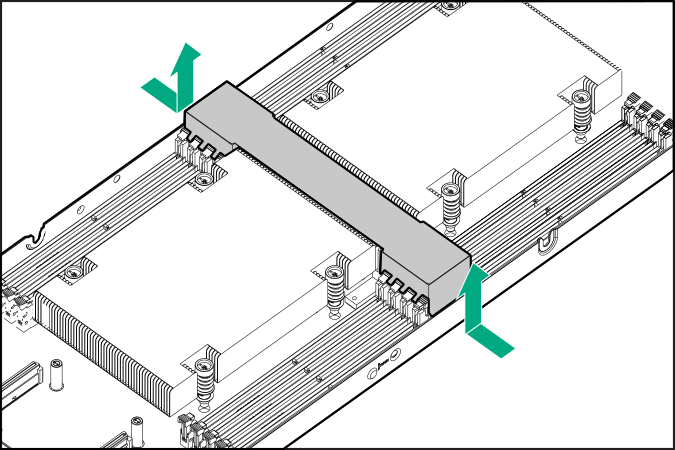
If you are installing a processor 1(B) DIMM and an OCP network adapter is installed, remove the OCP air baffle:
- Completely remove all screws in the same sequence.

- Tilt the OCP network adapter away from the rear bracket.
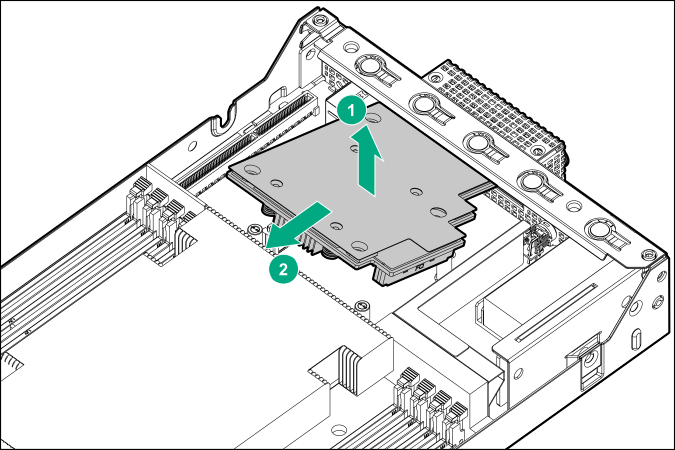
- Remove the OCP air baffle.
- Completely remove all screws in the same sequence.
-
Install the DIMM:
- Align the notch on the bottom edge of the DIMM with the keyed surface of the DIMM slot, and then fully press the DIMM into the slot until the latches snap back into place.
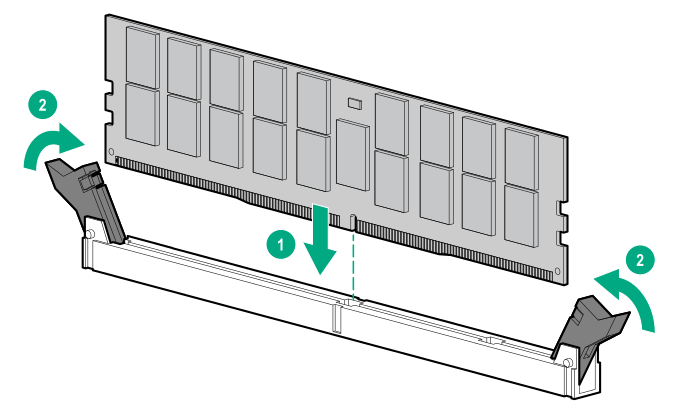
The DIMM slots are structured to ensure proper installation. If you try to insert a DIMM but it does not fit easily into the slot, you might have positioned it incorrectly. Reverse the orientation of the DIMM and insert it again.
- Align the notch on the bottom edge of the DIMM with the keyed surface of the DIMM slot, and then fully press the DIMM into the slot until the latches snap back into place.
-
Install the
server air baffle.
The installation is complete.