Installing an expansion board in the rear PCIe riser slot

CAUTION:

To prevent improper cooling and thermal damage, the PCI air baffle or an expansion board must always be installed in the rear PCIe riser slot. Do not operate the server unless this thermal requirement is met.

Prerequisites

Before you perform this procedure, make sure that you have a T-15 Torx screwdriver available.

Procedure
  1. Power down the server.
  2. Disconnect all peripheral cables from the server.
  3. Remove the server from the chassis.
  4. Remove the rear expansion cage cover.
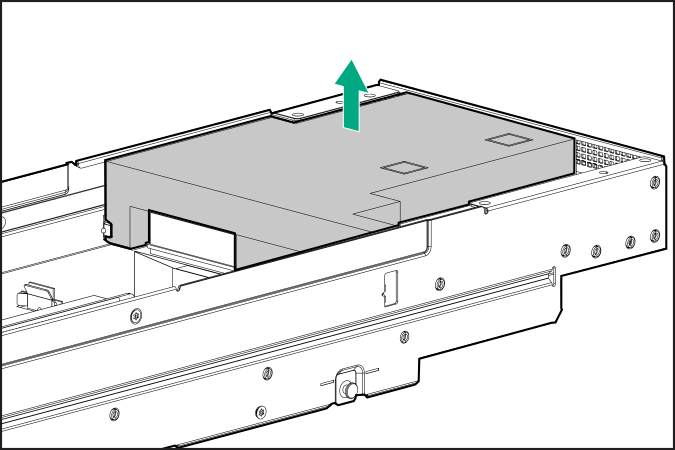
  5. Remove the PCI air baffle.

    Removing the PCI air baffle
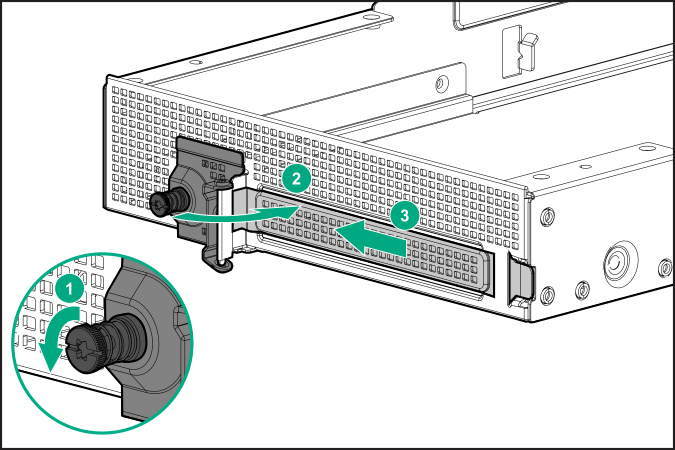
  6. Remove the PCI slot blank:
    1. Loosen the PCI blank retainer screw.
    2. Open the PCI blank retainer.
    3. Remove the PCI slot blank.

    Removing the PCI slot blank
  7. Make sure that any switches or jumpers on the expansion board are set properly.

    For more information, see the documentation that ships with the option.

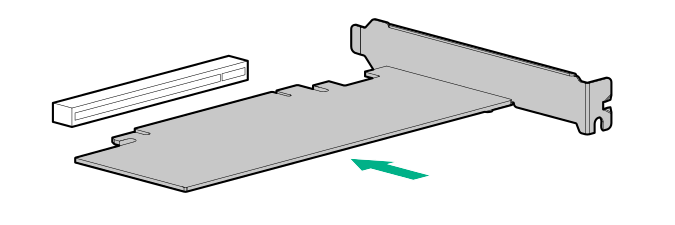
  8. Install the expansion board.

    Installing an expansion board
  9. Make sure that the board is firmly seated in the slot.
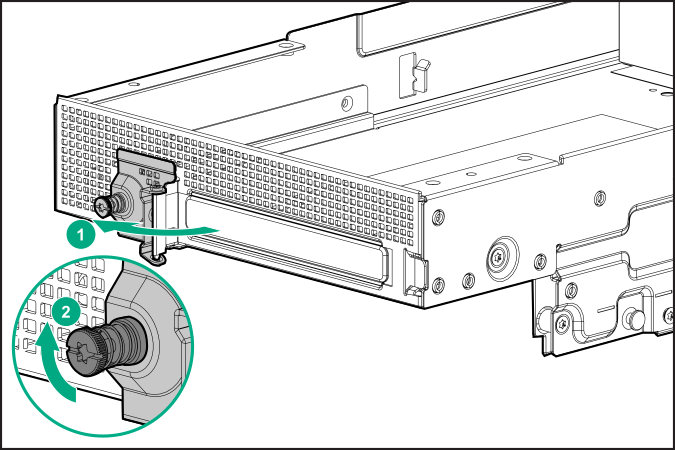
  10. Close the PCI blank retainer, and then tighten its screw.

    Closing the PCI blank retainer
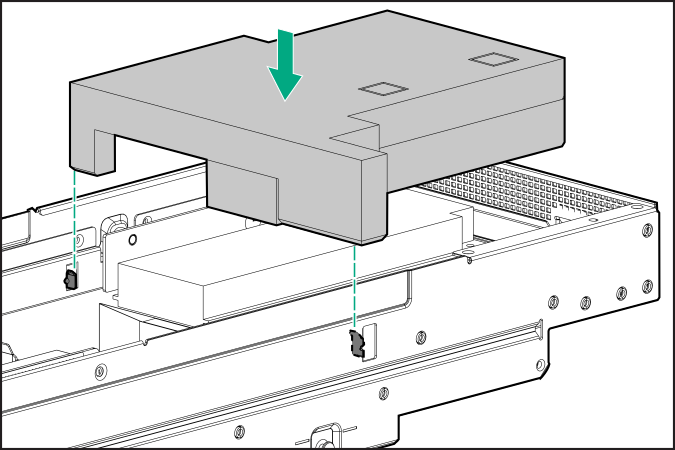
  11. Install the PCI air baffle.

    Installing the PCI air baffle
  12. Install the rear expansion cage cover.
  13. Install the server into chassis.
  14. Connect all necessary external cabling to the expansion board.

    For more information, see the documentation that ships with the option.

  15. Connect all peripheral cables to the server.
  16. Power up the server.

The installation is complete.