Install the SSD
Prerequisites
Before you perform this procedure, make sure that you have the following items available:
T-10 Torx screwdriver
T-15 Torx screwdriver
SSD enablement option kit. This kit includes:
SSD tray
SSD power cable
SSD SATA cable
T-10 screws (4, for securing the SSD)
T-15 Torx screw (1, for securing the SSD tray)
SSD option
Procedure
-
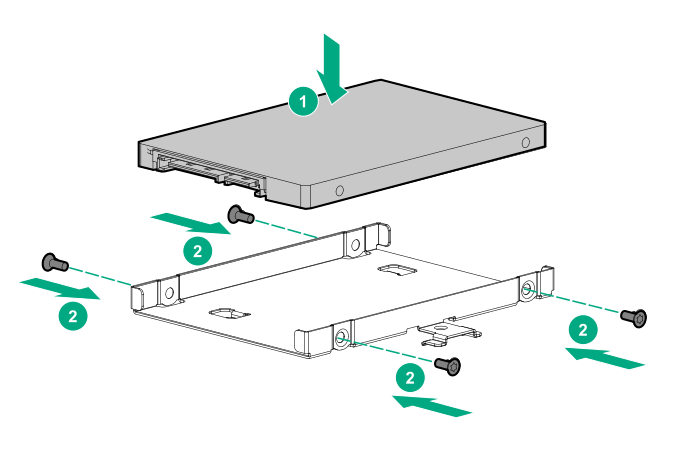
Place the SSD in the SSD tray, and then install the SSD screws.
-
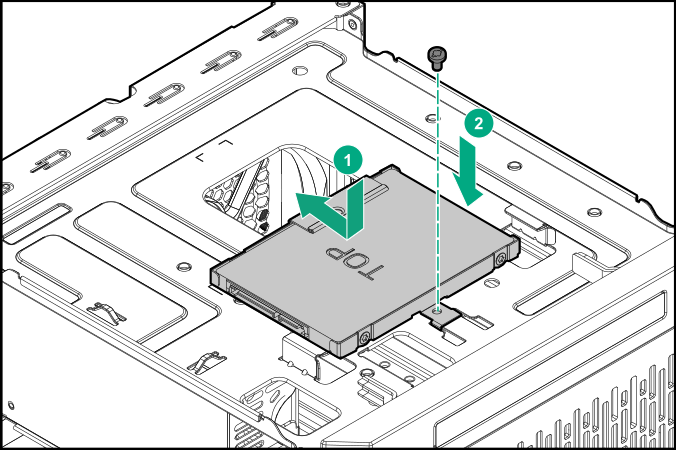
Install the SSD assembly in the media bay, and then secure it with the screw.
-
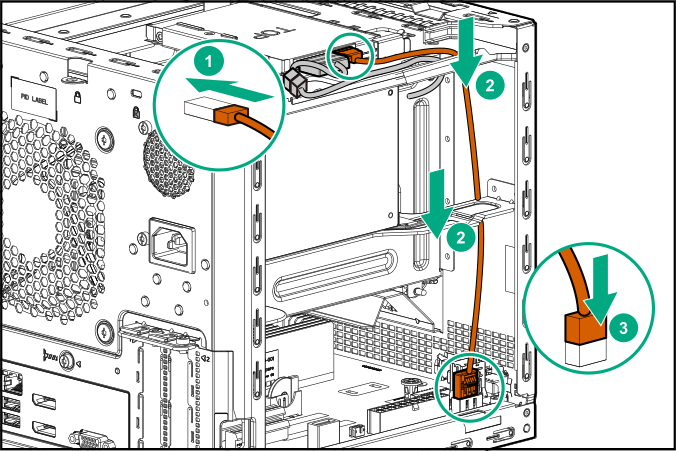
Connect the SSD power cable:
- Open the cable ties.
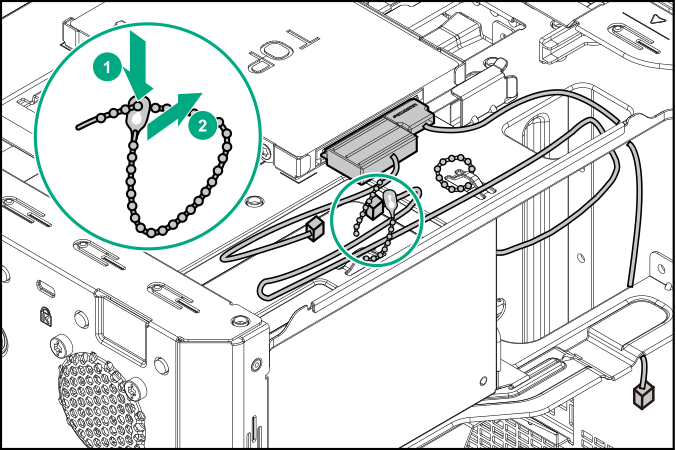
- Connect the power cable to the SSD, and then to the power supply cable labeled P3.
- Open the cable ties.
-
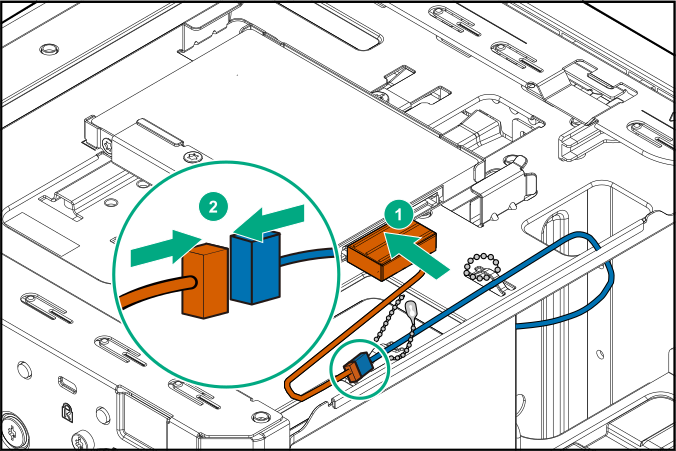
Connect the SSD SATA cable:
- Connect the SATA cable to the SATA port.
- Connect the SATA cable to the SATA port.
-
Bundle the extra length of the SSD power and SATA cables, and then secure them in the cable ties.
