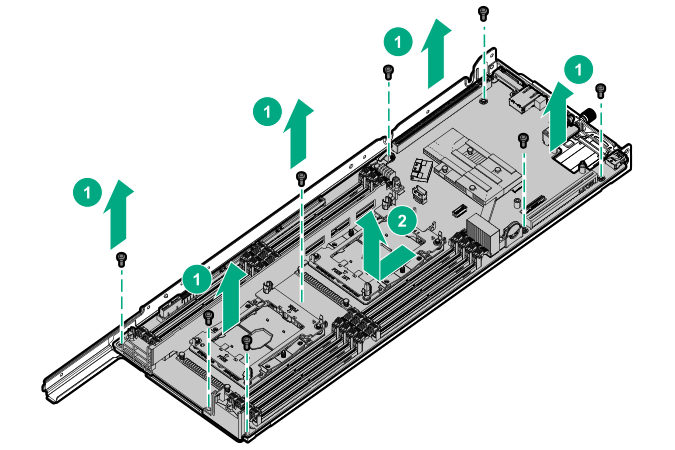
Removing the system board
Prerequisites
Take note of the following:
The slot locations in which each memory module is installed. These components must be installed in the same locations on the new system board.
The port numbers and cable connections between the system board and the secondary riser board.
Before you perform this procedure, make sure that you have a T-15 and T-30 Torx screwdrivers available.
Procedure
-
Remove the processor heatsink assembly:
- Loosen the heatsink nuts in the order specified by the label on the heatsink.
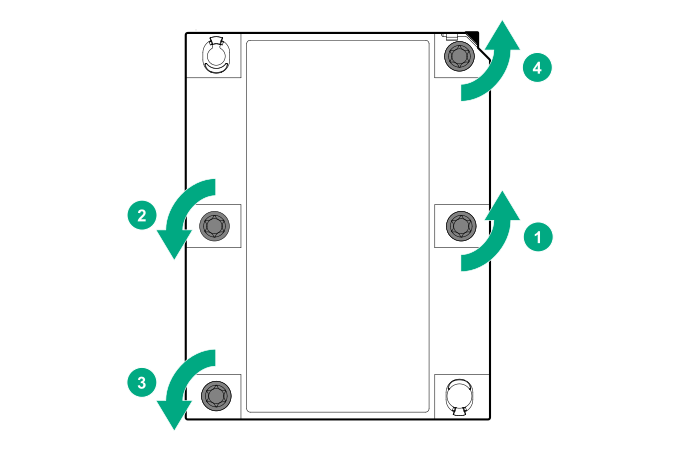
- Loosen the heatsink nuts in the order specified by the label on the heatsink.
-
Remove the system board.