Replacing the system board
Prerequisites
Before you perform this procedure, make sure that you have a T-15 and T-30 Torx screwdrivers available.
Procedure
-
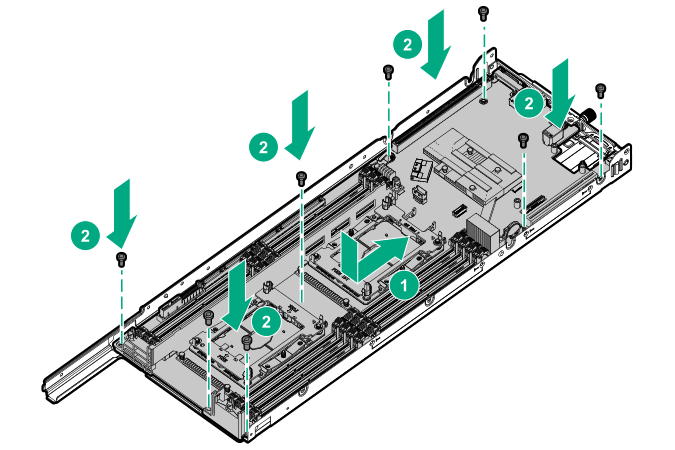
Install the system board.
-
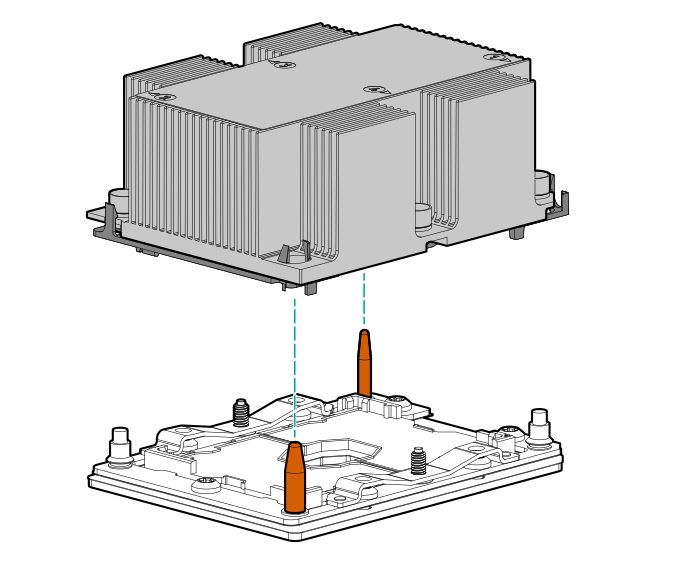
Install the processor heatsink assembly:
- Align the processor heatsink assembly with the heatsink alignment posts and gently lower it down until it sits evenly on the socket.
The heatsink alignment posts are keyed. The processor will only install one way.
A standard heatsink is shown, your heatsink might look different.
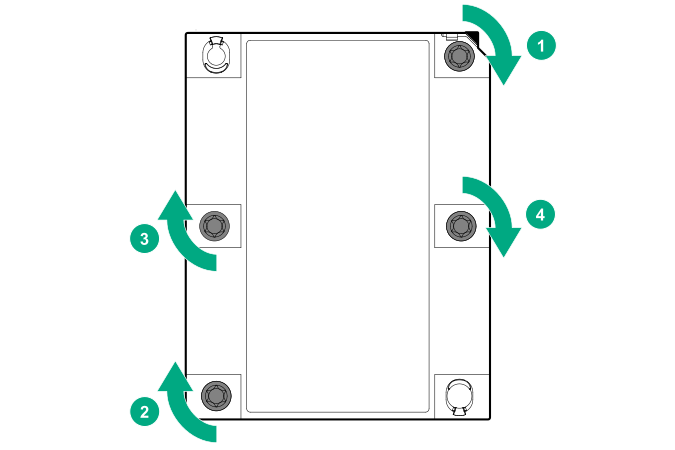
 CAUTION: Be sure to tighten each heatsink nut fully in the order indicated. Otherwise, boot failure or intermittent shutdowns might occur.
 - Using a T-30 Torx screwdriver, tighten the nuts until they stop.
- Align the processor heatsink assembly with the heatsink alignment posts and gently lower it down until it sits evenly on the socket.