Removing and replacing the five-slot secondary riser board

CAUTION:

Before replacing a DIMM, expansion board, or other similar PCA components due to a perceived hardware error, make sure first that the component is firmly seated in the slot. Do not bend or flex circuit boards when reseating components.

Prerequisites

Before you perform this procedure, make sure that you have a T-10 and T-15 Torx screwdrivers available.

Procedure
  1. Power down the server.
  2. Disconnect all peripheral cables from the server.
  3. Remove the server from the chassis.
  4. If present, disconnect the GPU power cable from the bayonet board.
  5. Remove the bayonet board.
  6. Remove the five-slot secondary riser cage.
  7. Remove the following brackets:
  8. Disconnect all cables from the five-slot secondary riser board.
  9. If present, disconnect the GPU power cables from the GPU accelerators.
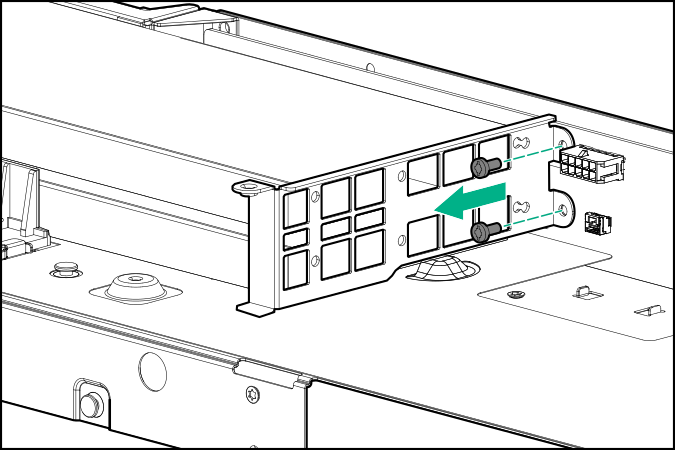
  10. If the GPUs are installed, remove the screws securing the GPU bracket on the riser board.

    Removing the screws securing the GPU bracket on the riser board
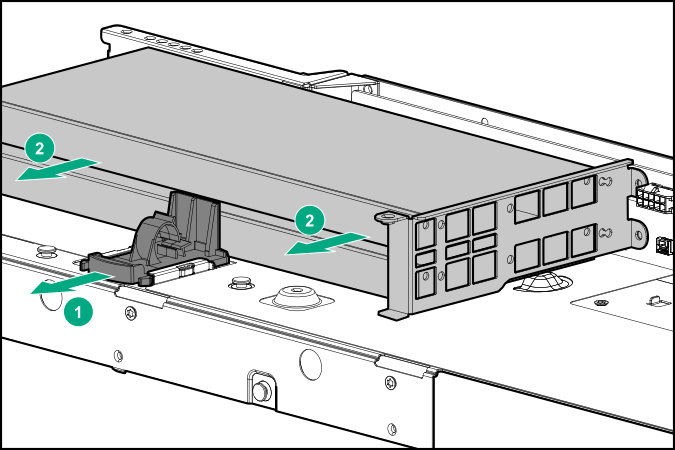
  11. Remove the GPU accelerator from slot 4 and 6 of the five-slot secondary riser board:
    1. Slide the cable clip outward.
    2. If installed, remove the riser slot 4 thermal bracket.
    3. Remove the GPU accelerator from slot 4 and 6.

    Removing the GPU accelerator from slot 4 and 6 of the five-slot secondary riser board
  12. Remove the transfer board from the five-slot secondary riser board.
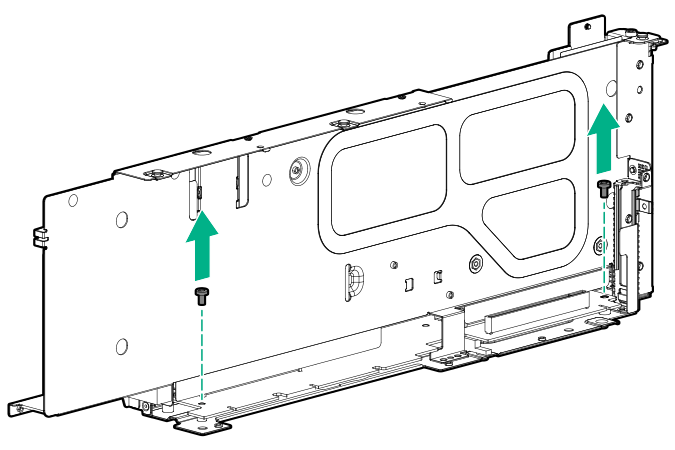
  13. Remove the screws from the five-slot secondary riser board.

    Removing the screws from the five-slot secondary riser board
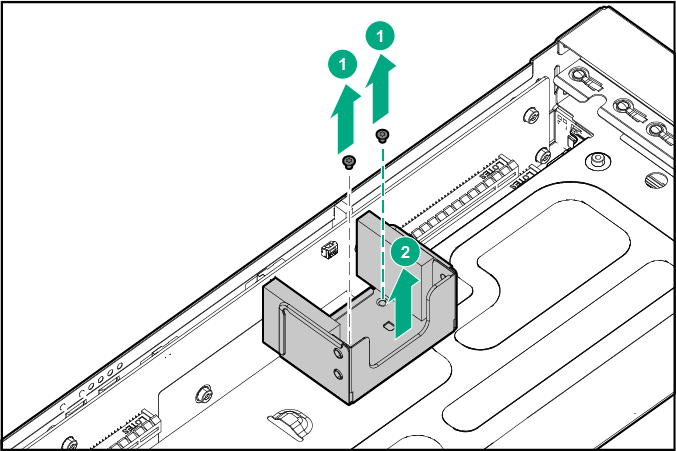
  14. Remove the square bracket from the five-slot secondary riser cage.

    Removing the square bracket from the five-slot secondary riser cage
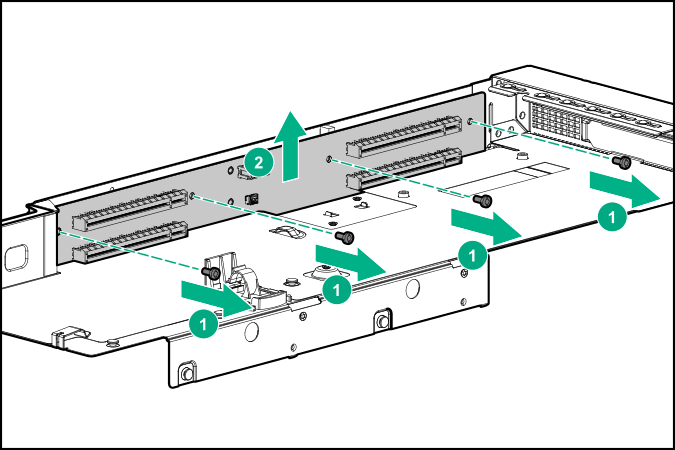
  15. Remove the five-slot secondary riser board.

    Removing the five-slot secondary riser board

To replace the component, reverse the removal procedure.