Installing an LFF drive

The LFF drives supported in this server do not require a drive caddy or a drive carrier to install. You only have to use the drive mounting screws on the chassis.

Prerequisites

Before you perform this procedure, make sure that you have a T-15 Torx screwdriver available.

Procedure
  1. Power down the server.
  2. Disconnect the power cord from the AC source.
  3. Remove the power adapter cord from the power cord clip, and then disconnect the power adapter from the server.
  4. Disconnect all peripheral cables from the server.
  5. If installed, unlock and remove the security padlock and/or the Kensington security lock.

    For more information, see the lock documentation.

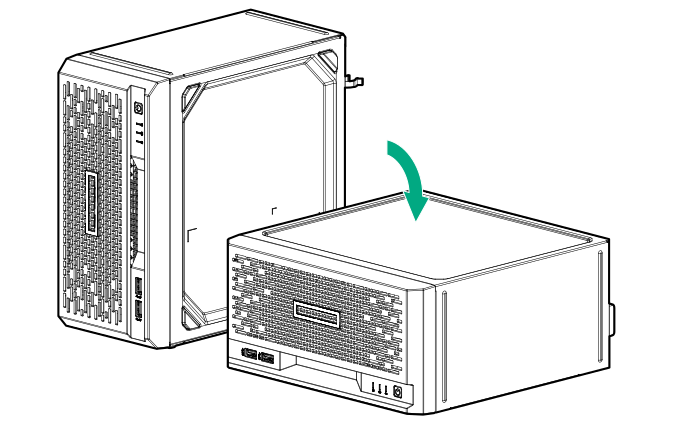
  6. If the server is in a vertical orientation, position the server in a horizontal orientation.

    Positioning the server in a horizontal orientation
  7. Remove the front bezel.
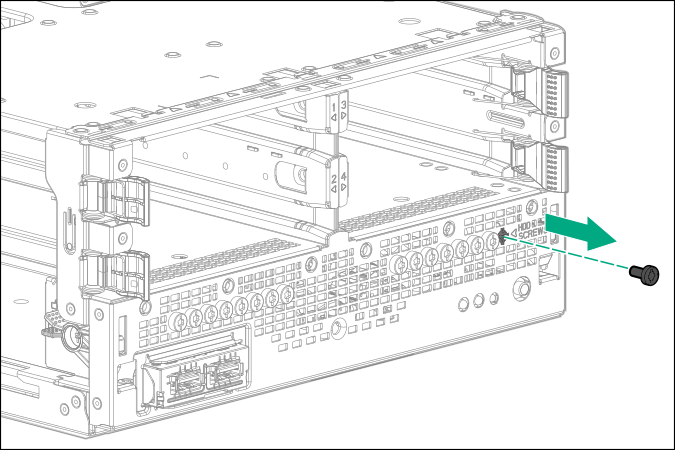
  8. Remove four drive screws from the front panel.

    Removing drive screws from the front panel
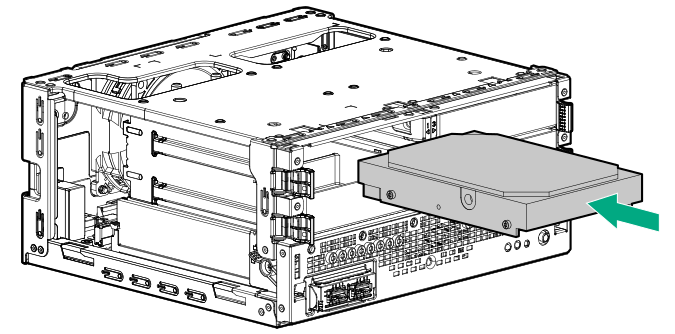
  9. Install the screws in the drive.

    Installing the LFF drive screws
  10. Slide the drive into the bay until it clicks into place.

    Installing an LFF drive
  11. Install the front bezel.
  12. Connect all peripheral cables to the server.
  13. Connect the power adapter to the server, and then secure the power adapter cord in the power cord clip.
  14. Connect the power cord to the AC source.
  15. Power up the server.
  16. Determine the status of the server drives.

The installation is complete.

To configure arrays, see the HPE Smart Array SR Gen10 Configuration Guide at the Hewlett Packard Enterprise website.