Prerequisites
Before you perform this procedure, make sure that you have a T-15 Torx screwdriver available.
Procedure
Power down the server .
Disconnect the power cord from the AC source.
Remove the power adapter cord from the power cord clip, and then disconnect the power adapter from the server.
Disconnect all peripheral cables from the server.
If installed, unlock and remove the security padlock and/or the Kensington security lock.
For more information, see the lock documentation.
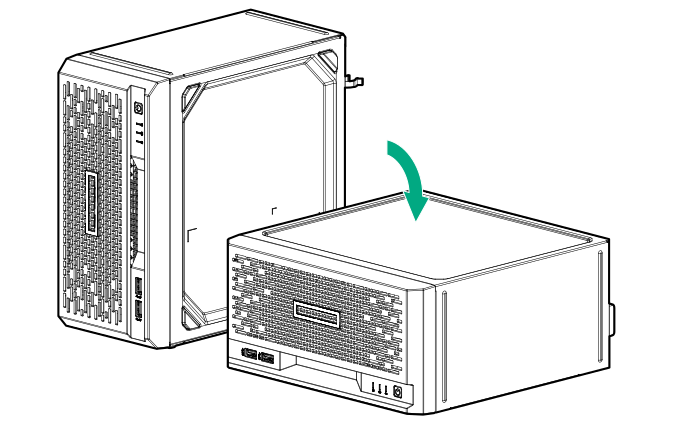
If the server is in a vertical orientation, position the server in a horizontal orientation.
Remove the chassis cover .
Remove the system board assembly .
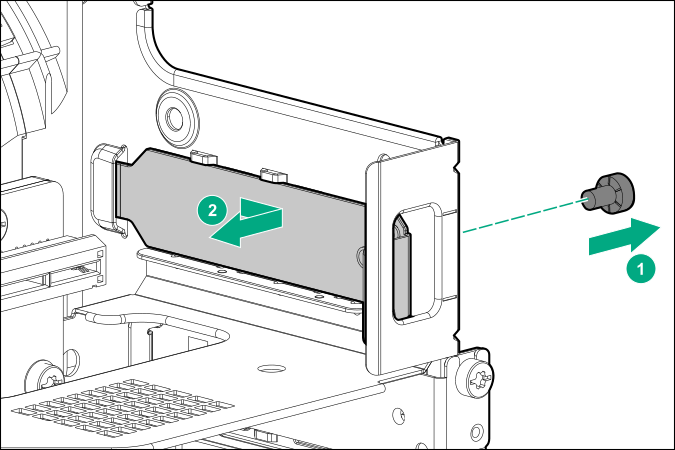
Remove the iLO enablement module blank.
Retain the blank for future use.
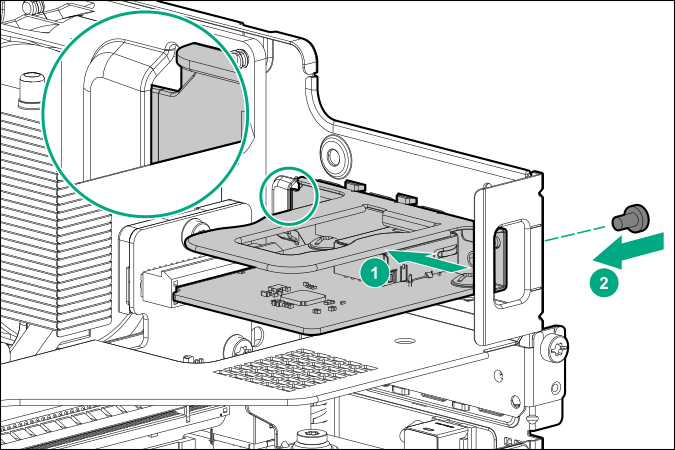
Install the
iLO enablement module (callout 1), and then install the screw on the rear panel (callout 2). Make sure that the module is firmly seated in the slot.
Install the server board assembly .
Install the chassis cover .
If removed, install the security padlock and/or the Kensington security lock.
For more information, see the lock documentation.
Connect all peripheral cables to the server.
Connect the power adapter to the server, and then secure the power adapter cord in the power cord clip.
Connect the power cord to the AC source.
Power up the server .
The installation is complete.
The iLO dedicated network port is now the default port for iLO connection. To configure the iLO dedicated network port settings, see the iLO user guide at the following website:
https://www.hpe.com/support/ilo-docs