Prerequisites
Before you perform this procedure, make sure that you have the following items available:
Procedure
-
If installed,
remove the front bezel.
-
Power down the server.
-
Remove all power:
- Disconnect each power cord from the power source.
- Disconnect each power cord from the server.
-
Disconnect all peripheral cables from the server.
-
Remove the server from the rack.
-
Remove the access panel.
-
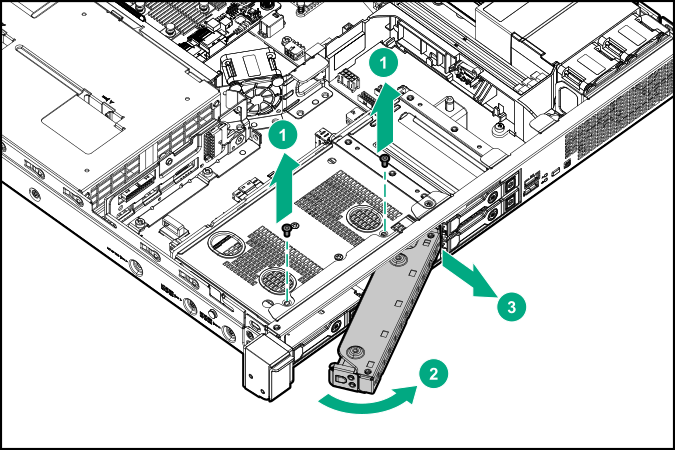
Remove the media bay blank:
- Remove the screws securing the media bay blank.
Retain the screws for installing the optical drive cage.
- Disengage the media bay blank.
- Remove the media bay blank.
-
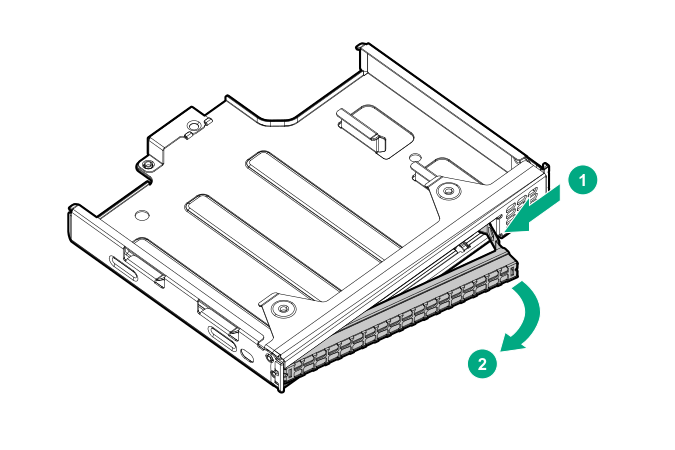
Remove the optical drive blank.
-
Install the optical drive bracket.
-
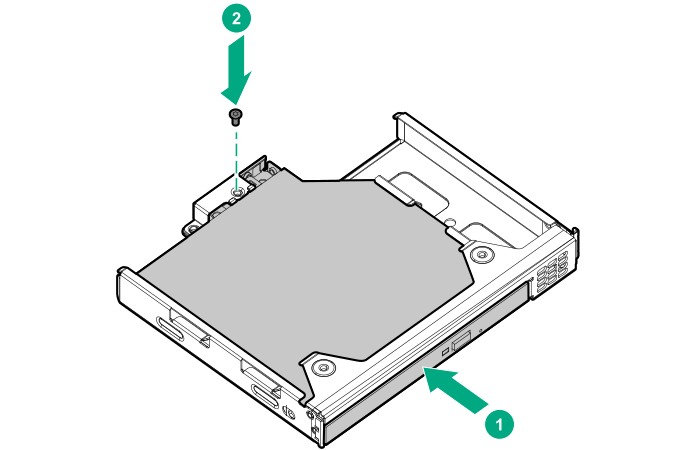
Install the optical drive in the optical drive cage.
-
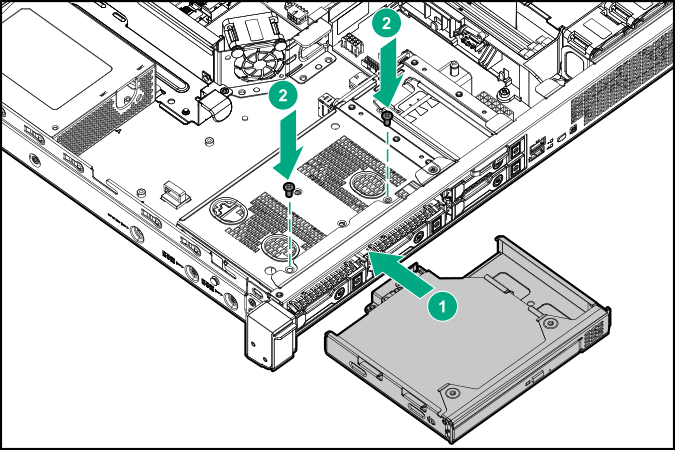
Install the optical drive cage assembly in the media bay.
-
Connect the optical drive SATA-power Y-cable.
-
Install the access panel.
-
Install the server into the rack.
-
Connect all peripheral cables to the server.
-
Connect the power cords:
- Connect each power cord to the server.
- Connect each power cord to the power source.
-
Power up the server.
-
If removed,
install the front bezel.
The installation is complete.