Prerequisites
Before you perform this procedure, make sure that you have a T-10 Torx screwdriver available.
Procedure
-
If installed,
remove the front bezel.
-
Power down the server.
-
Remove all power:
- Disconnect each power cord from the power source.
- Disconnect each power cord from the server.
-
Disconnect all peripheral cables from the server.
-
Remove the server from the rack.
-
Remove the access panel.
-
Remove the riser cage.
-
Identify the expansion slot compatible with the option.
-
If you are installing the expansion board in the PCIe riser slot 1, do the following:
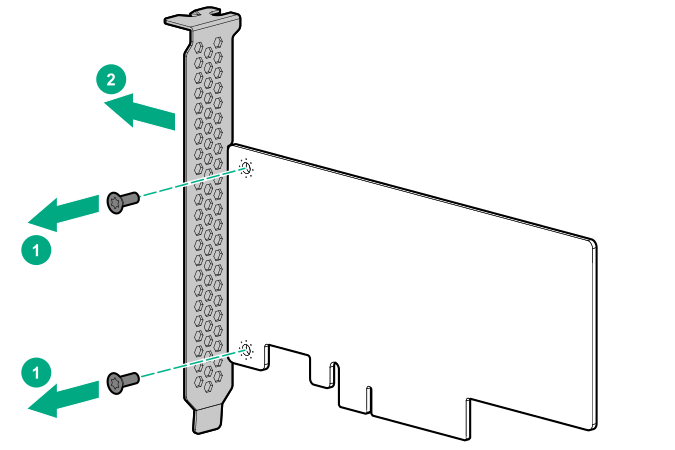
- Remove the full-height bracket from the expansion board.
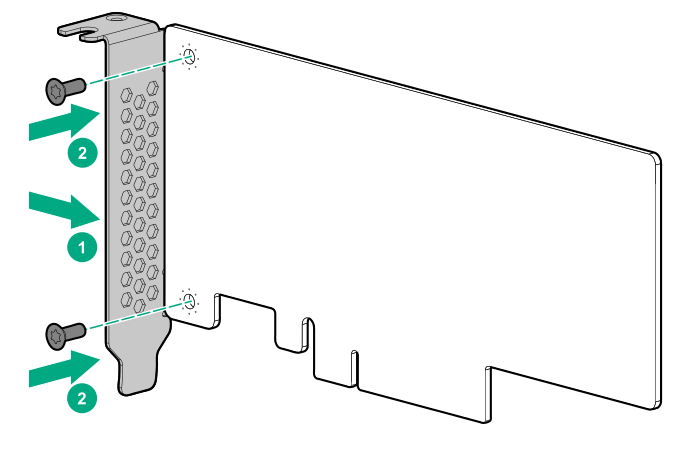
- Install the low-profile bracket on the expansion board.
-
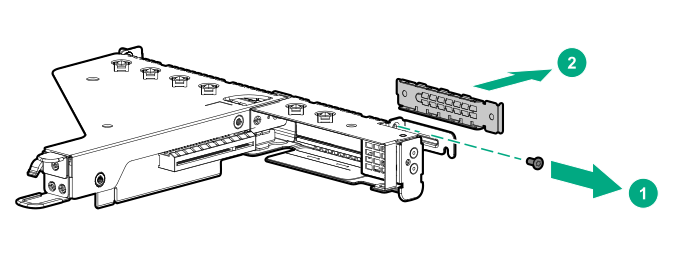
Remove the riser slot blank.
-
Make sure that any switches or jumpers on the expansion board are set properly.
For more information, see the documentation that ships with the option.
-
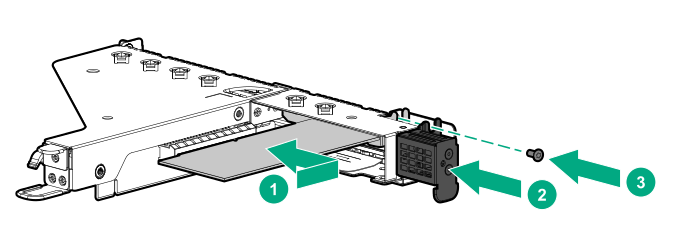
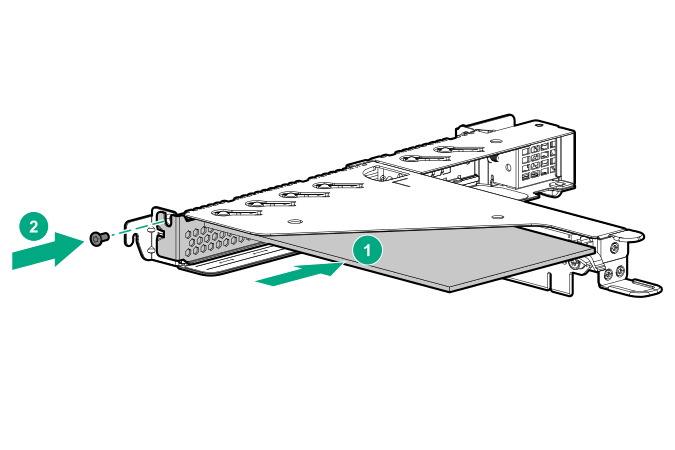
Install the expansion board.
Riser slot 1
Riser slot 2
-
Install the riser cage.
-
Connect all necessary internal cabling to the expansion board.
For more information on these cabling requirements, see the documentation that ships with the option.
-
Install the access panel.
-
Install the server into the rack.
-
Connect all necessary external cabling to the new expansion board.
For more information on these cabling requirements, see the documentation that ships with the option.
-
Connect all peripheral cables to the server.
-
Connect the power cords:
- Connect each power cord to the server.
- Connect each power cord to the power source.
-
Power up the server.
-
If removed,
install the front bezel.
The installation is complete.